Have I ever told you how much I adore empire style furniture? The lines are enough to draw me in every time no matter the state it's in. You can see my past empire furniture posts
HERE. This particular antique empire lady was offered to me by a friend.

Could I pass it up? NOPE, nada, not a chance. I will be honest, that after I picked it up, I had a little talk with myself...like..what.are.you.
thinking??? My mind instantly flashes back to my
Dumpster Diva,
BEEP, this
upholstered broken settee, and so much more.
DIY TIME
First, let's take a look at the bad.

Whenever you see contact paper, that's a red flag. You can see what I found with this
antique coffee table. So, I pull it off and see what's underneath. BINGO.


While I'm not afraid of
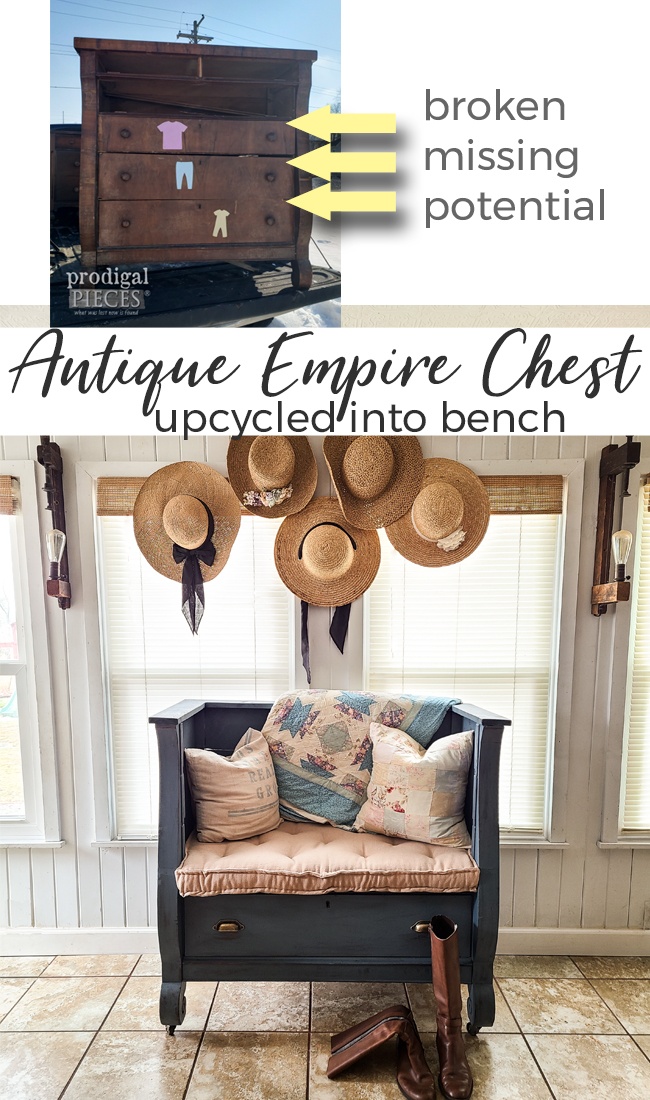
damaged veneer, I do not feel this one is a good candidate. Here's why, aside from the top, the drawers are all broken (2 are missing), more missing veneer, and it can be moved side-to-side at least an inch. Apparently, the owners were donating the chest and when going down the highway they lost two top drawers. oops.
Instead of trying to rebuild this antique empire chest, I'm going to un-build it....hopefully. The positive part is that it is good wood that still has oodles of potential.
NEXT STEPS
Next, I start to sketch out what I want the end result to look like. Basically, I plan to cut the top off and create a bench. Yep, I never go little. Are ya with me? In order to do that, I measure to make sure the spots I'm cutting will be level. After that, I cut with my circular saw.

Then, I bust out the drawer rails and guides to make space for the seat. However, instead of pitching them I use them to make a reinforced seat. I have to use one rail at the back to make a ledge for the rails to attach to. Also, using my pocket hole jig make this assembly go super quick. Here it is in a dry fit stage with missing parts and pieces.

After building up the seat, I then need to rebuild the back to make it stable and add a top cap ledge. That's where my stash comes in. I can't say enough how wonderful it is to have a stash of not only bits and baubles, but wood, fabric, and so much more. I love to create! Thankfully, I was able to get this build done in one day working 7am to 4pm with only stopping for lunch. {{huge sigh}}
BUILDING UP
However, before I can add my finishing touches, I need to make everything uniform. First, I apply a reactive stain to make everything cohesive as a base coat. A reactive stain work with the natural tannins in the wood to create an aged appeal without the blucky chemicals.

Then, while that is curing, I begin my sewing adventure. I just happened to have two cushions, fabric, and batting to make a tufted French mattress cushion suited for this fun antique empire chest upcycle. Who doesn't love a little sewing therapy? Additionally, you can see my past sewing fun in
my project gallery HERE.


Last, but not least, it's time for paint. My focus was to not spend outside of my stash for any of this, so I wanted to make use of this gorgeous blue/gray paint I enjoy using on
my hutch makeover for our living room.

THE REVEAL
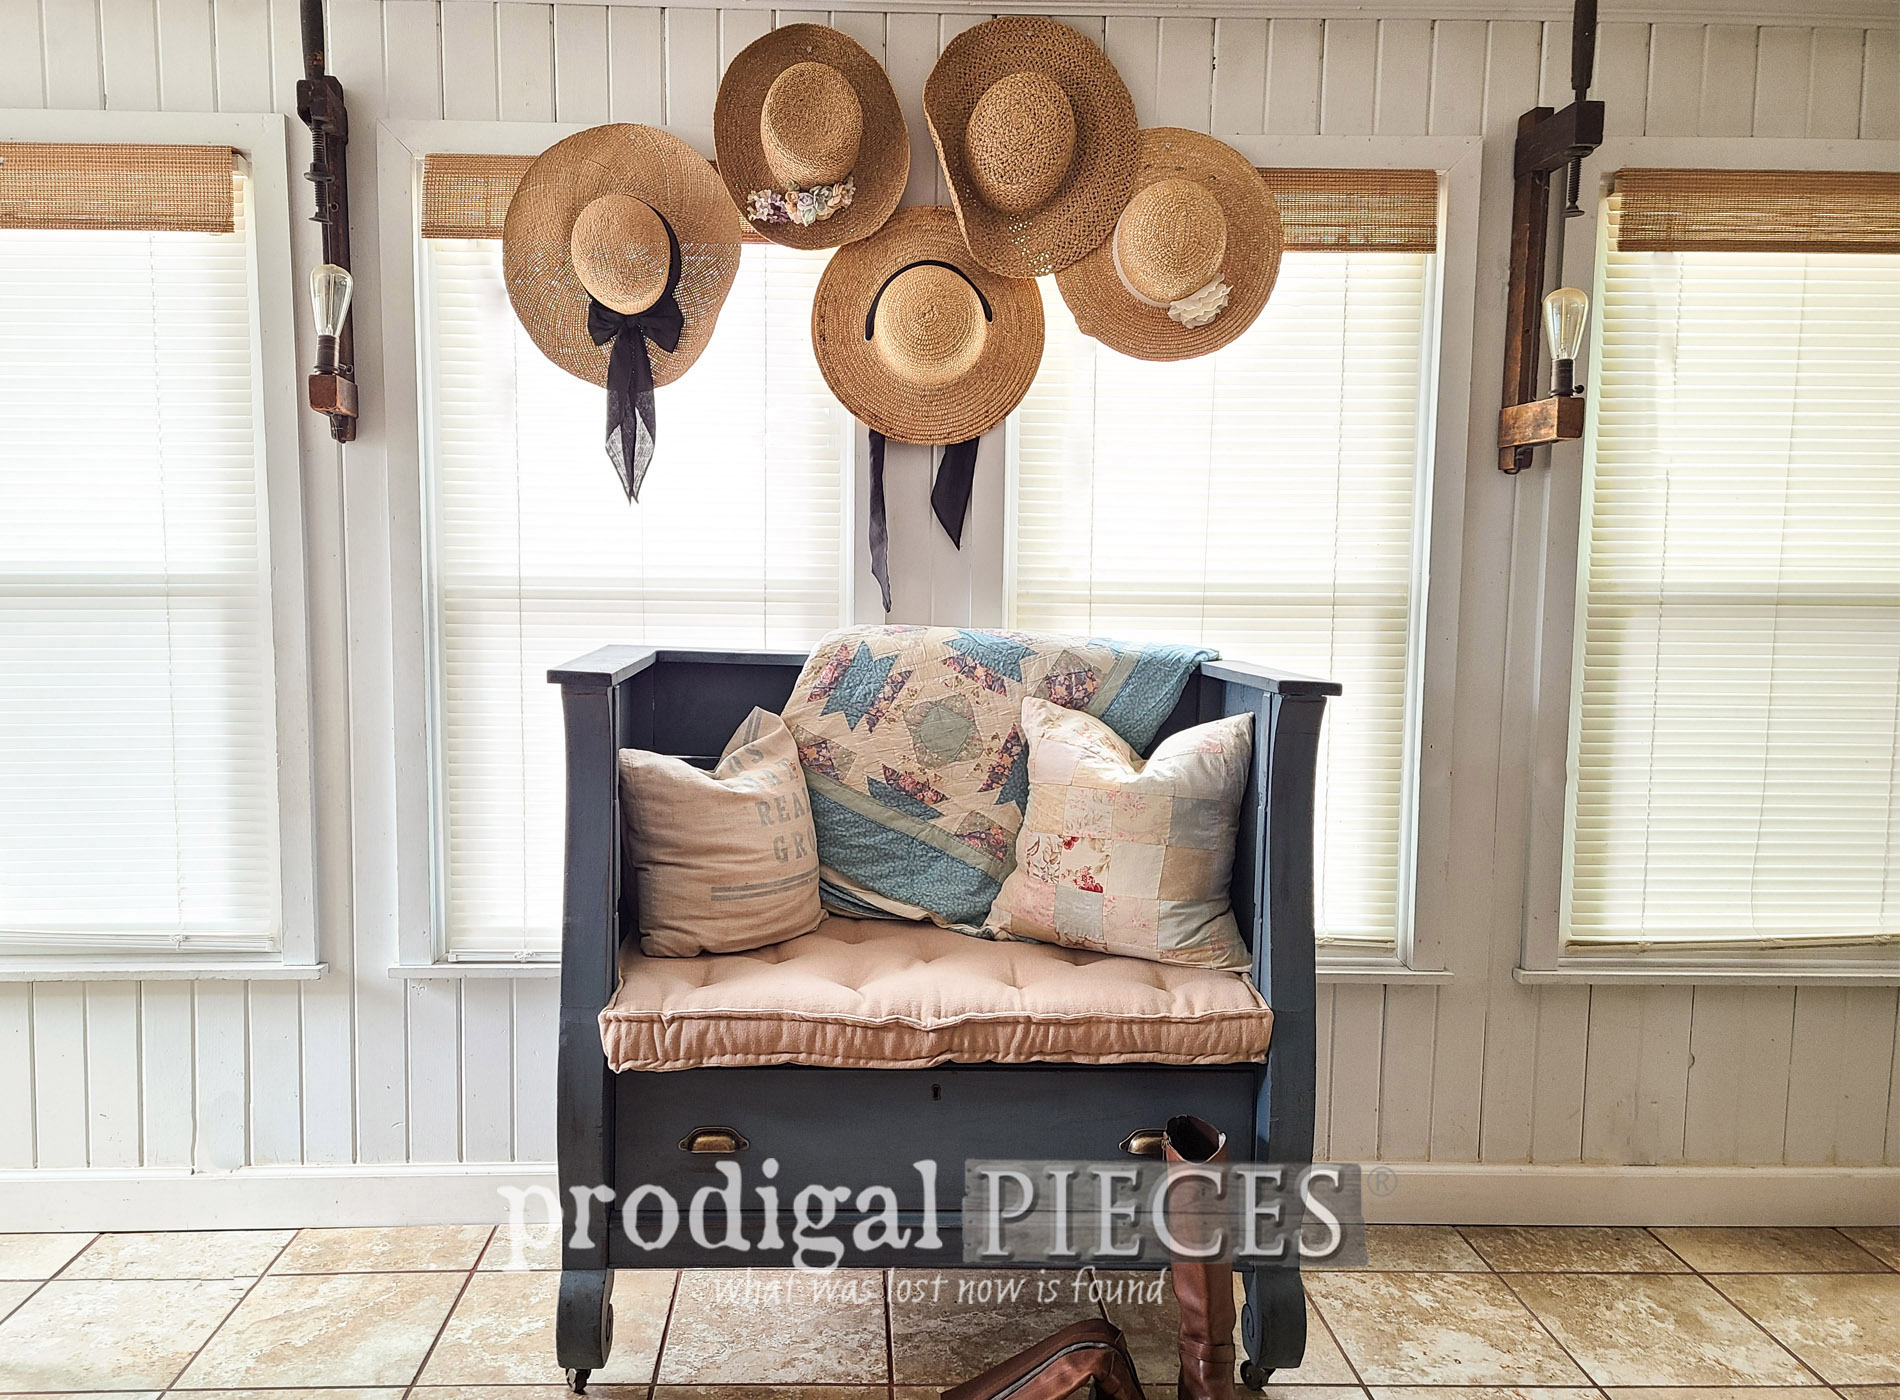
Here is my antique empire chest turned upholstered bench.


Would you guess it used to be a broken-down chest of drawers? This was so fun! And my favorite parts are the curves, the drawer for storage, and the mattress. I've only sewn three of these cushions and they're pretty simple to do. See the massive one I first did here with this
upcycled headboard bench.


Also, what made this such fun is that I used everything I already had on hand. I really try to challenge myself in that respect to encourage you that you don't need a big budget to create your own home story.


So, tell me...are you inspired yet? I sure hope so! With that in mind, if you'd like to make this a part of your home, you can find it and more available in
my online shop.


SHARE
In addition, do pin and share my antique empire chest bench upcycle. I'm sure there are more broken-down pieces that just need a new life.
Up next, the misfit top and drawers are getting new life. Any guesses?? See
Part 2 HERE and
Part 3 HERE.

To get these DIY tips & tricks in your inbox, be sure to
sign up for my newsletter. Until next time!

Also, more furniture upcycles like this antique empire chest: