Little did I know one day that I would be bringing home FOUR pieces of furniture at the same time. You would think that is normal around here as it's not the first time, but I have been trying to scale back until I can find suitable storage. However, who can blame me when I guy offers antique pieces from a storage unit for an amazing price? This antique dresser was one of them and the subject for my
Trash to Treasure post today. Likewise, read through to see what my blogger friends have for you too.

This lovely lady had a good face on front, but the sides left you wanting. See what I mean?

GAME ON
That damaged veneer may scare most away, but I'm here like...BRING IT! Woot! Thankfully, the veneer was
not a hot mess to remove and came off fairly easily. I was so delighted I didn't have to use my
towel-soak method because that would have also made me have to remove the second layer of veneer.
After removing the top layer of veneer, I glued down all the loose parts and filled in all the holes, gaps, etc. on the rest of the dresser with wood filler. Looks like a hot mess going on, doesn't it? You can see at the bottom edge there's still a huge chunk of veneer missing. No problem. mwahahaha...

Next, after all was dried and cured, I sanded down the top with my orbital sander and then hit the corners and edges with my Corner Cat. Love that little thing and my new orbital. Truly essentials, I tell ya.

TIME FOR PAINT
Sanding is complete and I go back inside to get the finish work started. Since I planned to keep the top wood, I chose to use a soft finish. Super easy to apply with my paint brush.
First, the top gets two coats with time to cure in between. Then, I begin on the cabinet. Since I need to paint, I also need to stain that raw veneer to get it to blend with the rest.

Much like
my last dresser redo, I had planned to blend several colors for some really cool effects. I'm using 3 colors and three brushes to get the job done.
I begin with the darker shade and work my way up to light, blending as I go. It's a quick process that is done in two coats.

FINE DETAILS
Then, once the frames of the antique dresser cabinet were done, I moved on to the drawer fronts. The same technique is applied and creating the depth I'm after.

The mirror and the harp got the same soft green color as the main color of the cabinet.

If you know me, I love to highlight the little details and this piece was begging for a unique design. Next, I use my recent thrift store find, an overhead projector, to get the frame on, and then added the rose bouquet by hand.

Once all the details were added, I used a dark wax and lightly distressed to add more dimension. Finally, to seal the painted cabinet, I rubbed it down with Hemp Oil. Love that stuff for so many uses.
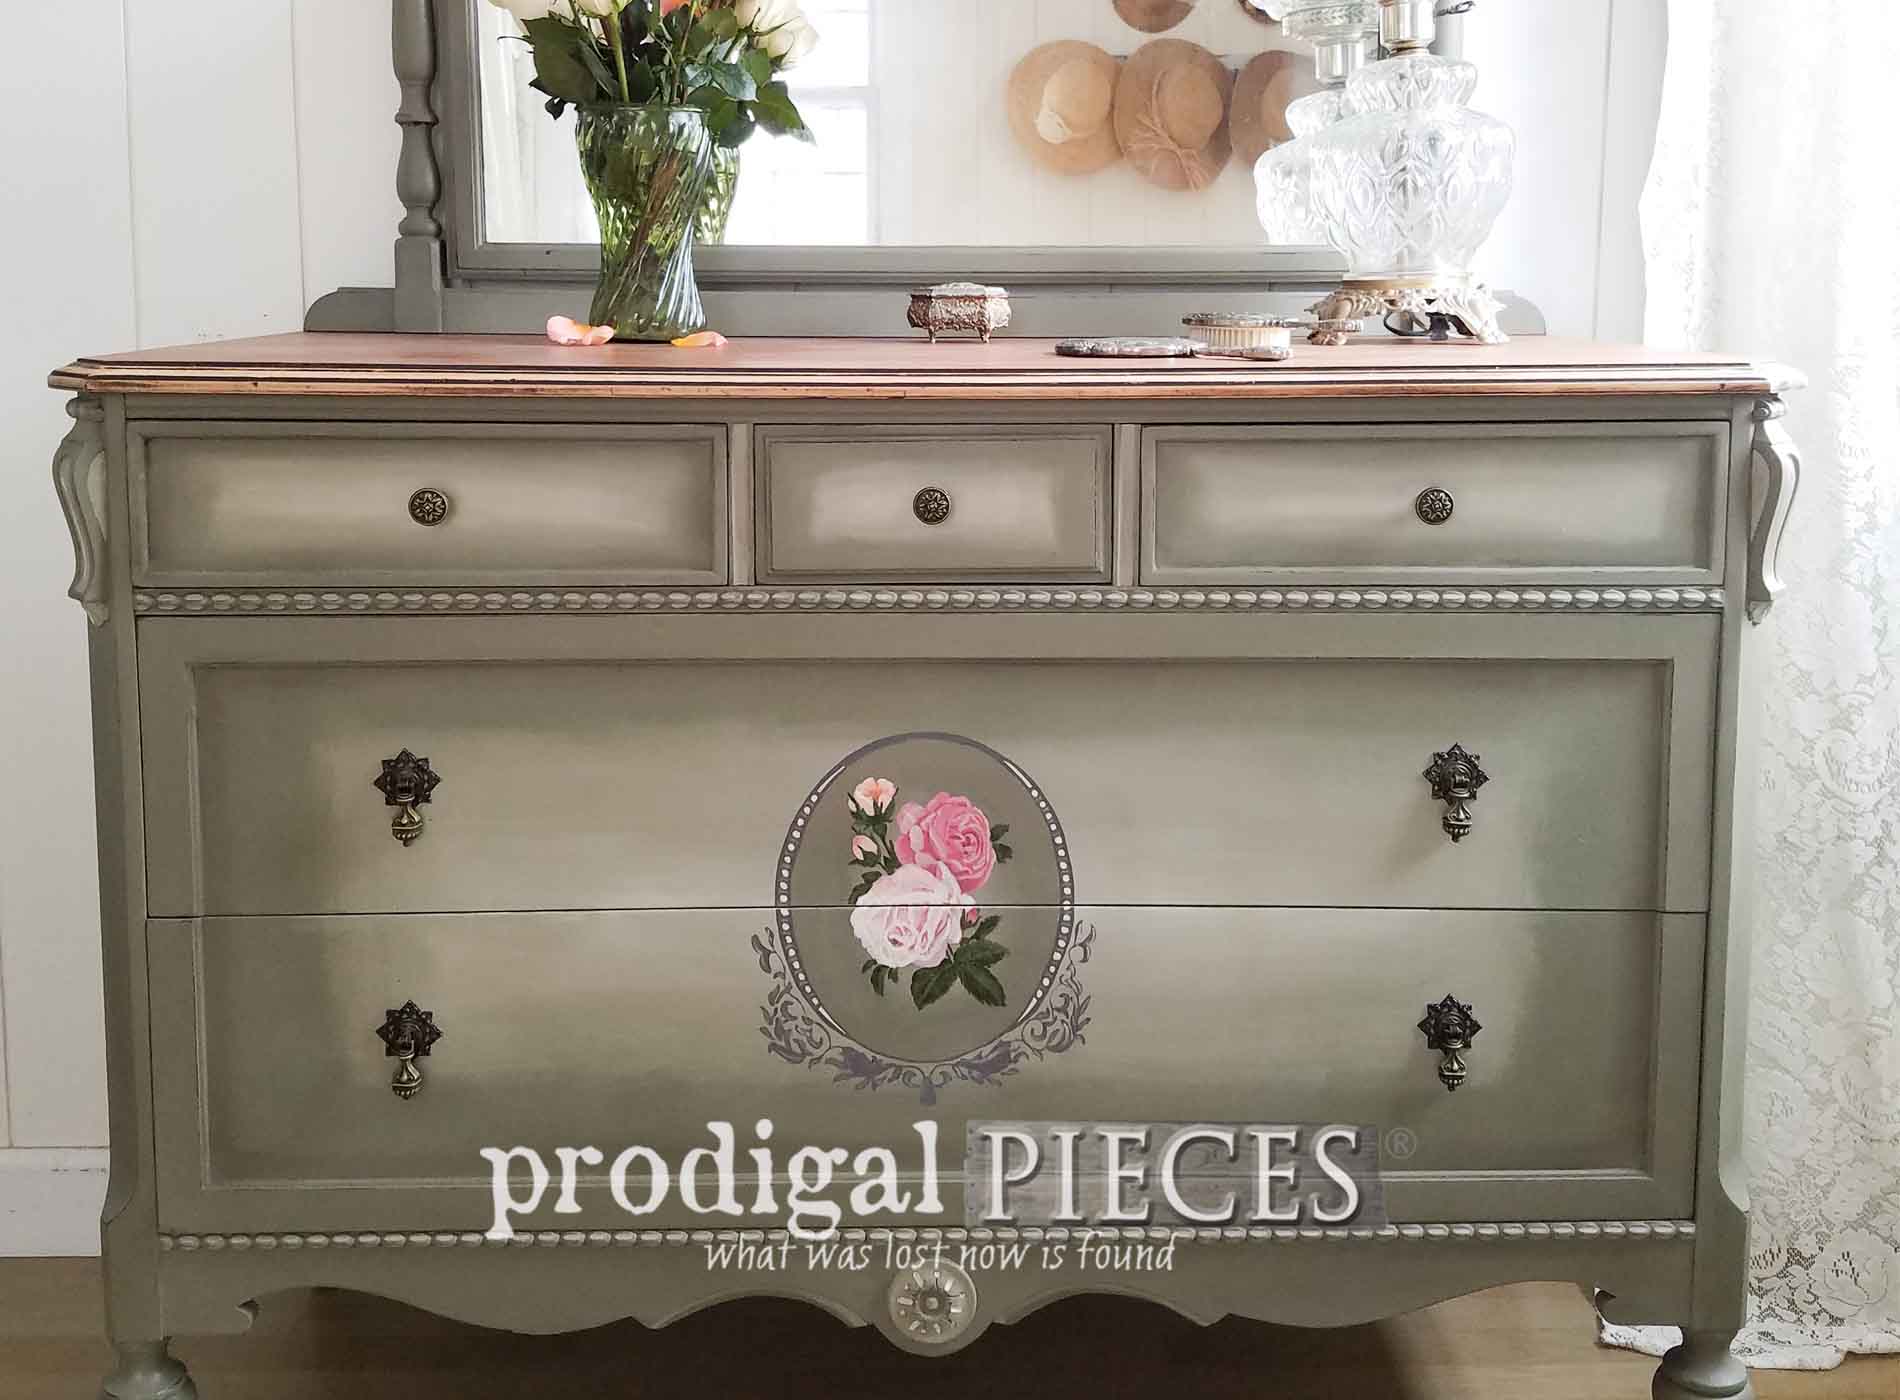
THE REVEAL
Ready to see this lady all put back together? I am!


Not only is the damaged veneer is gone, but also now new life graces this classic beauty. I left the top in its raw state, but finished with a topcoat. The way the wood tones compliment the green shades really makes my heart happy.

The week I was working on this I even found a gorgeous unopened roll of embossed wallpaper. It was perfect for lining the top drawers.

THE ROSES
And... of course my favorite part is the detailed front and the little touch I added on the top of the mirror. Those carved wood trim pieces look like embroidered stitches to me. Also, it was so nice that I didn't even have to do anything to the hardware. It's beautiful as-is, don't you think?


It's truly a treat to get to recreate otherwise cast-off furniture. Additionally, there's nothing like seeing a sad looking piece come back to life and sharing it with you is even better.


Likewise, I must say this dresser looks so good in my bedroom. It's making me consider redoing my own antique dresser too. Hmmm...dare I? If you would love to have this piece in your home, you can find it available in
my online store along with all my other recreated pieces and finds.


Can you see past the obvious? Let's focus on the potential in old furniture...and even people. So much joy when we do!

SHARE
In addition, pin and share my antique dresser makeover to inspire others too. Thank you!

MORE FUN
Up next, I'll be sharing some spring-cleaning fun to get you in the mood to freshen up your home. To get these DIY tips & tricks in your inbox, be sure to
sign up for my newsletter. Now, it's time to see what my Trash to Treasure Friends have for you!

 PINTEREST | EMAIL


- Artsy Chicks Rule
- Confessions of a Serial DIYer
- Bless'er House
- Girl in the Garage
Also, more projects like my antique dresser makeover: