 When I spied this antique buffet beauty in a local thrift store, I just knew it had to come home with me. Not only did it need some lovin', but buffets (aka. sideboards) are some of my favorite pieces to work on because they're so versatile. You can see my past buffet pieces HERE. They are obviously useful in the dining area, but also work as a console in your entry, and even sometimes refurbished into bathroom vanities.
THE BACKSTORY
This one has a story behind it from a local business and I'm happy to get to know her. (Yes, her, because she's a Queen...right?) Somewhere along the line she received some damage to the top surface and someone thought it wise to cover the entire thing in a heavy coat of lacquer. Ugh. It was a gloppy application at best too. Even the all hardware got coated with it.
 At least the hardware wasn't anything to worry about as it was made of an aluminum, and not brass or some other quality material. Then, there is the sectioned top drawer...another mess!


*post sponsored by Modern Masters. (see full disclosure)
Likewise, someone saw fit to line the drawers with contact paper on top of the velour lining. I have my work cut out for me to get that all out. (le sigh...)DIY TIME
First order of business is to break out my sander and get the gunk OFF. I cannot tell you how liberating it is to see that stuff go buh-bye. Woot! Typically, when tackling this kind of project, I use a 150 grit sandpaper since the wood is usually brittle and I want to take it slow. After sanding, I apply plenty of wood filler to all the damaged veneer and gouges, then sand smooth again.
PAINT
Finally, it's time to see some beauty coming out in this antique buffet. My end vision is to create a glamorous feel with this lovely lady with the beautiful Modern Masters metallic paint. I've used their paints in these past on these makeovers, and they are still my favorite. Now their products range from satin to matte sheen, and even have applications for outdoors. I've even used their patina paint in the past and love it! First, I need to apply a primer coat that is similar in shade to the metallic color (they offer two choices) I'll be applying since metallic paints can tend to be translucent. In most instances, I prefer to use my paint sprayer to apply the coats. However, the weather outside is not conducive to that at this point. No worries though as a special roller can be used to get a flawless finish as well. Once the first coat cures, I apply a second coat and we're ready for the exciting part. eep! One of my first loves when it comes to metallic paint is Modern Masters color Warm Silver. It's not a brassy, bold metallic, but rather a soft glow.

METALLIC
Using the same technique as applying the primer, I put on three coats of the Warm Silver. Again, the paint tends to be translucent, but the extra coat doesn't take much time and adds such depth to the shine. Isn't that gorgeous? This is when my pulse quickens and I can't wait to see the end result. Since not all of the buffet is getting the metallic colors, I apply a similar finish to the parts I want highlighted.
 The metallic coats need to cure, so in the meantime, I set about to add a pop of color to the interior of the antique buffet. You know I love me some aqua! I did a similar treatment to another antique buffet HERE and it got me hooked. Those dark, dingy recesses need to have some fun too!

HOT MESS
Then, there's my nemesis...the drawer. ugh. I really dreaded tackling removing that lining. I have done similar before and it's never fun. However, knowing the end result is worth the effort. I have at it with a vengeance! I used my putty knife, oodles of Goo Gone, and more elbow grease than I used on the rest of the buffet combined, just to get that junk out. In addition to the pops of color on the inside, I wanted to bring a bit of ooh, la, la to the rest of the buffet. With some low-tack tape, I created metallic stripes.
 Before top-coating the buffet, I added a brown wax to give the feel of an aged appeal. This helps to draw out features and really soften the look.
Finally, all my extra steps were complete and it's time for the MasterClear Satin Poly finish. This will allow my metallic paint to shine as it should, but also give it a protective, durable finish. I applied two coats in the same method as the primer and paint.
Before top-coating the buffet, I added a brown wax to give the feel of an aged appeal. This helps to draw out features and really soften the look.
Finally, all my extra steps were complete and it's time for the MasterClear Satin Poly finish. This will allow my metallic paint to shine as it should, but also give it a protective, durable finish. I applied two coats in the same method as the primer and paint.
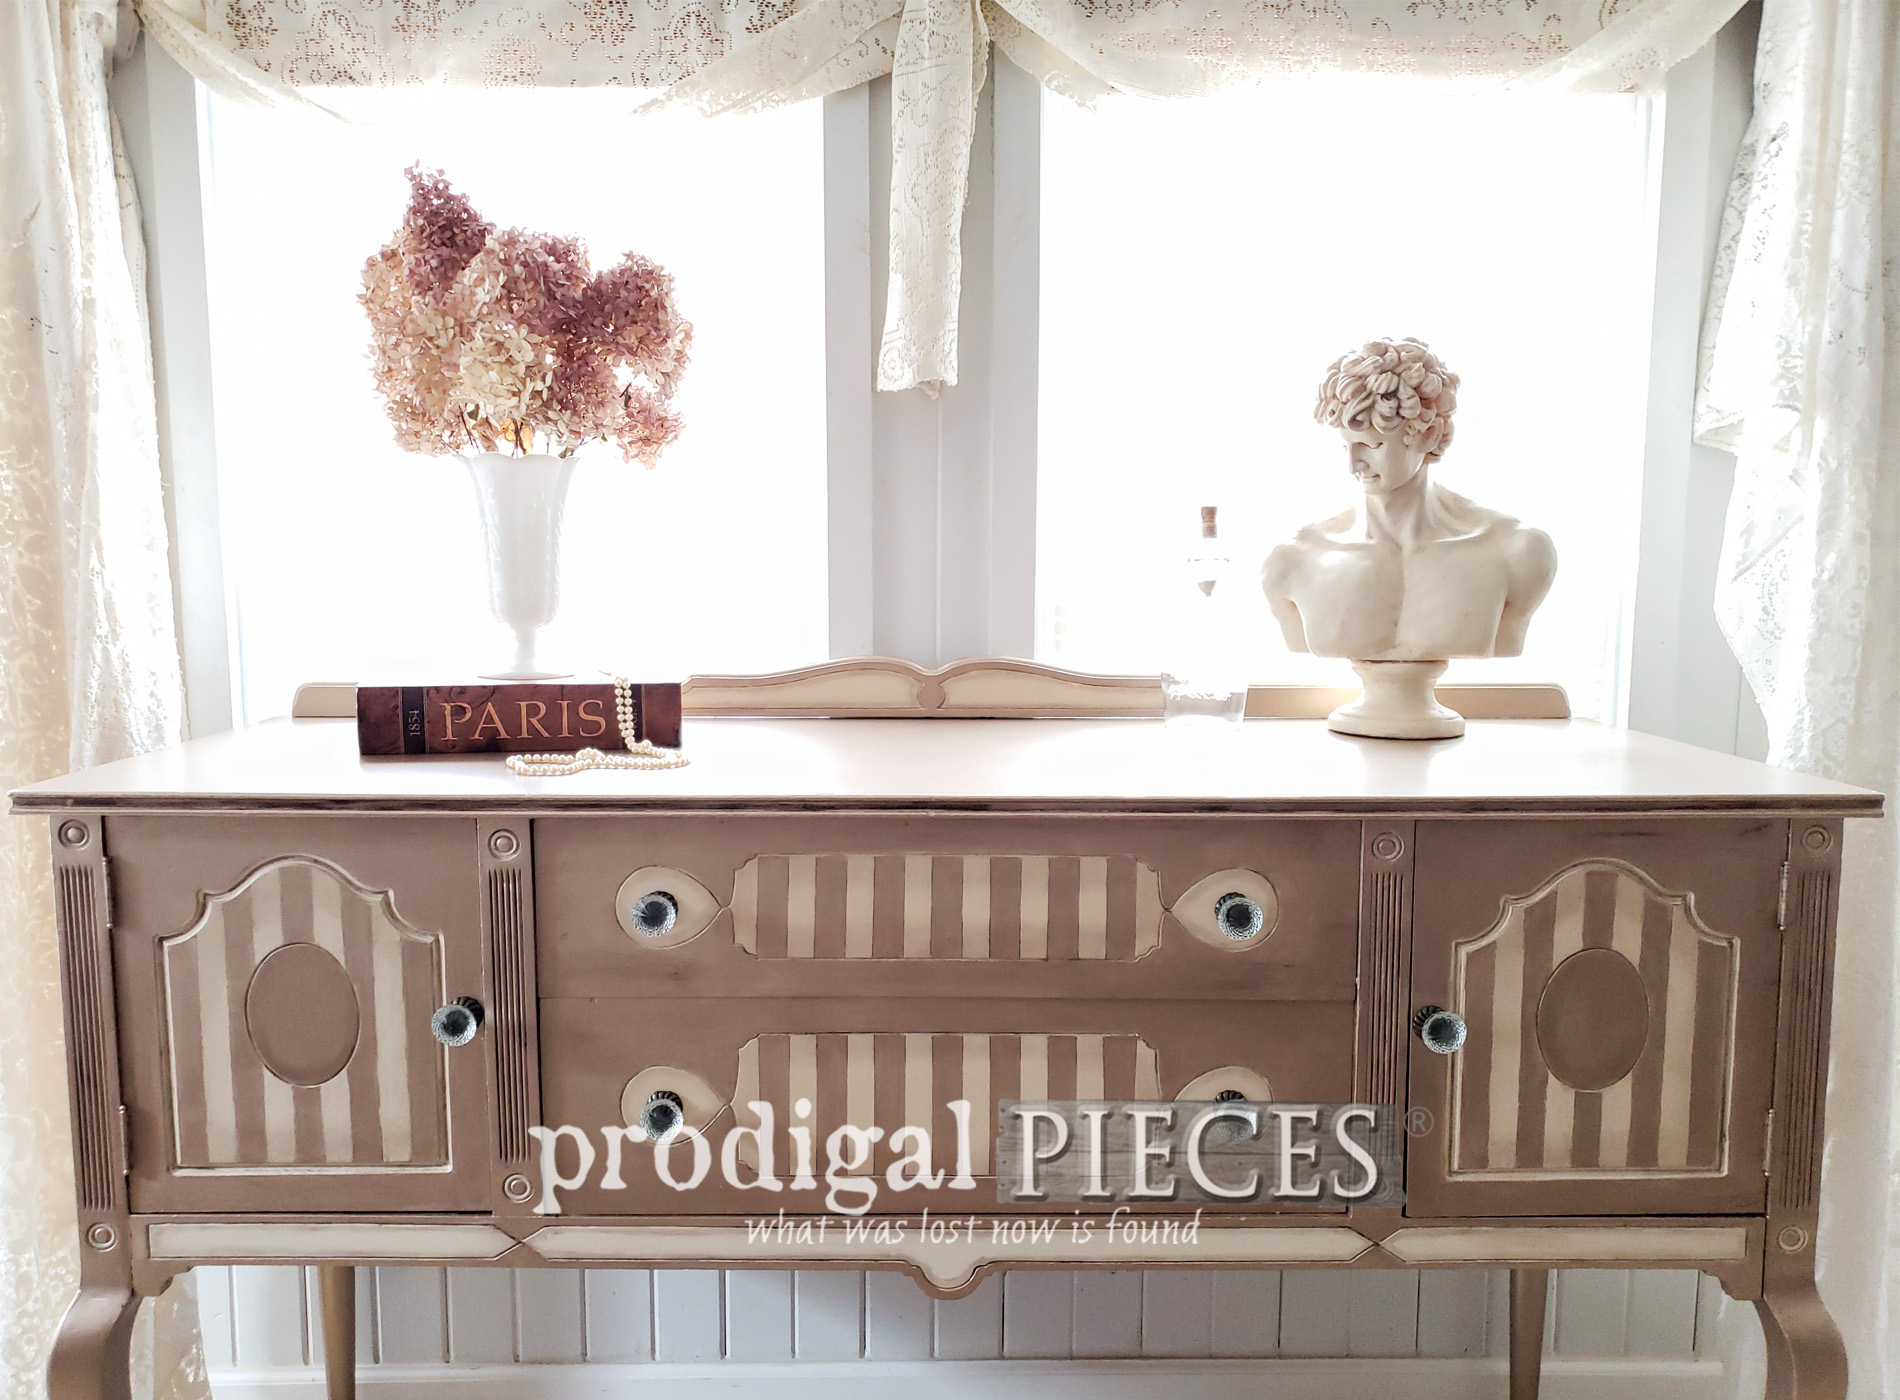
THE REVEAL
And...we're done.
 Just look at her shine! I just love that it came out as I'd hoped.


 Those faceted glass knobs I chose really made my whole project gleam with a time-worn feel. Now, don't forget the party on the inside!

 Even the drawer got some much needed fun with color and fresh paper. No more grungy yuck.


 As much as I'd like to keep this beautiful antique buffet, alas, I have no room. It is now available in my online store and can be shipped to your door.

 Do pin and share this antique buffet makeover using Modern Masters products. I'm all about inspiring you to give DIY a try. Let's inspire others too!

MORE FUN
Up next, this basic wooden vase is about to get a fantastic new look. See the new look HERE. Before you go, be sure to sign up for my newsletter. It's time to see what my blogger friends have for you below.


- Confessions of a Serial DIYer
- The Interior Frugalista
- Just the Woods
- Petticoat Junktion
- Girl in the Garage
In addition, more furniture fun like this antique buffet makeover:

