At this point in the year, I'm normally getting seed started in my trays and graphing out my garden plans to make use of every inch of space. Often, my ideas are surplus compared to the space I have, but companion planting allows you to really make use of every inch and it always falls into place. However, the last few years I've been taking a step back. Not because I've lost garden joy, but I have been working on planting other things. Today, I'm still in
my middle-aged and motivated mindset and working towards a healthier me. This stash below is one I've had for quite some time, and they are about to become my new garden, a set of wooden bead vegetables.

These are all leftovers from my craft adventures for nearly three decades. I've made
clothespin dolls, dollhouse miniatures, dollhouse dolls,
a walking duck toy, and so many things.

CREATIN' TIME
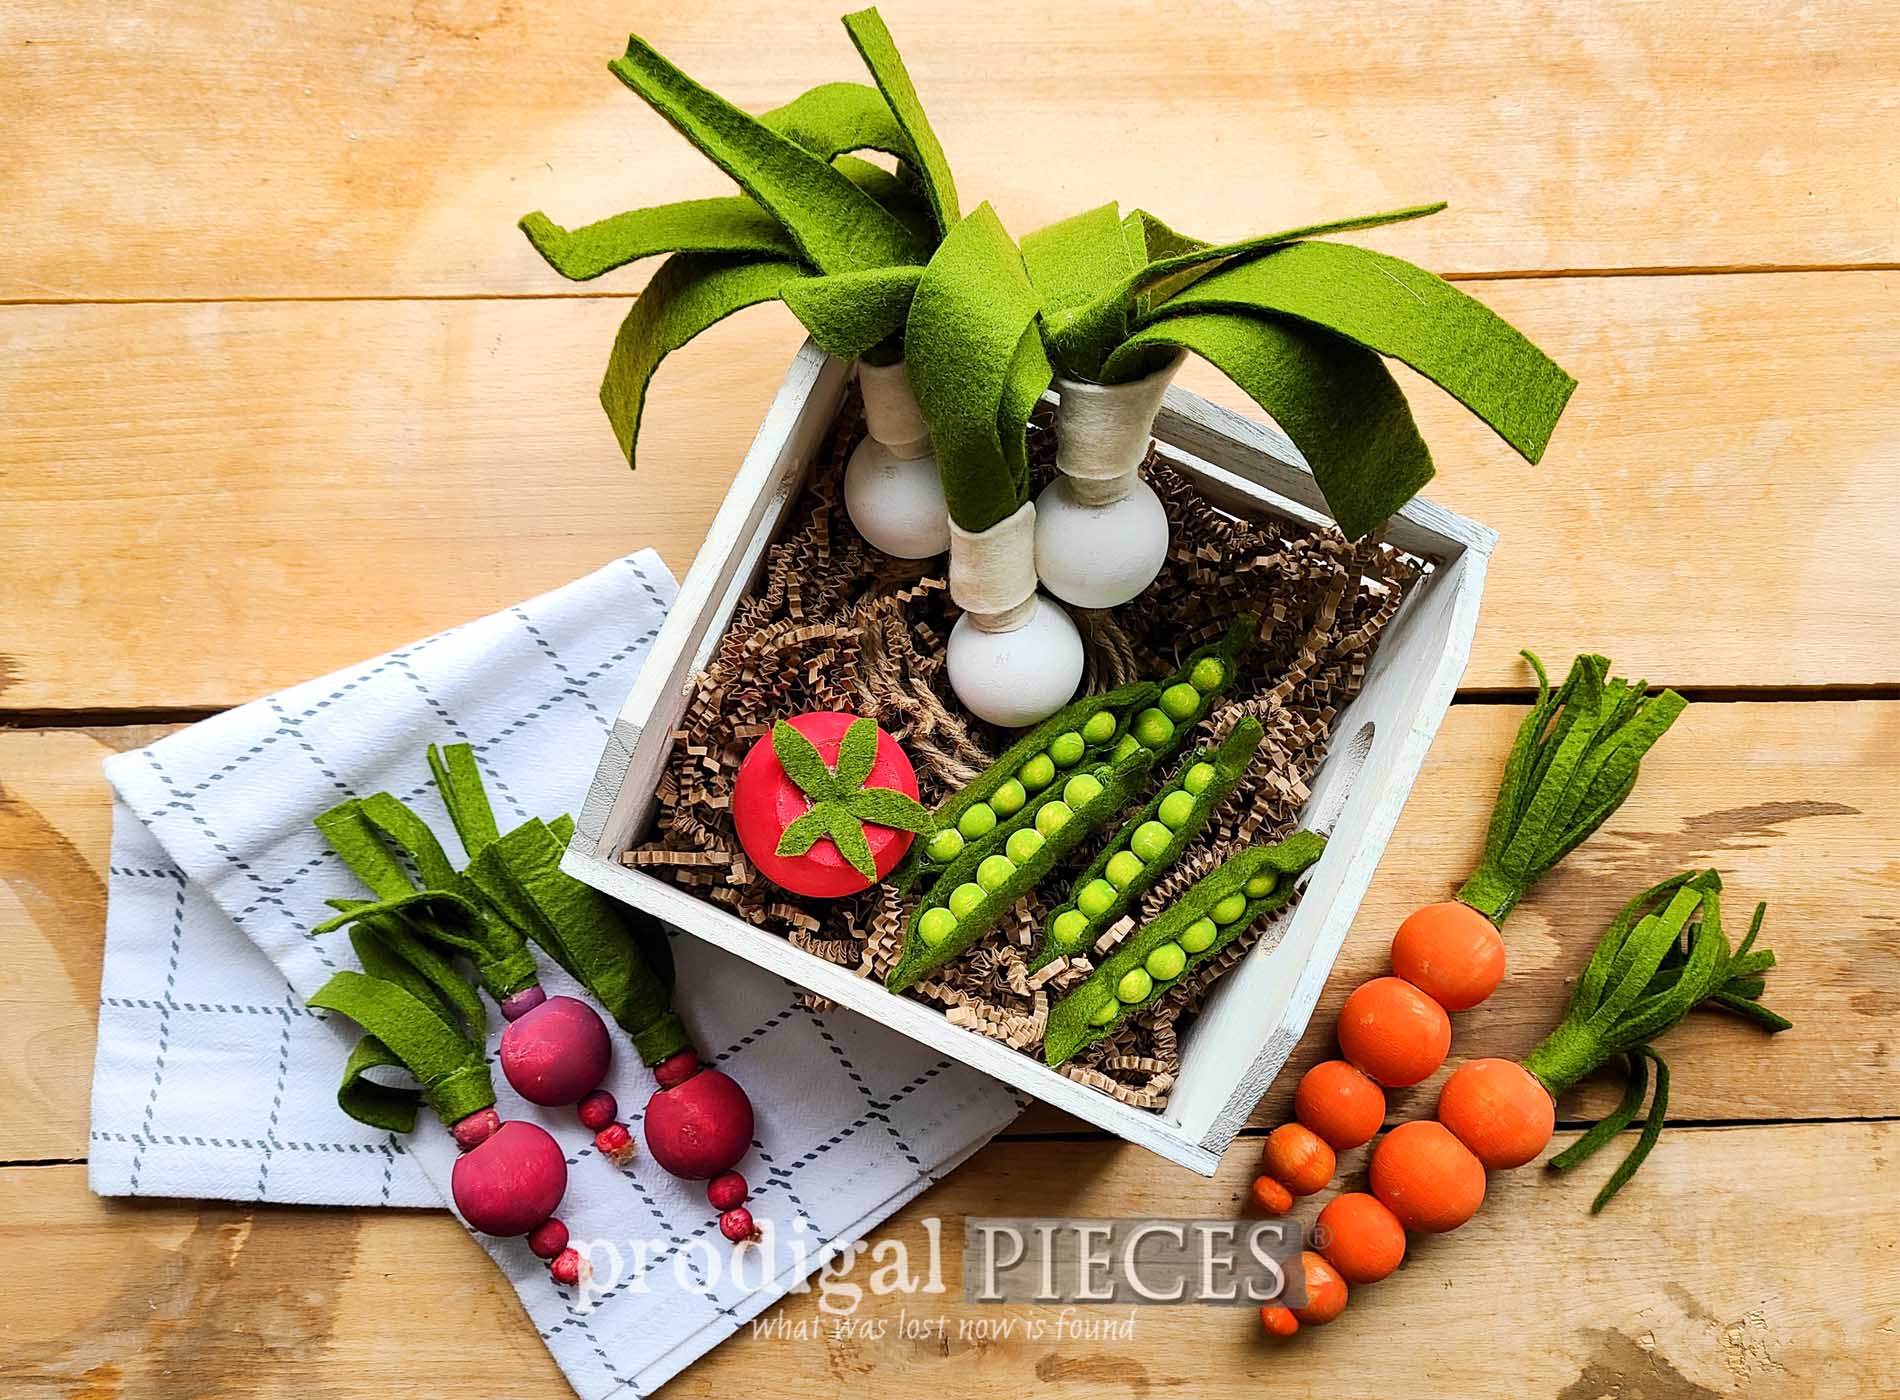
With that in mind and spring on the way, I've got garden brain so vegetables it is. If you'd like to make something similar, I'm outlining the supplies and basic steps, but this is really open to interpretation, and I encourage you to have fun with it. What you see here are onions, pea pods, carrots, tomato, and radishes.
 TERMS OF USE: If you want to create these vegetables, you agree to the following: it cannot be shared or distributed for monetary gain in any way, it may not be modified in any way, and you may not claim the work as your own.
TOOLS & SUPPLIES
- wooden beads of various sizes. (¼", ⅜", ½", ⅝", 1", 1 ¼", 1 ½", 2")
- earth tone pipe cleaners
- ⅛" dowel
- wool felt (or acrylic, but I prefer wool - so soft!!) in green and white
- acrylic paints in vegetable colors - I mix mine custom
- paint brush
- jute twin
- glue gun/glue sticks
- wood glue or e6000
- drill and ⅛" drill bit - optional
First, I'm literally using only what I have on hand and to make the best garden, I just play around with designs until they look like a vegetable (hopefully). Gather your family with kids and grands and have some fun creating! You can see
my felt garden HERE.
STEP 1
As a basic example, I begin with my green pipe cleaner and my ⅜" beads stringing on five beads. Then, cut the pipe cleaner a little long so you can fold over each end to keep the beads on.

Meanwhile, some of my beads are actually clothespin doll heads so I need to drill a hole to accept a tiny dowel. Using a bit of e6000, I adhere the dowel and each corresponding bead for the carrots. I used a dowel because the pipe cleaner wouldn't quite be strong enough for these size beads.

After that, I continue assembling the rest of my vegetables. For instance, when it comes to the onions and radishes, I use lengths of jute twine threaded through and knotted leaving one side open.
STEP 2
While you can leave your wooden bead vegetables in raw wood, you can also stain or paint them in fun colors too. I chose to give a paint wash using one coat.

Then once the paint cures, I can add the various details like stems, stalks, pods, etc. You can see here my onions are 1 ½" bead painted white with six lengths of twine threaded in and knotted with "roots" hanging out the bottom. I use my white and green wool felt to cut five strips in various lengths between 5-6" long and approximately 1" wide in green. Also, a strip of white approximately 4" long and 1" wide to wrap around the stalk.

Next, I begin with hot glue and attaching one stalk at a time overlapping as I go around to top of the onion.

Last, once I have the stalks attached, I take the white strip and wrap it up the stalk, gluing to attach. I chose to snip off the twine close to the top as I was only using it as a base to attach the stalk. Additionally, this is how I did the radishes using smaller lengths and widths.
STEP 3
The carrots and pea pods are assembled a bit differently. Consider the carrot top to be like a tassel. I cut a 3" x 4" square and then use my scissors to create fringe cutting down the 4" side.

To finish, add a bed of glue to begin rolling the fringe and secure with another bead of glue.

Finally, for the pea pods, I cut a piece 4" x 1 ½".

Add a bead of hot glue in each end pinching the pipe cleaner, then snip off the end curving from back to front. Last, run a bed of glue near the back of each side of the pea row and press/hold the side in until glue cools.
GARDEN-A-PLENTY
I daresay this is the fastest and most adorable garden I've ever created!


Aren't they fun? I hope you can tell I had a blast in my creative therapy.


If you'd like to make this set your own, you can find it and more in
my online store.

SHARE
Likewise, I want to hear from you! My goal is always to create inspiring projects that will get you creating on your own. Leave some comment love below and also pin and share.

Before you go, be sure to
sign up for my FREE newsletter as my trashure friends and I bring you a new adventure for
Trashy Treasure Tuesdays!

Until next time!

 PINTEREST | EMAIL
While you're at it, check out these other crafty creations like my wooden bead vegetables: