What do all gals do in their free time when they're not homeschooling or working two jobs? They refinish their wood kitchen counters. haha. Yeah, sounds like super fun, right?

So why would a mama like me want or need to take on this project? First, I'm going to take you back a few years.
THE BACKSTORY
Back in 2016, we began our major kitchen remodel with
our flooring. When I say major kitchen remodel, it's because JC and I had already yanked out a wall, repaired flooring and, updated when we purchased our home in 2003. Of course, over time it needs done again. This time around we yanked out our counters, cabinets, dishwasher, and floors. Then, we built a custom double-oven cabinet, range hood, added a laundry utility sink, new windows, and also added our wood kitchen counters. Here's the second remodel "before".

And the after...


Okay, so these shots were taken in fall of 2018 and we couldn't be more delighted with the fruits of our labor.

INITIAL FINISH
You may be wondering what happened before and why I'm in the refinish mode after 3 years of use. Initially, as mentioned in
my kitchen reveal post with video tour, I used a precatalyzed lacquer. Why?
Benefits of precatalyzed lacquer:
- quick drying
- available in different finishes
- perfect for use in sprayer
When we were wrapping our remodel, we were hitting a deadline of beating old man winter creeping in. We lack the space and facility to refinish in a temperature-controlled environment. So, with that we chose the precatalyzed lacquer based on my research and suggestion by a chain paint store. However, our top choice is Waterlox. I've used Waterlox on our
bathroom dresser turned vanity and our
dining table with wonderful success.
UPDATE
Three years after we finished our kitchen, we needed to redo the counters. Bummer! I had hopes they would stand up to all eight of us using it daily, all day, for longer than this. So...now it is time to get done what I wish I would have been able to do initially.

Why Waterlox? Well, I've put together this video explaining it to you, but also will write it out for your reference as well.

Not only have I used this product with much success in the past, I also only tried it initially because of my dad. When my parent's were building their dream home (a 6000 sq. ft. log home), he wanted the best. After talking to universities to find out what they used on their gym floors, he knew Waterlox was for him. That finish they put on lasted over 25 years! Nuff said for me.
If you want to read up on Waterlox, you can find information on their site
HERE. Also, both precatalyzed lacquer and Waterlox are both suitable for food surfaces. The only major difference is Waterlox performs better when brushed on, and it takes 24 hours cure time between coats.
DIY TIME
First, using my sander, my respirator, and a whole lotta sanding pads
, I begin my refinishing project. It's a kitchen lockdown! And that is not fun. Oh, and I completely forgot to take before pictures, which is not my norm. My excuse is that we had 3 days to get our
home ready to list and I was not in my right brain.

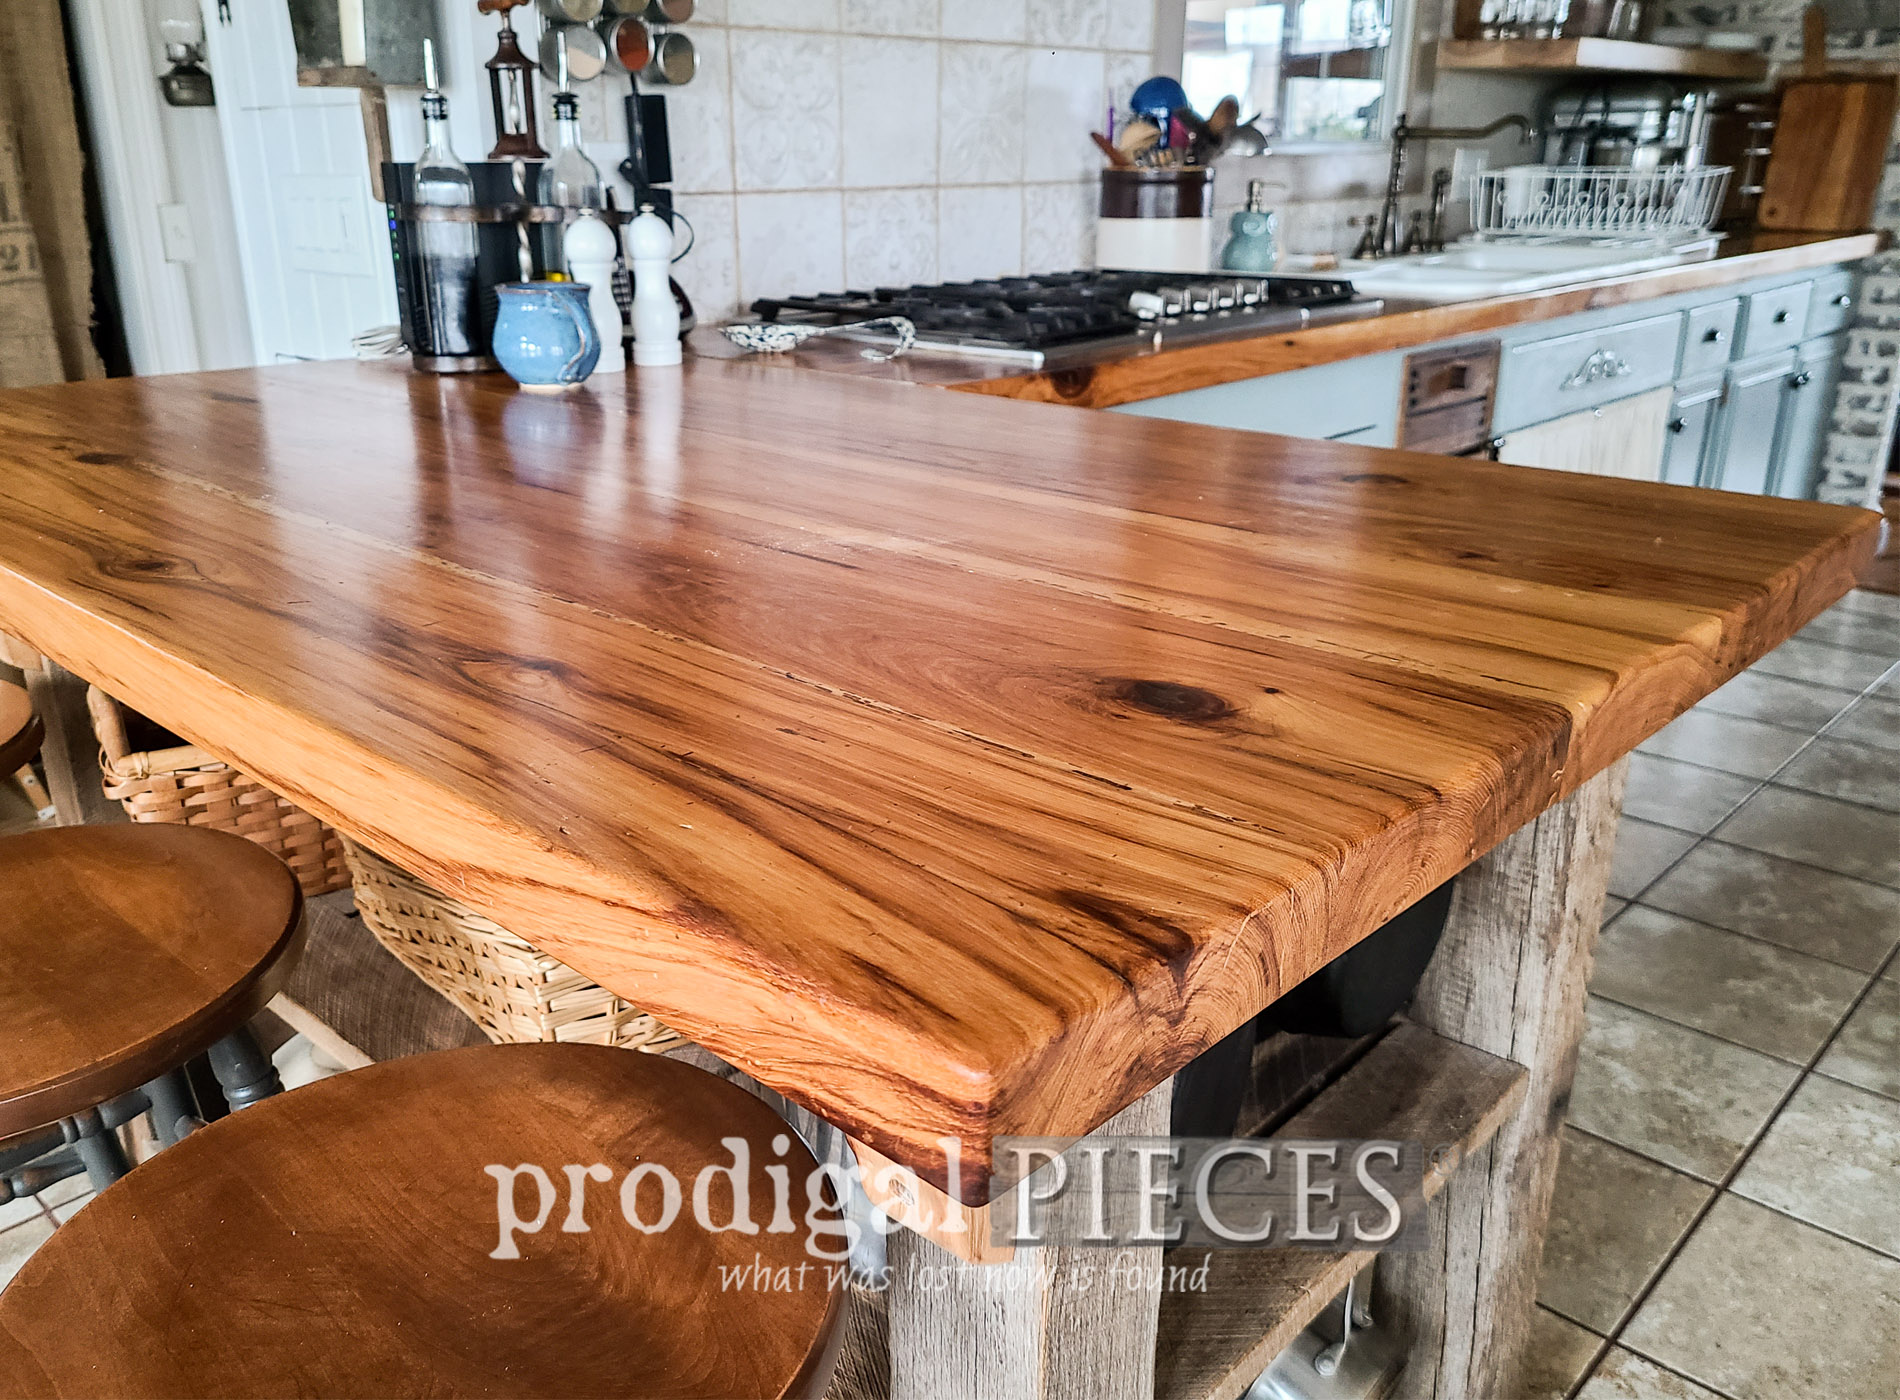
Finally, after one day of sanding and cleaning, then three separate days of three coats using my brushes, my counters are DONE. {{yeah, baby!}}

While the manufacturer recommends one or two coats, I go with three. Why? Because that's what I is on my bathroom vanity and my dining room table.


Can you hear me breathing that sigh of relief? DONE and DONE.

For us, the hard-hit spots on our wood kitchen counters are our kitchen sink and our laundry sink. Both have oodles of water traffic, so that makes sense. I don't believe the precatalyzed lacquer issues were a user problem, but I don't know for sure.
Under the drainboard had a sort of bubbling in the finish, and the same was at the laundry. However, I'm happy to say they are now refinished and good to go. The kitchen...


...and the laundry.


WRAP-UP
Last, to wrap up my reclaimed wood kitchen counters, I'm happy to answer any questions you may have. I know many bloggers who love using linseed oil or tung oil because it's natural and rustic. However, that need reapplied every six months or sooner. It also doesn't protect the wood from damage as much as a poly does. In addition, you can use an epoxy which would be wonderful if you love the glass-like finish. However, I wanted something to match my time-worn decor, so I went with a satin finish.

Also, if you watched my video above, I mentioned that I didn't do one of the six counters. Mainly because I needed a spot to use for the week my kitchen is under demo. However, it also wasn't as bad off as the others. From this view it looks fine.

Whereas if you look close, you can see the bit of wear. I will tackle this one come warmer weather. But, for now, it isn't a worry.

There you go! My kitchen lockdown is now a bust and ready to go. Time to have a party!


RELATED PROJECTS AND POSTS:
Also, do pin and share to encourage and inspire others to give wood kitchen counters a try.

Up next, it's
Trash to Treasure Tuesday! This hot mess will be getting a new lease on life.
See the after HERE.

Before you go, be sure to
sign up for my FREE newsletter. Until next time!

 PINTEREST | EMAIL
Also, more DIY fun like my wood kitchen counter makeover: