Don't you just love finding objects from the near-past? Yes, the stuff that was only cool a few decades ago and is now an artifact even when you are a part of that same era? haha. This vintage sewing bucket is a Mid-Centry piece and were quite a hit. Particularly the Firkin sewing bucket with the solid build and tapered legs, like this one. Vintage Firkin Sewing Bucket Makeover Before | prodigalpieces.com prodigalpieces It's in decent shape with original parts, even the handle in one piece. However, the built-in divider has had a few repairs. Sorry for the fuzzy pic - I was trying to rush before my pup butted in. Damaged Vintage Sewing Bucket by Firkin | prodigalpieces.com prodigalpieces What is more, the inside has seen some wear with stains too. Inside Vintage Sewing Bucket Before | prodigalpieces.com prodigalpieces

DISASSEMBLY

First, in order for me to do the repair work on the divider, I need to take this bucket apart. Removing Sewing Bucket Handle | prodigalpieces.com prodigalpieces These handle plugs are basically dowel inserted into the bucket. In addition, though, the divider is nailed in from the sides and the bottom, so it took a bit to get it apart. After I remove the divider, I also remove the L-brackets and screws. Removing L-Brackets from Vintage Sewing Bucket | prodigalpieces.com prodigalpieces Next, as soon as I have the pieces apart, I drill one side of the split to make spots for mini-dowel pins. I glue those in and then mark on the corresponding split piece so I can drill matching holes. Finally, I add wood glue to both and the seam and clamp together until cured. Repaired Vintage Sewing Bucket Divider | prodigalpieces.com prodigalpieces Once I have the pieces secure, I add a touch of wood filler, let cure, and then sand down.

UPDATING & DECORATING

While there are many ways I could have gone with this vintage sewing bucket, I truly wanted to give a nod to the Mid-Century era while updating it. That means, a paint comes into play. Painting Firkin Sewing Bucket | prodigalpieces.com prodigalpieces For the exterior, I use a basic white for the main bucket, but do something fun to the inside and outside as well. 
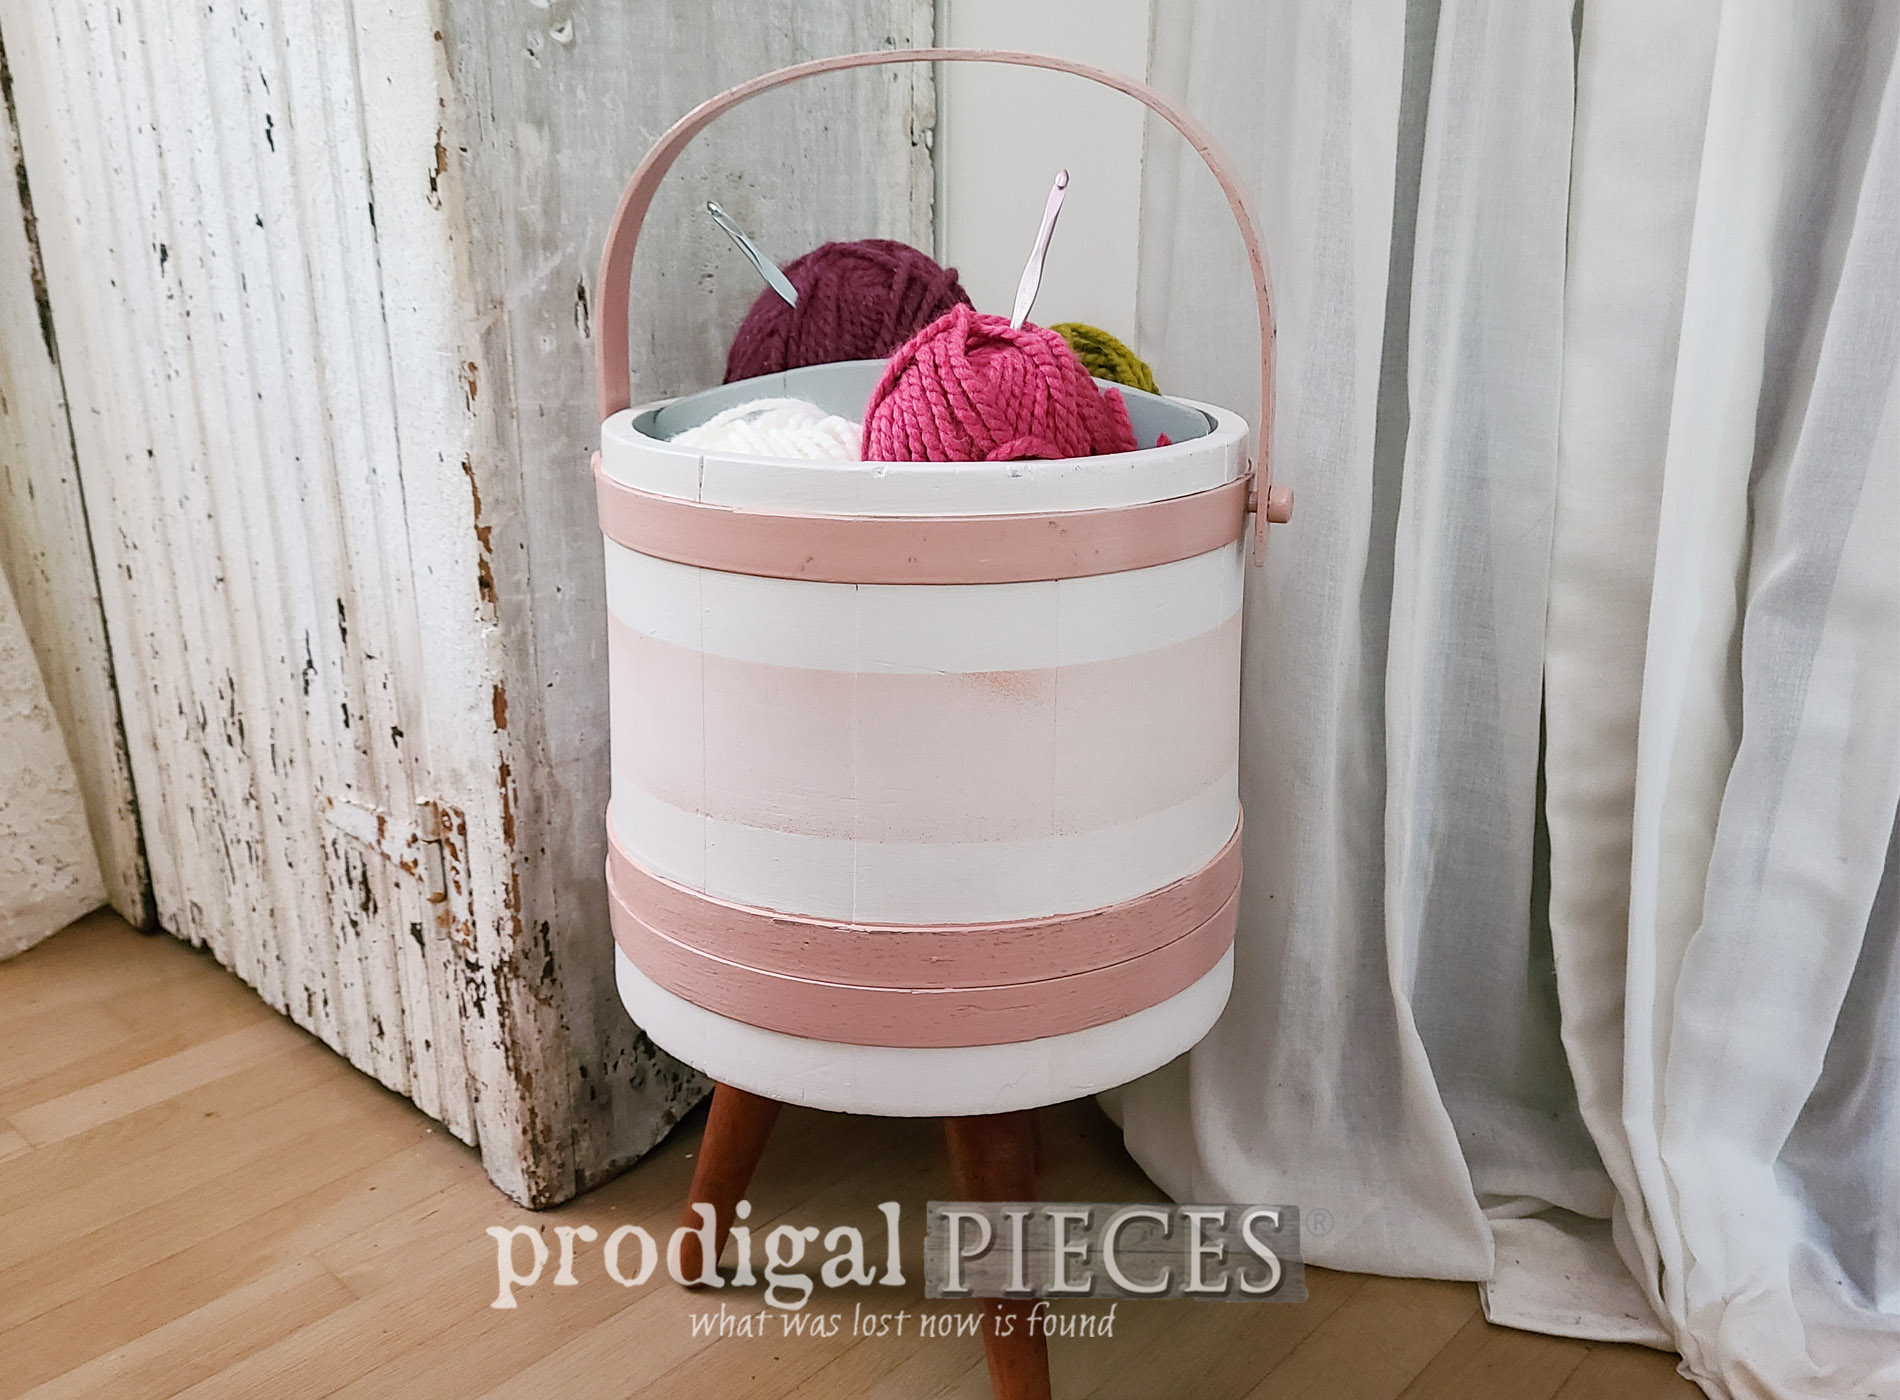
Here's the end result of my DIY fun. My vintage gem now rocks a modern vibe with plenty of life left for creative folk to get their fix. Mid-Century Modern Sew Basket Makeover by Larissa of Prodigal Pieces | prodigalpieces.com prodigalpieces   Right Side Vintage Sewing Bucket Makeover by Larissa of Prodigal Pieces | prodigalpieces.com prodigalpieces I'm so smitten with it...are you? The bands are the same Rustic Pink I've used in these past posts, while the inside is the Slate Green same as my kitchen cabinets and other projects. DIY Yarn Vintage Sewing Bucket Makeover | prodigalpieces.com prodigalpieces   Inside Vintage Firkin Sewing Bucket by Larissa of Prodigal Pieces | prodigalpieces.com prodigalpieces Not only seeing this complete makes me happy, but almost gives me the urge to pick up my hooker craft outside of winter...almost. Do you have handwork you do too? Mid=Century Modern Sewing Bucket Makeover by Larissa of Prodigal Pieces | prodigalpieces.com prodigalpieces Pink Stripe Vintage Sewing Bucket by Firkin | Makeover by Larissa of Prodigal Pieces | prodigalpieces.com prodigalpieces As with most of my creations, I can't keep them all, so if you'd like to add this to your home story, you'll find this and more available in my online store. Shop Prodigal Pieces Furniture, Vintage Finds, Handmade Goods, & Supplies for your home | shop.prodigalpieces.com prodigalpieces

SHARE

After leaving me some comment love below, do take a second to pin and share this mini makeover. I know there are many sweet pieces out there just waiting to be revived. A vintage sewing bucket by Firkin gets a much-needed makeover for an updated Mid-Century Modern style by Larissa of Prodigal Pieces | prodigalpieces.com prodigalpieces diy midcentury modern Before you go, make sure to sign up for my FREE newsletter to see what becomes of this curbside freebie HERE (aka. trashure). Curbside Reclaimed Board Before | prodigalpieces.com prodigalpieces Until next time! blog signature

let's get socialPINTEREST | EMAIL

While you're at it, here are more makeovers like this vintage sewing bucket:

Left out for trash, this vintage sewing stool has a new lease on life with a fresh new modern look by Larissa of Prodigal Pieces | prodigalpieces.com prodigalpieces vintage sewing midcentury Art Deco Sewing Desk Gets New Life by Larissa of Prodigal Pieces | prodigalpieces.com prodigalpieces furniture home homedecor diy vintage


Niki

Shared publicly - 2023-08-18 09:14:52

I have seen these, My mother in law has a squarish/rectangular one. Isn’t it funny to think of the things that were common sites growing up as being artifacts?? Anyway,I am not a stripe person, especially vertical stripes but I really like them. The pink is, well I don’t have a word…. but, it’s very good!! And without ombré it almost looks that way. This bucket is one of those things that would just cozy up a corner!

Kim Domingue

Shared publicly - 2023-08-18 09:38:11

Being the baby of my Grandmama’s change of life baby (my father) garners me some strange looks every now and then as I can identify things from the late 1800’s on up through the Great Depression years and the 40’s and 50’s that were once common household items even though I’m a 60’s era child. I recognized the “thing” as being a sewing bucket right away, lol! You did a good repair job on it. My preference would have been to leave the outside in it’s original state and paint the interior so it would be nice and clean for all the yarny goodness that I’d store inside but….different strokes for different folks, right? How boring this old world would be if we all had the exact same tastes! I thoroughly enjoy seeing your ideas and projects!

Larissa

Shared publicly - 2023-08-18 10:11:51

I have my grandmother's as well. And I use it for my handwork from time to time. I was wanting to do a sligh ombre, so thanks for getting it. :D

Larissa

Shared publicly - 2023-08-18 10:13:11

That's so fun! Yes, I knew what it was right off and was excited to get it. I did intend to leave the outside, but the off colors in the stains and the amount of work it would take to remove them would bring my time and effort to nil. So, paint it got. haha. Thanks so much, Kim.

Caye Cooper

Shared publicly - 2023-08-18 11:13:44

I also am not a fan of stripes, but yours, I LIKE! All I can say about your creation is, Keee-UTE!! Well done, Larissa!

Larissa

Shared publicly - 2023-08-18 11:39:21

It was kinda a happy mistake that it came out this way because of the damage it had to the rings, but I like it! :D Thank you, Caye.

Cheryl Atkinson

Shared publicly - 2023-08-18 14:05:09

Hi Larissa! I love the. Colors you chose. How did you not get any bleed through? It looks like a bleeder. Great makeover!!

Larissa

Shared publicly - 2023-08-18 14:50:42

Hi! I was ready for bleed through too and it didn't happen. Normally, I would use BIN primer by Zinsser for that, but didn't need to. Thanks!

Anita

Shared publicly - 2023-08-27 03:00:42

Very sweet! Personally, I love stripes! And I love the combination of colours you chose. I don’t know how to knit, but I could see using this as a little wrapping station/caddy, with rolls of paper, assorted ribbons, scissors, and tape stored in the compartments. Awesome job!

Larissa

Shared publicly - 2023-08-27 07:46:27

Thanks! It's funny to me that folks keep mentioning stripes, but yet the original had all these same "stripes" there in the binding and the slats of the bucket. All I did was bring them out a bit. ;) Thank you for your sweet words and affirmation, Anita. I love your idea!! Special wrapping is so fun.

Sign Up To Comment