 First, I'd like to brush you up on your vintage folding chairs background (as if you had one). These beauties are made by Louis Rastetter & Sons of the The Solid Kumfort company. Also, it's crazy that they can date as far back as 1900.
 I believe my set to be around the 1920-30's based on the harp and design. In addition, they have that Mid Century feel to them. These chairs are the coolest! They don't fold up like modern day chairs do. However, these have to close them by holding the base and lifting the seat.

BUILT TO LAST
That gives them more stability and strength - like most furniture from the past and unlike modern-day furniture. Also, true to the 20's and 30's the vinyl seats are a dead giveaway. Can you say sweaty bottom? eeewwww...
*post sponsored by HomeRight (see full disclosure)
At a closer look, you'll see that these chairs haven't had the respectful treatment they deserve. It seems as if they had been stored in a basement or garage where temps fluctuated and cause moisture to accumulate. Or, quite possibly, they were sprayed with water. Either way, they are still wood, still full functional, and have oodles of potential.
DIY TIME
First, I begin by removing the seats and then wiping the chair frames down with a vinegar/water mix to clean the wood. I use a 1:1 ratio in a spray bottle and a soft rag. This gets rid of any residue or build-up that would prevent paint from sticking. Then, I pop up my spray shelter and set up my DIY Furniture Turn Table. You can read how I built that awesomely handy tool HERE. You can see how easy it is to use and set up in this video below:

MORE TOOLS
In addition to my shelter, I bring out my paint sprayer. I'm not a glutton for punishment and painting chairs by hand is one of my least favorite things to do. With my sprayer, I just fill up the canister, attach my blue tip, and away we go! Also, it only takes a second to get some practice in on a scrap piece of wood or cardboard. The key to a smooth finish is to get the flow knob set right, initially. Then, while spraying, stay about 8-12 inches away from piece, and work from your elbow and shoulder.
UP NEXT
Not only am I using paint, but also a primer to hide the stains and give my next layers of paint tooth. After that, I use two coats of a custom-mixed antique white. Each coat only took about 15 minutes to apply. I'm tellin' ya, that sprayer and shelter make my job a blast...literally! Meanwhile, during those cure times I took the in-between times to remove that awful vinyl. It was time to freshen up these chairs with new batting and upholstery. I had this soft green upholstery in my stash that would be perfect. Next, I wanted to add a bit of ooh, la, la to my vintage folding chair set. I used this same grain sack stencil I use in this basic acrylic paint and a textile medium added, it's super simple to create this design.

REVEAL TIME
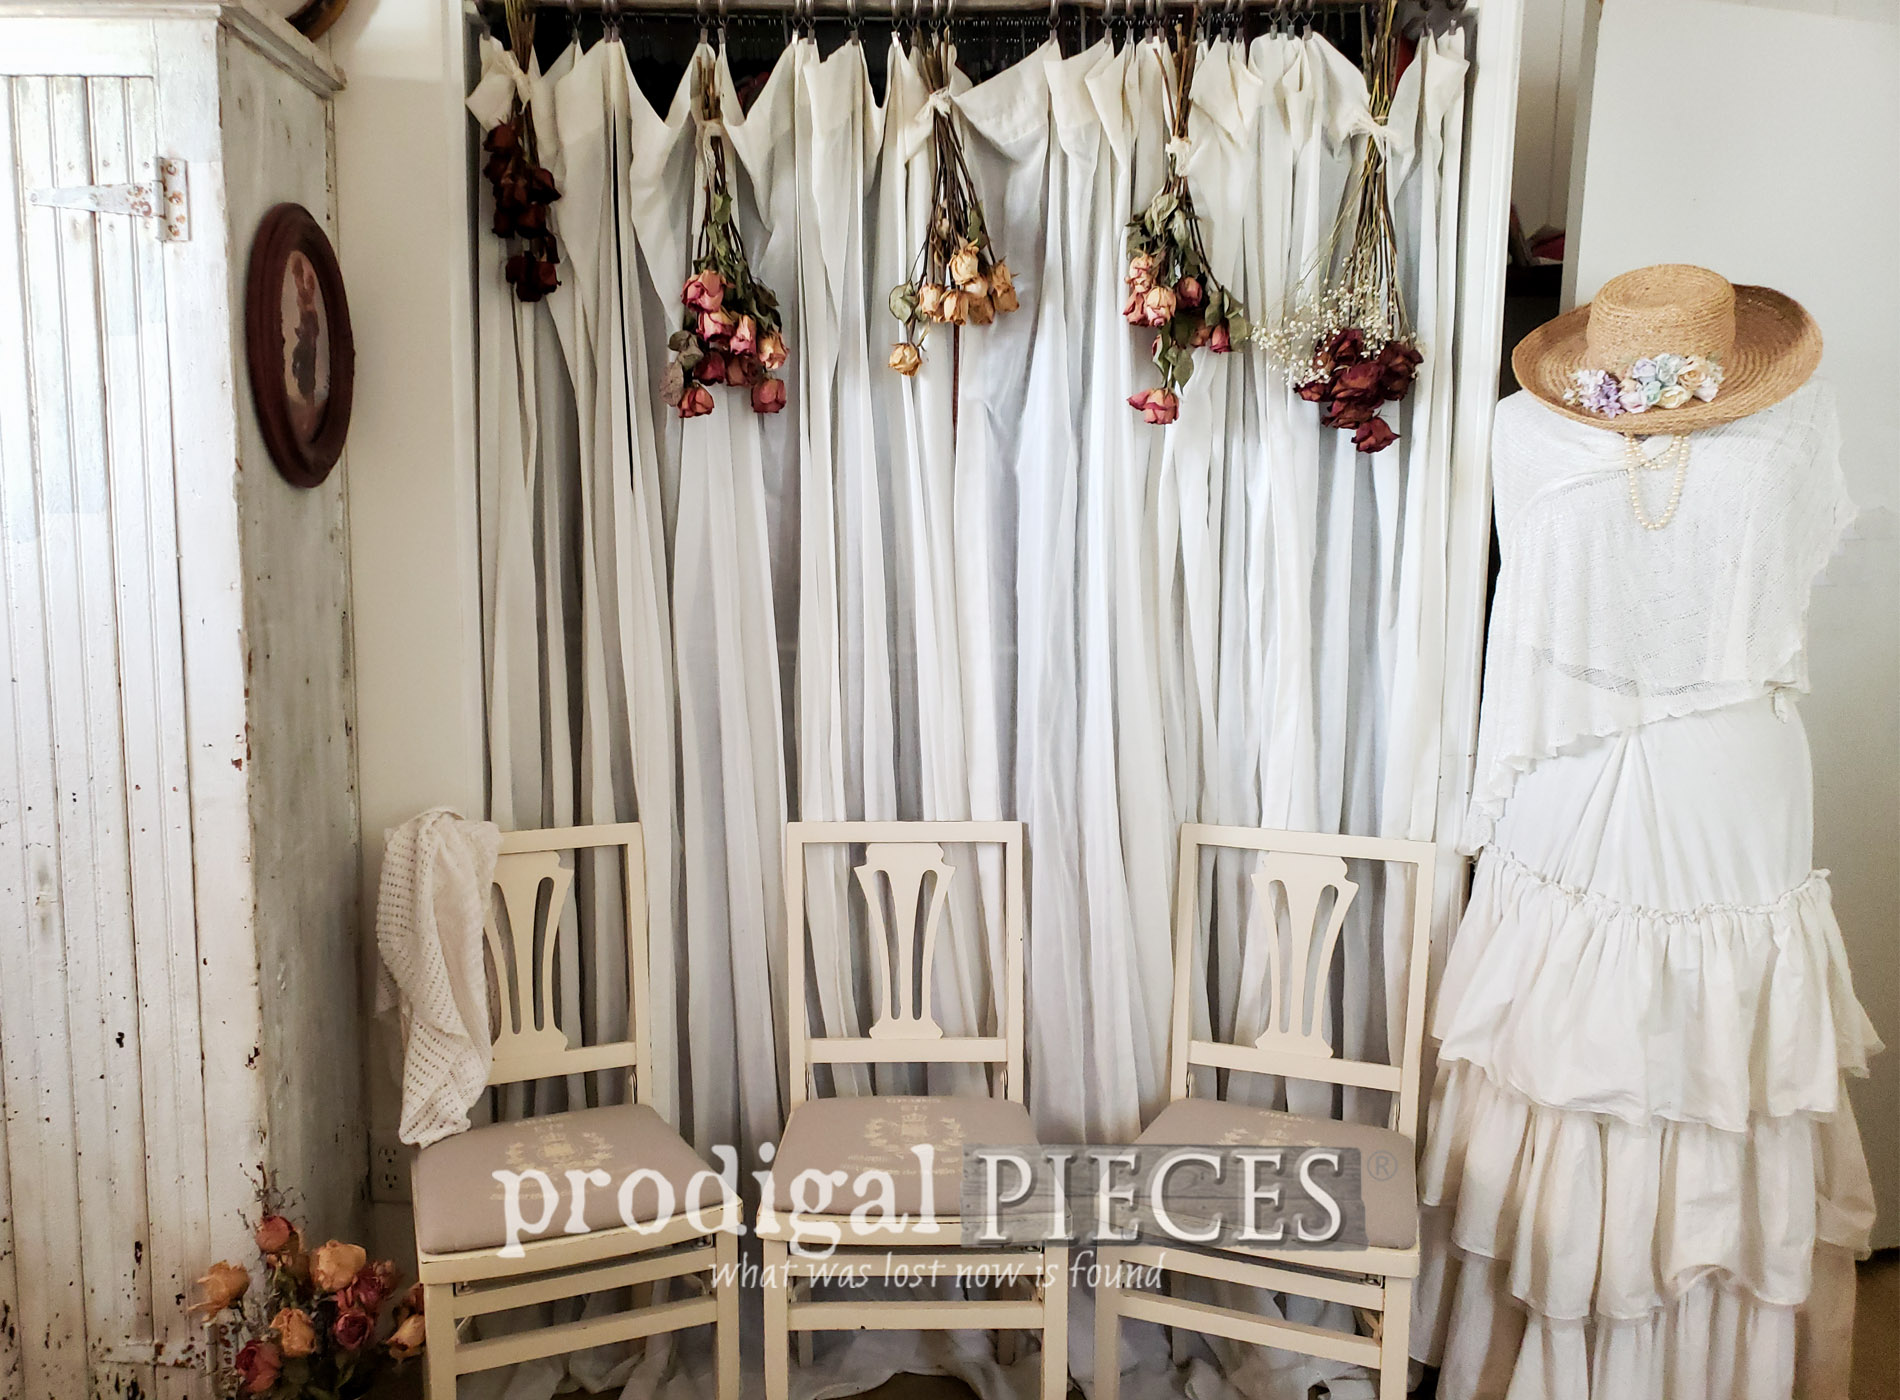
Now my set is refreshed, renewed, and so pretty!
 Likewise, I'm smitten with the stencil that really took these chairs to a whole new level. Without it, they would have seemed flat, don't you think?


TREASURE
I don't know about you, but I always have a few folding chairs hanging out in storage. They're handy for when guests come over and we need extra seating. Also, they work in filling up those awkward spots in our home too.
 What a happy ending to my fun thrift store haul. Finally, it is my goal to inspire you to see beyond the obvious and give DIY a try.
</em> <a href=") First, I'd like to brush you up on your vintage folding chairs background (as if you had one). These cuties are made by Louis Rastetter & Sons of the The Solid Kumfort. They can date as far back as 1900. I believe my set to be around the 1920-30's based on the harp and design. In addition, they have that Mid Century feel to them. These chairs are the coolest! They don't fold up like modern day chairs do. With these, you have to close them by holding the base and lifting the seat. That gives them more stability and strength - like most furniture from the past and unlike modern-day furniture. Also, true to the 20's and 30's the vinyl seats are a dead giveaway. Can you say sweaty bottom? eeewwww...
First, I'd like to brush you up on your vintage folding chairs background (as if you had one). These cuties are made by Louis Rastetter & Sons of the The Solid Kumfort. They can date as far back as 1900. I believe my set to be around the 1920-30's based on the harp and design. In addition, they have that Mid Century feel to them. These chairs are the coolest! They don't fold up like modern day chairs do. With these, you have to close them by holding the base and lifting the seat. That gives them more stability and strength - like most furniture from the past and unlike modern-day furniture. Also, true to the 20's and 30's the vinyl seats are a dead giveaway. Can you say sweaty bottom? eeewwww... *post sponsored by HomeRight and includes affiliate links so you can find the products I love to use too. (see full disclosure)
At a closer look, you'll see that these chair haven't had the respectful treatment they deserve. It seems as if they had been stored in a basement or garage where temps fluctuated and cause moisture to accumulate. Or, quite possibly, they were sprayed with water and not wiped clean. Either way, they are still wood, still full functional, and have oodles of potential. DIY TIME
First, I begin by removing the seats and then wiping the chair frames down with a vinegar/water mix to clean the wood. I use a 1:1 ratio in a spray bottle and a soft rag. This gets rid of any residue or build-up that would prevent paint efforts from sticking. Then, I pop up my HomeRight Medium Spray Shelter and set up my DIY Furniture Turn Table. You can read how I built that awesomely handy tool HERE. You can see how easy it is to use and set up in this video below: In addition to my shelter, I bring out my Super Finish Max Extra. I'm not a glutton for punishment and painting chairs by hand is one of my least favorite things to do. With my sprayer, I just fill up the canister, attach my blue tip, and away we go! Also, it only takes a second to get some practice in on a scrap piece of wood or cardboard. The key to a smooth finish is to get the flow knob set right,initially. Then, while spraying, stay about 8-12 inches away from piece, and work from your elbow and shoulder. For my project, I'm using a primer to hide the stains, but also give my next layers of paint tooth. After that, I use two coats of a creamy antique white for the finish. Each coat only took about 15 minutes to apply. That sprayer and shelter make my job a blast...literally! UP NEXT
Meanwhile, during those cure times I took the in-between times to remove that awful vinyl. It was time to freshen up these chairs with new batting and upholstery. I had this soft green upholstery in my stash that would be perfect. Next, I wanted to add a bit of ooh, la, la to my vintage folding chair set. I used this same grain sack stencil I use in this past post HERE. With basic acrylic paint and a textile medium added, it's super simple to create this design. REVEAL TIME
Now my set is refreshed, renewed, and so much better! I'm smitten with the stencil that really took these chairs to a whole new level. Without it, they would have seemed flat, don't you think? I don't know about you, but I always have a few folding chairs hanging out in storage. They're handy for when guests come over and we need extra seating. Also, they work in filling up those awkward spots in our home too. What a happy ending to my fun thrift store haul. It is my goal to inspire you to see beyond the obvious and give DIY a try. ;More DIY fun projects like my vintage folding chairs: 
 " src="https://ezbloo.prodigalpieces.com/uploads/2019/11/grain-sack-folding-chairs.jpg" alt="Set of 3 Grain Sack Folding Chairs by Prodigal Pieces | prodigalpieces.com prodigalpieces diy home furniture homedecor farmhouse vintage" width="550" height="745" />
 Also, if you'd like to own this set for your home, you can find it and much more available in my online shop.

SHARE
Additionally, pin and share my vintage folding chairs fun. I know I'm not the only one with spare chairs hanging around that need new life. Up next, this broken ladder remnant will become something new. See HERE.
 To get these DIY tips & tricks in your inbox, be sure to sign up for my newsletter. Until next time!

Also, more DIY fun projects like my vintage folding chairs: