One thing is for certain, I can't watch good furniture go to the dump. I either will rescue it to find it a new home, or work on it myself.
My Dumpster Diva is a prime example of how far I'll go to save an old soul. If you take a peek below at these vintage chairs, you can see that they are in need of some love. While no one wants them and they were destined for the dumpster, I want to rebuild and renew them.

Truth be told, I needed more stuff cluttering up my workshop like I need another hole in my head. However, I figured that I could find them a new home. After setting them on the curb for the day with a "Free" sign, a large looming storm was rolling in so I decided to adopt them. It's what a good junker would do, right?

It's easy to see they aren't pretty in the least bit, but I do appreciate they are solid oak. Also, they're not safe to sit on as the wood has shrunk loosening up all the joints. Shall we have a vintage chair makeover? We shall....woot!
A CLOSER LOOK
The first order of business is to truly look into the rock-n-roll shake they have going on. Before that, I take off the duct tape that was awesomely stuck on as scuff guards on the feet. Then, I grab my hammer and dismantle them both all the way down to pieces. I only found one rail that had a crack where the dowel pins rest. However, other than that I think I don't need to chop them up and upcycle
like I did this set, but just grab my wood glue and get to work. Here's one in the middle of re-assembly while the other in the background is awaiting its revival.

To give them more stability, I not only glue, but add pocket hole joints to the rails so that they aren't going anywhere. Yeah, baby! Here they are after assembly and ready for a good sanding.

A FRESH COAT
The wood is parched and can be stripped and restored, but I don't have that kind of time on my hands. So, in order to revive them I'm using a soft blue paint that will allow the grain to peek out when complete.

Only one coat is what I need and then I use a brown wax to draw out the grain and add texture. Otherwise, they end up looking flat and boring.

See the difference from the waxed chair on the left and the plain paint on the right? The brown wax will accent the upholstery I've chosen for these two. I just use and old brush, wax in the direction of the grain, and use an old rag to wipe away excess.

UPHOLSTERY
Next, it's time to dress up the seats of these vintage chairs with fresh upholstery. Before I even start on this project, I head to my stash to see what's available and to my liking. Then, I pick out a complimentary paint and go from there. If you ever want to dive into the upholstery world, it's truly easier than you think to have a go at it. You can start with a footstool and follow
my tutorial here or see the demo in the video below.

After removing the old vinyl and rusty nails, I cut new batting and upholstery and attach with my stapler.

DRESSIN' UP
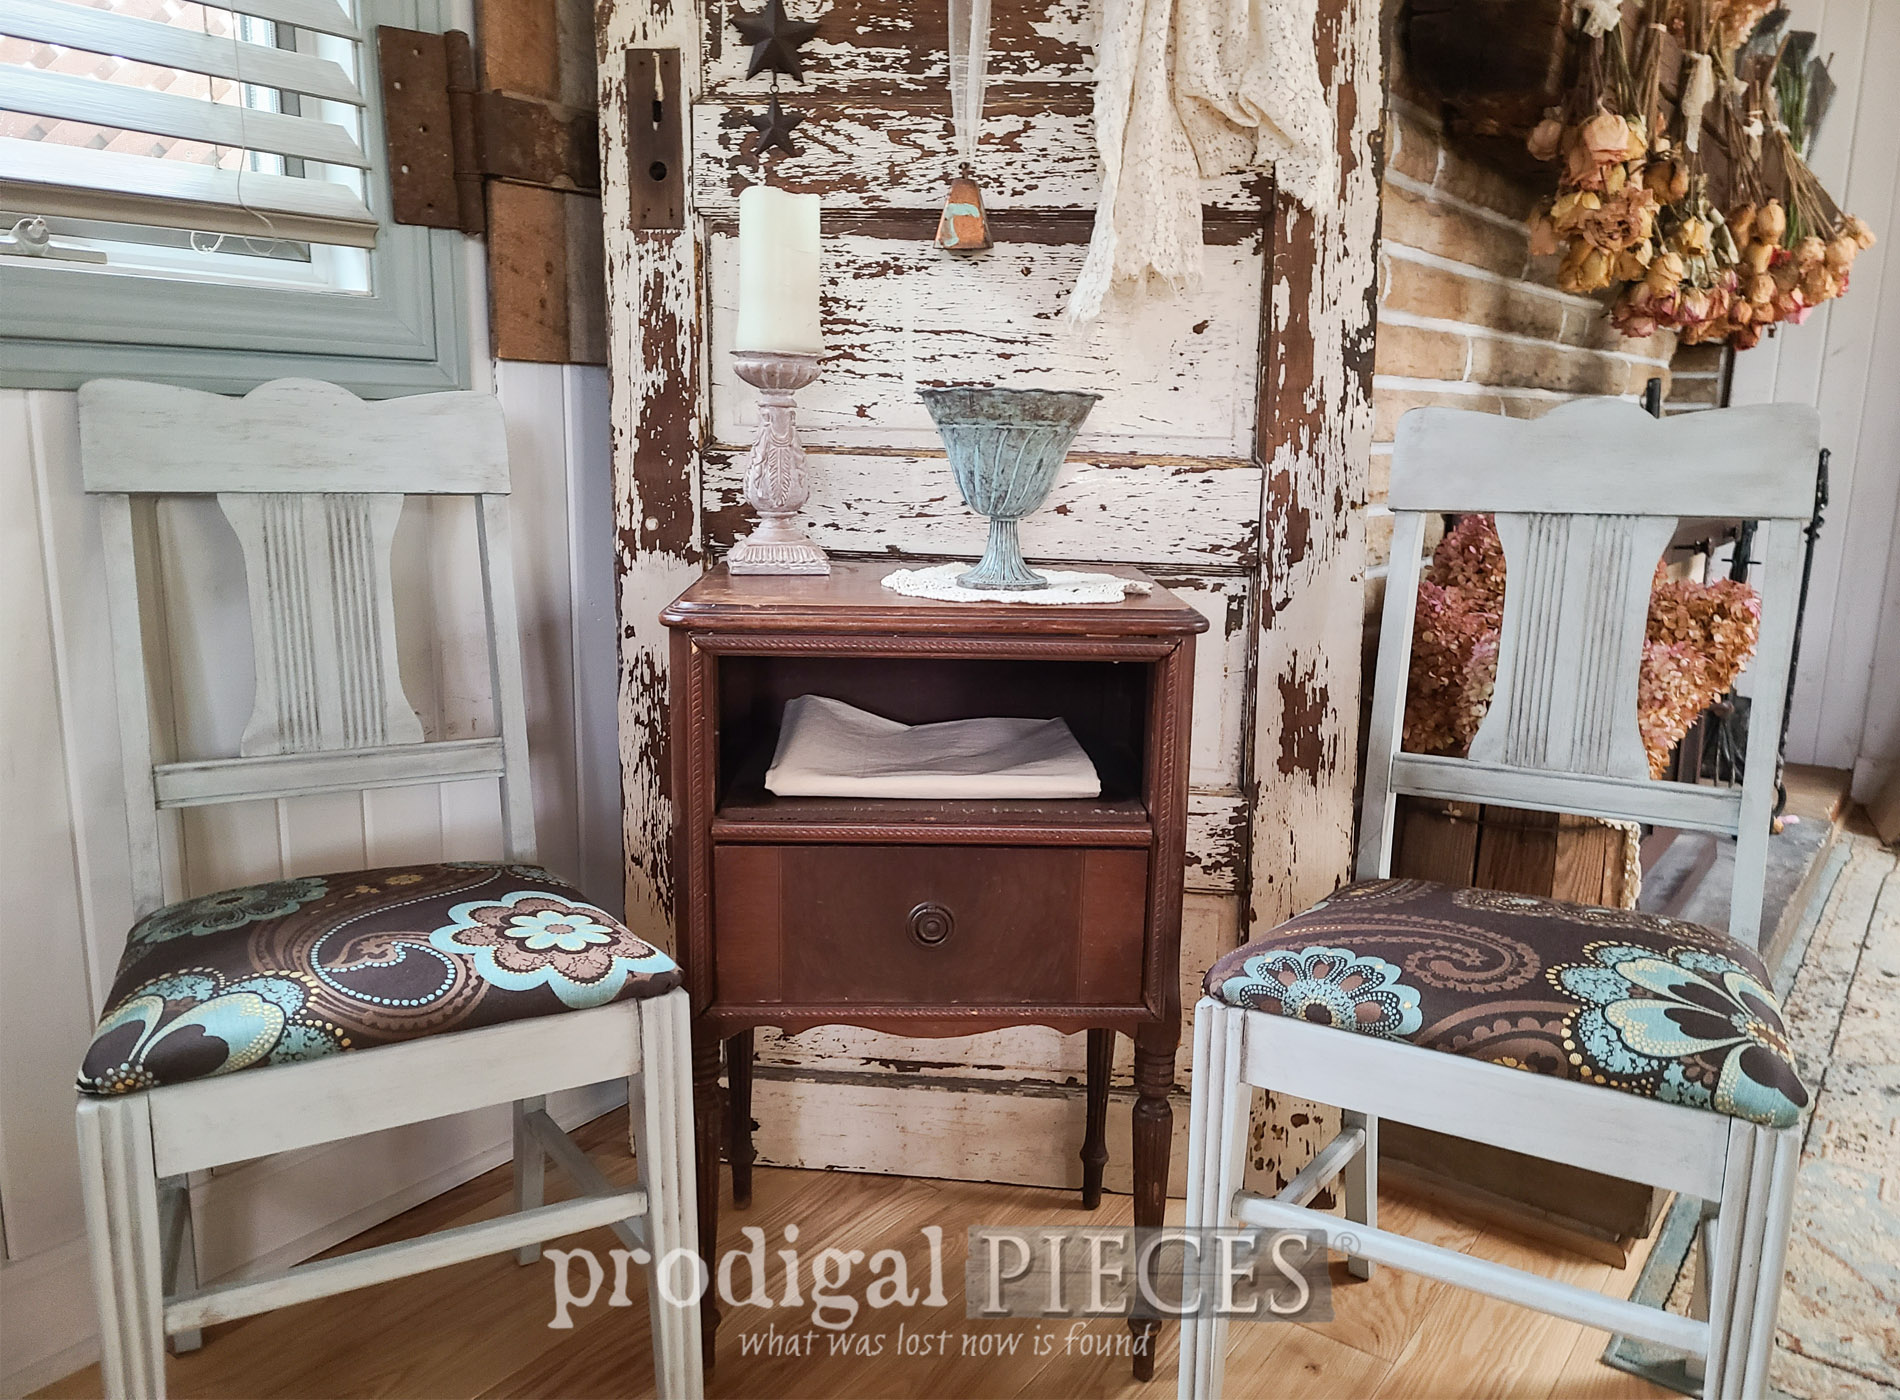
Here's my set of vintage chairs ready for many more years of adding fun and style to a home.


Isn't that sooooo much better?!? What a relief that I am able to save them and dress them up. I would have made use of the parts, but I'd rather this ending instead. You can't tell as much in the pictures, but the fabric has a slight sheen to it dressing them up just right.


While I am a confessed lover of chairs in all forms (see
my past makeovers HERE), I am offering this dynamic duo in
my online shop.


SHARE
In addition to leaving comment love below, do pin and share to inspire others to think outside the obvious and skip the dumpster.

Now, before you head off, be sure to
sign up for my newsletter so you can see what I did with my neighbor's trash. {{GASP!!}} Come on
OVER HERE to see!


Also, here are more fun vintage chairs projects for you to enjoy: