 Back about 4 years ago I wanted to add curb appeal to our front stoop. I wanted a custom build because the urns I had there were a bit too dressy for my rustic vibe. So, I created these "X" planters and share the FREE step-by-step build plans with you. Now, after that time in full sun and snow all summer and winter, they are looking a little...er...tired. Here's the original stain finish with our old red door before and my video demonstrating the finish below.


*post sponsored by HomeRight (see full disclosure)
DIY TIME
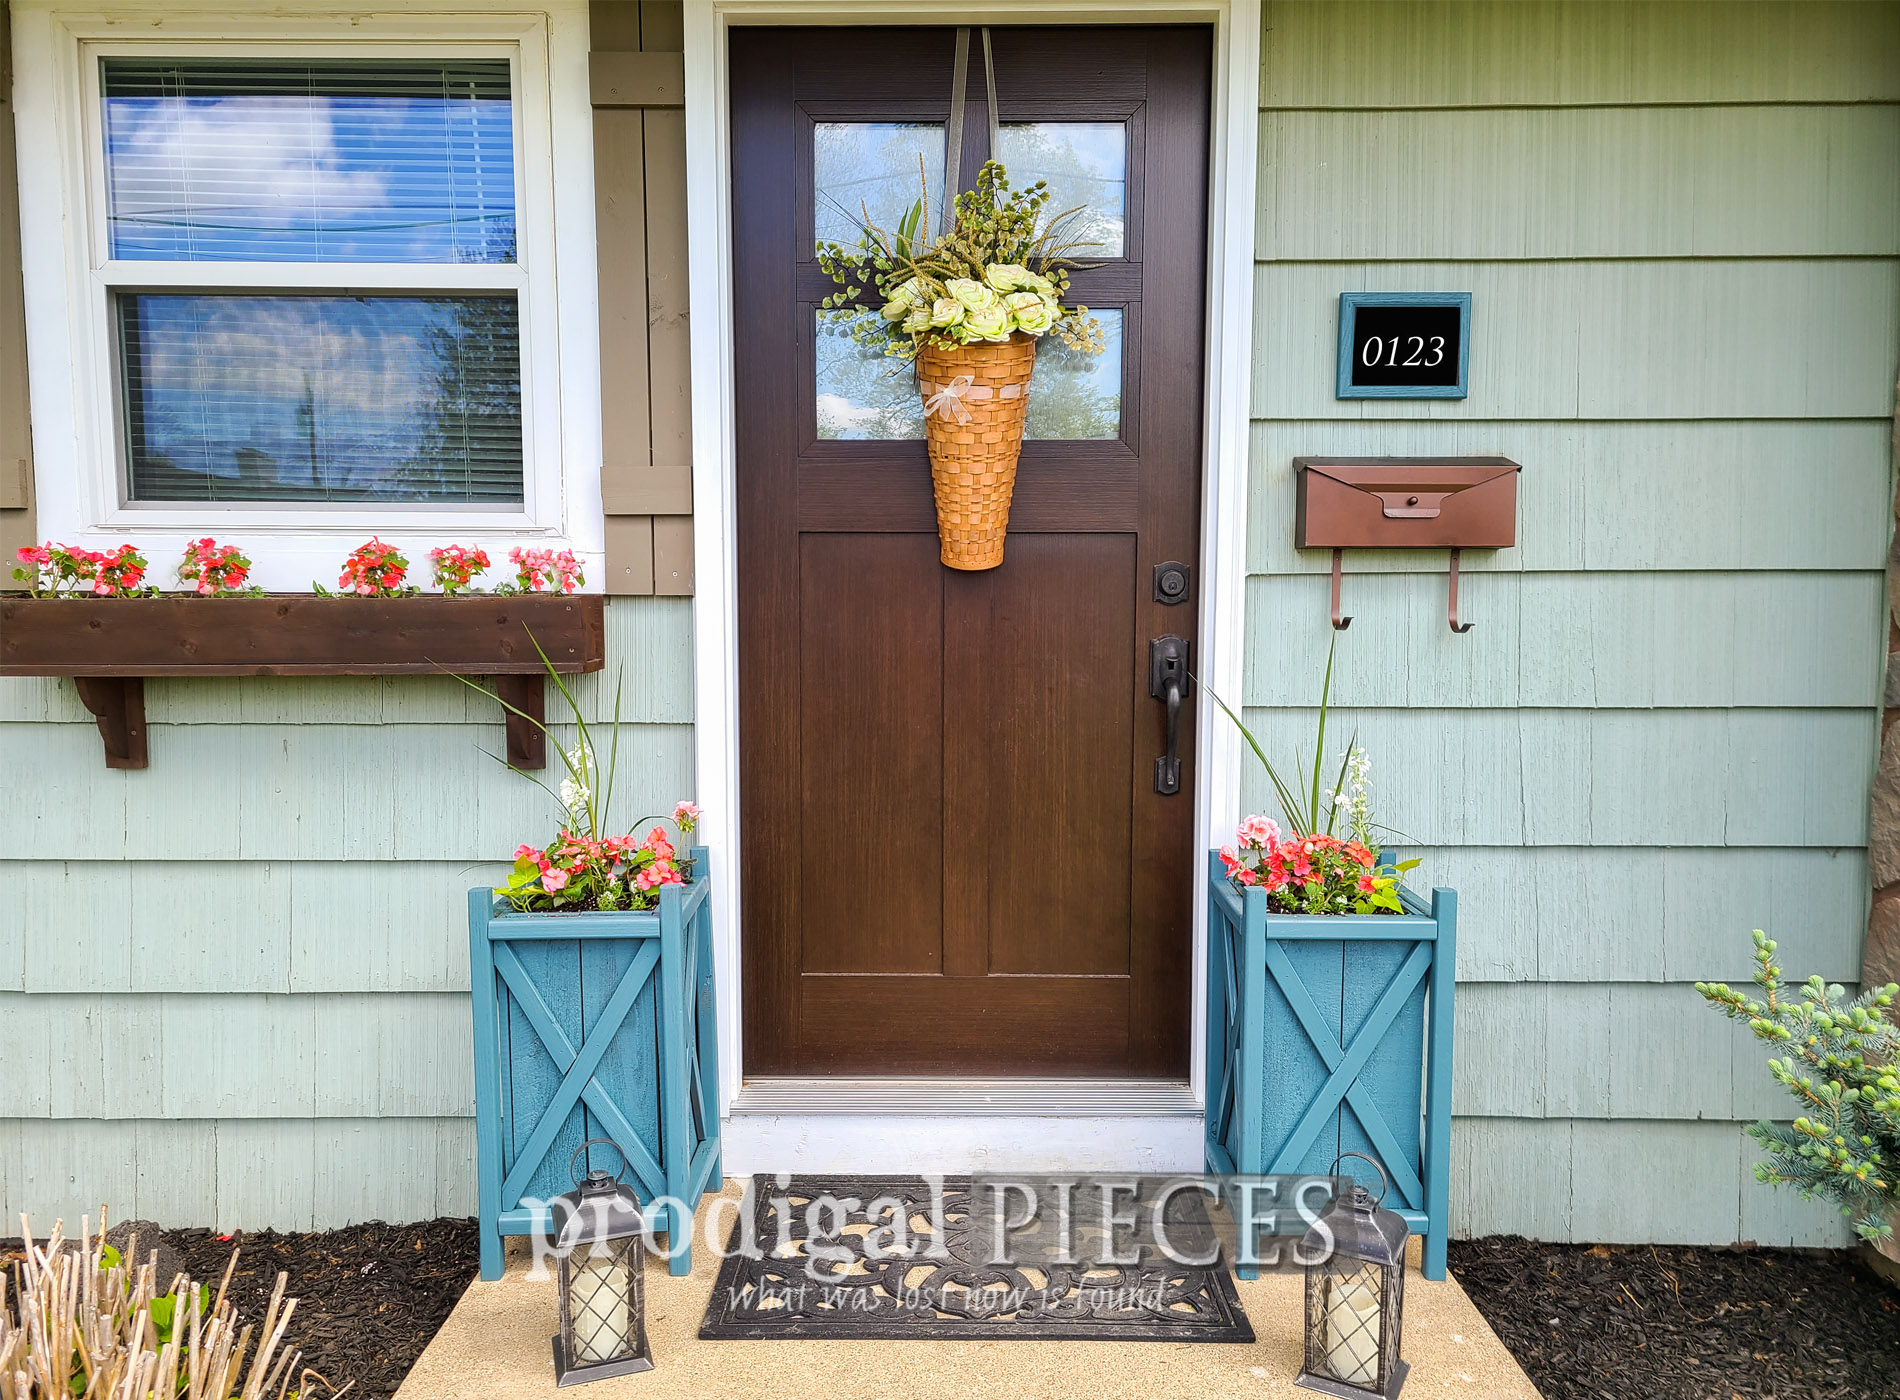
Like I mentioned, the goal to update planters is pretty simple. They're not too far gone and I want to keep them that way. I just need to tighten things up and refresh them. This time around, however, I'll be using paint. If you look up in the before photo, you see we recently replaced our front door. Then, I darkened the stain on my flower boxes we built. So, you know what's coming, right? DIY domino effect e'ry time. Since I wanted this project done pretty fast, I whip out my Medium Spray Shelter and my Quick Finish Sprayer. Last summer I changed the rest of my exterior door colors on the rest of the house to match my shed door. I love that blue! It's called Superstitious.
  You can see our demo and remodel in this post. This transformation is like night and day! In order to bring that color to the front, I'm painting the planters this lovely color.

SETUP & SPRAY
You know I love my HomeRight sprayers. I have a few of the models for different reasons. This Quick Finish Sprayer is perfect for just that...a quick finish. It suits your smaller projects, is easy to setup, and super fast to clean. I fill up the canister thinning the paint per manufacturer instructions, Then, before starting my project, I adjust the flow on a piece of cardboard. First, I apply one coat and let it cure. After that, a second coat and I'm done. Literally each coat take 10 minutes, and two cleanups 10 minutes. What could be easier than that? Now, it's time for my greenhouse therapy. I just love going to the nursery! Hard to not come home with a truck full. Am I right?
THE FINISH
Finally, my efforts to update planters is complete. It was an easy job and I'm so pleased with the results.
 Now, I have that blue color tied into the front of my home and filled with my favorite coral color flowers. What's your favorite accent color in your garden?

 I don't know about you, but I really love planting. However, the best part is seeing the fill in over the summer months. I want them full right away! haha! I still need to add my vines to my window boxes, but that will come soon. It's all part of the fun for sure.

 As always, my goal is to inspire you. Whether you build your own, buy, or upcycle, they're all part of your own home story. Making your house your home is one of the greatest adventures. Enjoy it to the full.
GIVEAWAY TIME
With that, HomeRight and I want to help you have the right tools for your DIY projects. We are giving away a HomeRight Quick Finish Sprayer. Easy entry - just complete the widget below for as many entries as you like. Giveaway is open to U.S. & Canada residents 18 years of age and older. In addition, winner will be notified by email and will have 24 hours to claim their prize. Also, be sure to check your spam! In addition to leaving a comment below, do pin and share this update planters fun to inspire others too. Up next is Reduce, Reuse, REFASHION time. See what becomes of a pair of mens swim trunks HERE!
 To get these DIY tips & tricks in your inbox, be sure to sign up for my newsletter. PLUS, you will get your special discount to my shop. Until next time!

Also, more fun DIY projects for your home like this update planters project:

