 Do those look like butterflies to you? Maybe not now, I get it. However, hang with me. These turnings are sure beautiful and definitely worth making use of. Especially when they are as fun as this...
 The colors and details are totally customizable to your liking. Likewise, if you don't have spindles, don't worry. You can still create this from what you have on hand or is available locally. In addition, take a peek at the sheep I created from spindles in this past post. Here's what you need to get started:
TERMS OF USE: If you want to create a these butterflies, you agree to the following: it cannot be shared or distributed for monetary gain in any way, it may not be modified in any way, and you may not claim the work as your own.
The colors and details are totally customizable to your liking. Likewise, if you don't have spindles, don't worry. You can still create this from what you have on hand or is available locally. In addition, take a peek at the sheep I created from spindles in this past post. Here's what you need to get started:
TERMS OF USE: If you want to create a these butterflies, you agree to the following: it cannot be shared or distributed for monetary gain in any way, it may not be modified in any way, and you may not claim the work as your own.
TOOLS & SUPPLIES
- spindles, dowels, sticks, paper tubes...whatever you can come up with
- soda pop cans - two for each butterfly (washed and dried)
- paint brushes
- stain of choice
- paint of choice
- scissors
- mixed media - fabric, paper, buttons, waxes, stamps, etc.
- hot glue gun
- hot glue sticks
- floral wire
STEP 1
First, decide what size you want your upcycled spindle butterflies to be. I had a 11 ½" spindle that I halve. That way, my pieces are 4 ¾" long when the spindle is cut in half. However, if you're into dragonflies, you can keep them whole to make those too. To start, I chose to keep them whole until I stained them. Easiest way to do that is to support them in some fashion. In addition, I prefer to use a box with a hole punched in to support the spindles. You can finish these in any way you like. For me, I'm after an aged appeal with a mixed media flair. I apply my reactive stain. With a reactive stain it will cause this new wood to age within minutes.
 STEP 2
Next, while I'm waiting for my stain to cure, I begin to cut my soda pop cans. Just pop the tip of your scissor in and cut around, then cut down the side, and finally around the bottom.
 Then, because your can will want to curl, you can reverse roll it up to get it to lay flat. Last, cut a wing shape out of the aluminum. It's super simple to draw or etch into the metal before cutting.
 Of course, you need opposing wings. Use a bead of hot glue to attach them together. Also, I think you can even just use a the bead of hot glue for a butterfly body and skip the spindle.

STEP 3
With your butterfly wings assembled, it's time to dress them up. I'm going for a neutral palette, but feel free to change them up however you like. I apply two coats of paint, letting them cure in between.
STEP 4
Last, this is where you can let loose and have fun. Add bits and baubles...anything you like. I added textiles, paper, and beaded bits for antennae (added at the end). Also, I used a wax to create an aged appeal to my my design as well. Notice I'm waxing to add depth and dimension.
 One last thing, you can add a bit of floral wire or similar to the back as a hanger.

DONE
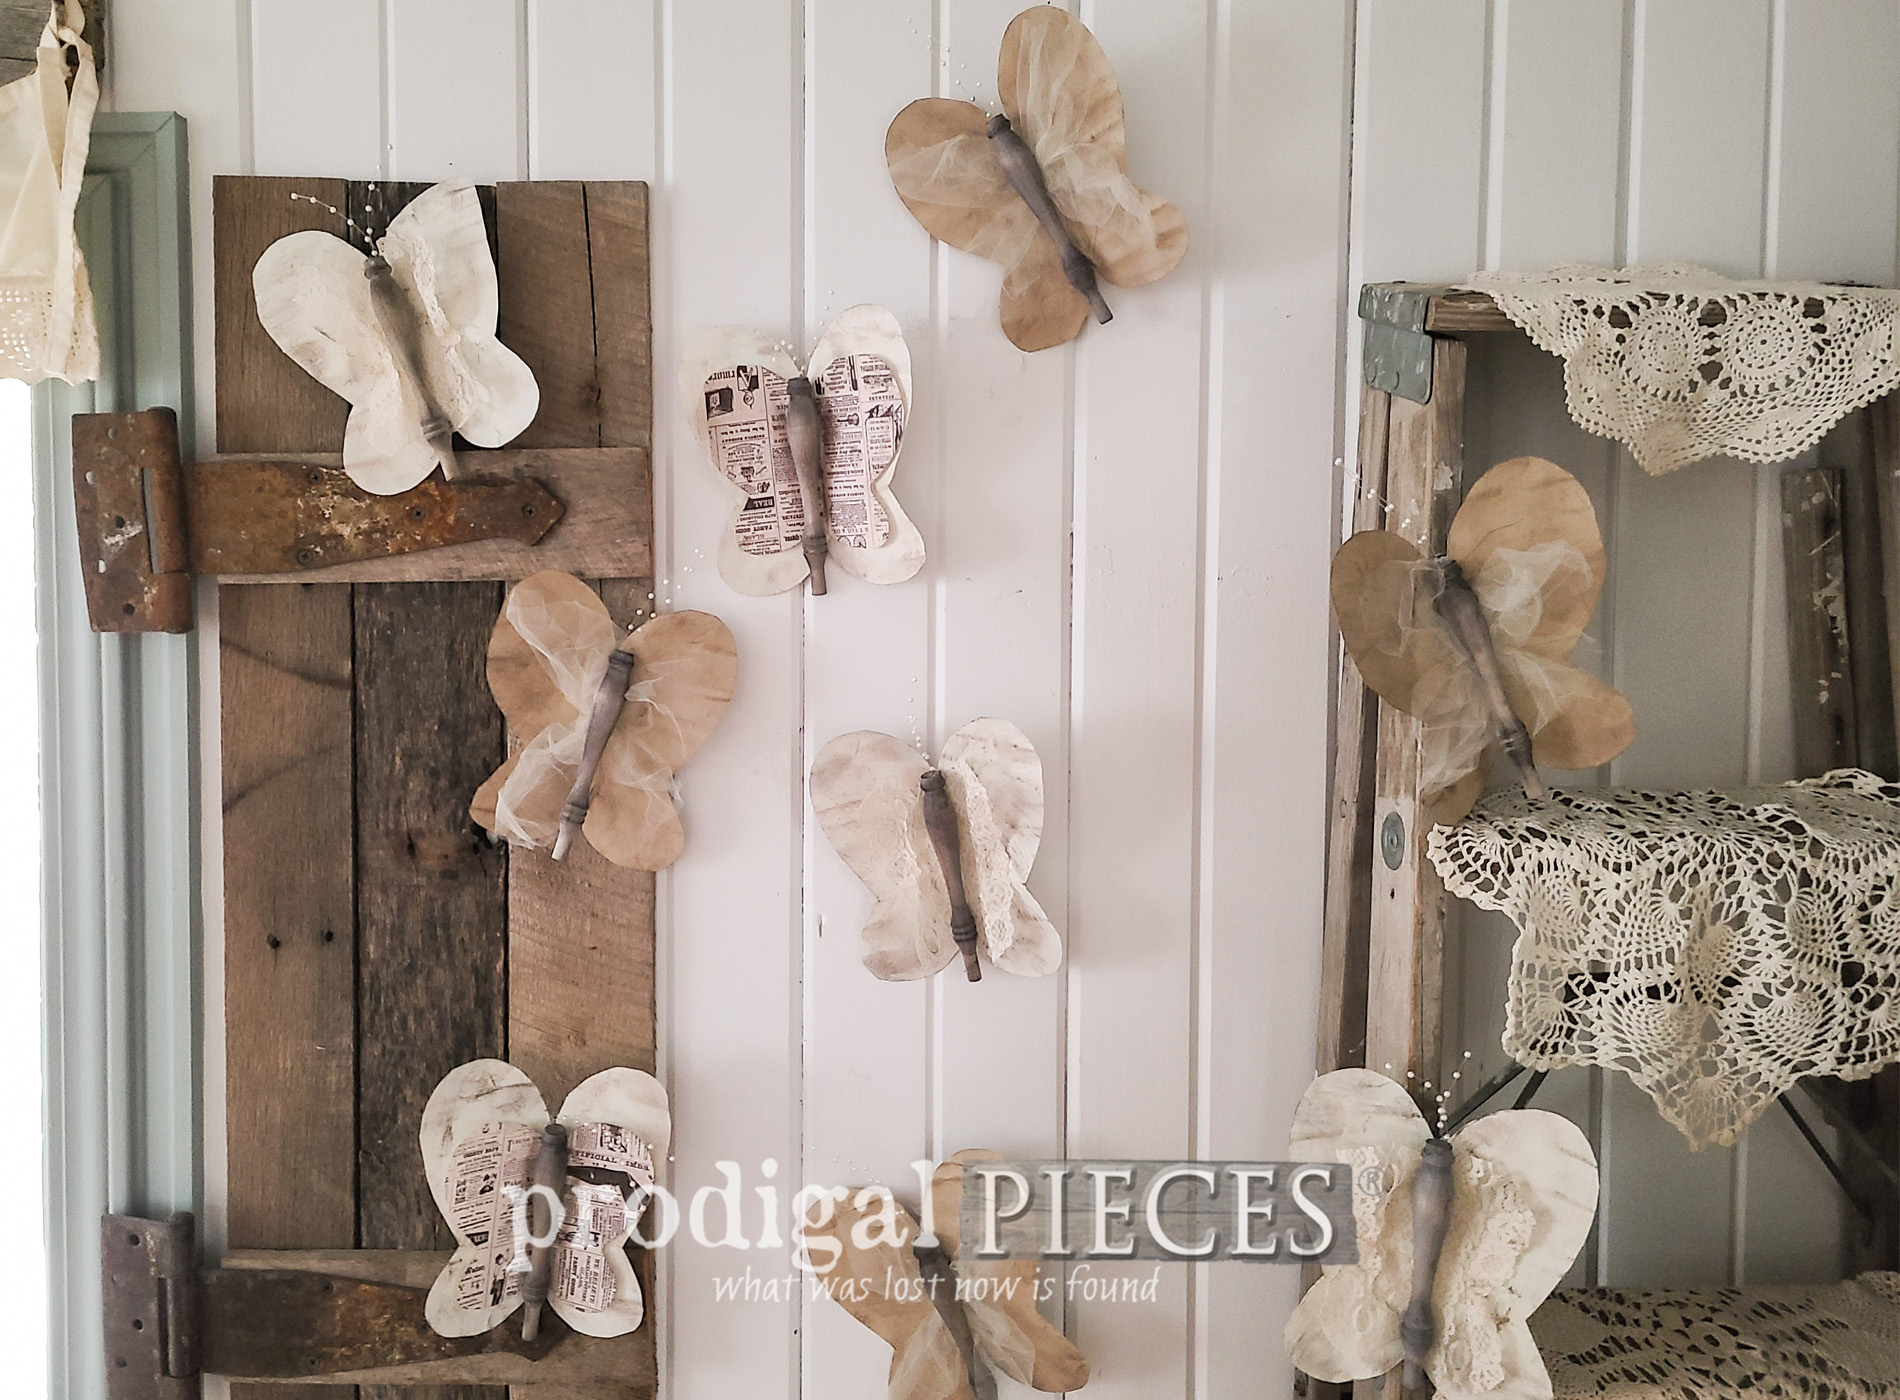
Finally, we're done!

 Which one is your favorite? I'm smitten with each one for different reasons. Additionally, going bold would be fun too!

 If you're not feeling crafty or just love my butterflies, you can purchase a set in my online shop.
[metaslider id=30251]
In addition, to leaving me a comment below, also pin and share to inspire others. Creating is great therapy! Up next, there's a kitchen lockdown going on! Head HERE TO SEE.
 To get these DIY tips & tricks in your inbox, be sure to sign up for my newsletter. PLUS, you will get your FREE Furniture Buying Checklist and special discount to my shop. Until next time!

Also, even more crafty fun like these upcycled spindle butterflies:
 | Head to prodigalpieces.com prodigalpieces diy handmade toys home homedecor farmhouse")
