Have you had any thrifting adventures lately? It could be sourced from ever-popular Curb le Chic, or maybe your family, or even a local haunt (I have a few non-chain store places that always have goodies). Either way, those kinds of journeys
almost always prove fruitful. Take for instance this loot below. I found two sets of shutters and for some reason I am drawn to louvers. I'm breaking up this set into two projects. Today, I'm creating a upcycled shutters wall cabinet from my scrap wood.

Before I get started, I invite you to take a peek at my past louvered projects:
So, dare I say I'm hooked? tee hee. Not only are louvers a great way to add texture to our home, but they also addfunction, and are timeless as well.
DIY TIME
First, to create my upcycled shutters cabinet I dig into my wood stash and pull out some 1" x 6" boards and cut them to length. I'm not going for super decorative, but rather a simple and rustic, per my normal style and so you can create it too.

I'm basically building a box and adding the shutters to the front as doors. See the graphic I created below for reference. If you want to make one too, here's a basic outline:

BUILD STEPS
- Measure your shutter height and add 1 ½" to the measurement (accounting for the 1" x 6" lumber you're using) Cut two boards using that measurement.
- Also, measure the top and bottom of your shutters. This will give you the bottom board length. Cut one board for the bottom.
- You will need one more board for the top. I prefer to use a wider and slightly longer board to add interest. Because I use 1" x 6" boards (which actually measures ¾" x 5 ½"), I cut a 1" x 7" x top measurement + 1 ½". Feel free to email me with questions.
- Optional: in addition, I add a shelf in the middle that is the same dimensions as the bottom of the cabinet.
- Assemble using wood glue and either a nail gun or pre-drill with screws.
- Measure from center of side-to-side and top-to-bottom to find dimensions of a rear panel made of luan, bead board, hardboard (if desired).
- Last, cut and add your back panel.
This time around I use luan - a super thin ply that works for oodles of things and I always keep some on hand.
*note: I love to support local and purchased this at a family business. They had me checked out and loaded in less than 10 minutes with a smile and respect. I definitely don't receive that kind of customer service at a big box store. For every dollar you spend locally puts $3 back into the community.

Additionally, I want to add a bit of drama to the top, so I find more scrap trim and add it to the top edge piece.

FINISHING
Further, it's time to add the finishing touches to our wall cabinet. First, I want it all to have the same base color, so I use a reactive stain to darken the new wood. This stain is so awesome to use. It is less toxic, doesn't need wiping off afterward, and dries so fast. Plus, it ages the wood naturally in minutes.

Then, once the stain cures I set up
my DIY lazy susan, spray shelter and sprayer.

This setup makes my job done in 10 minutes...
really!! I apply two coats letting cure in between and then add gray wax with distressing to age it a bit.

THE REVEAL
Finally, after only a few hours of DIY fun, we have our upcycled shutters turned wall cabinet. woot! It's ready for any room in your home. What would you use it for?


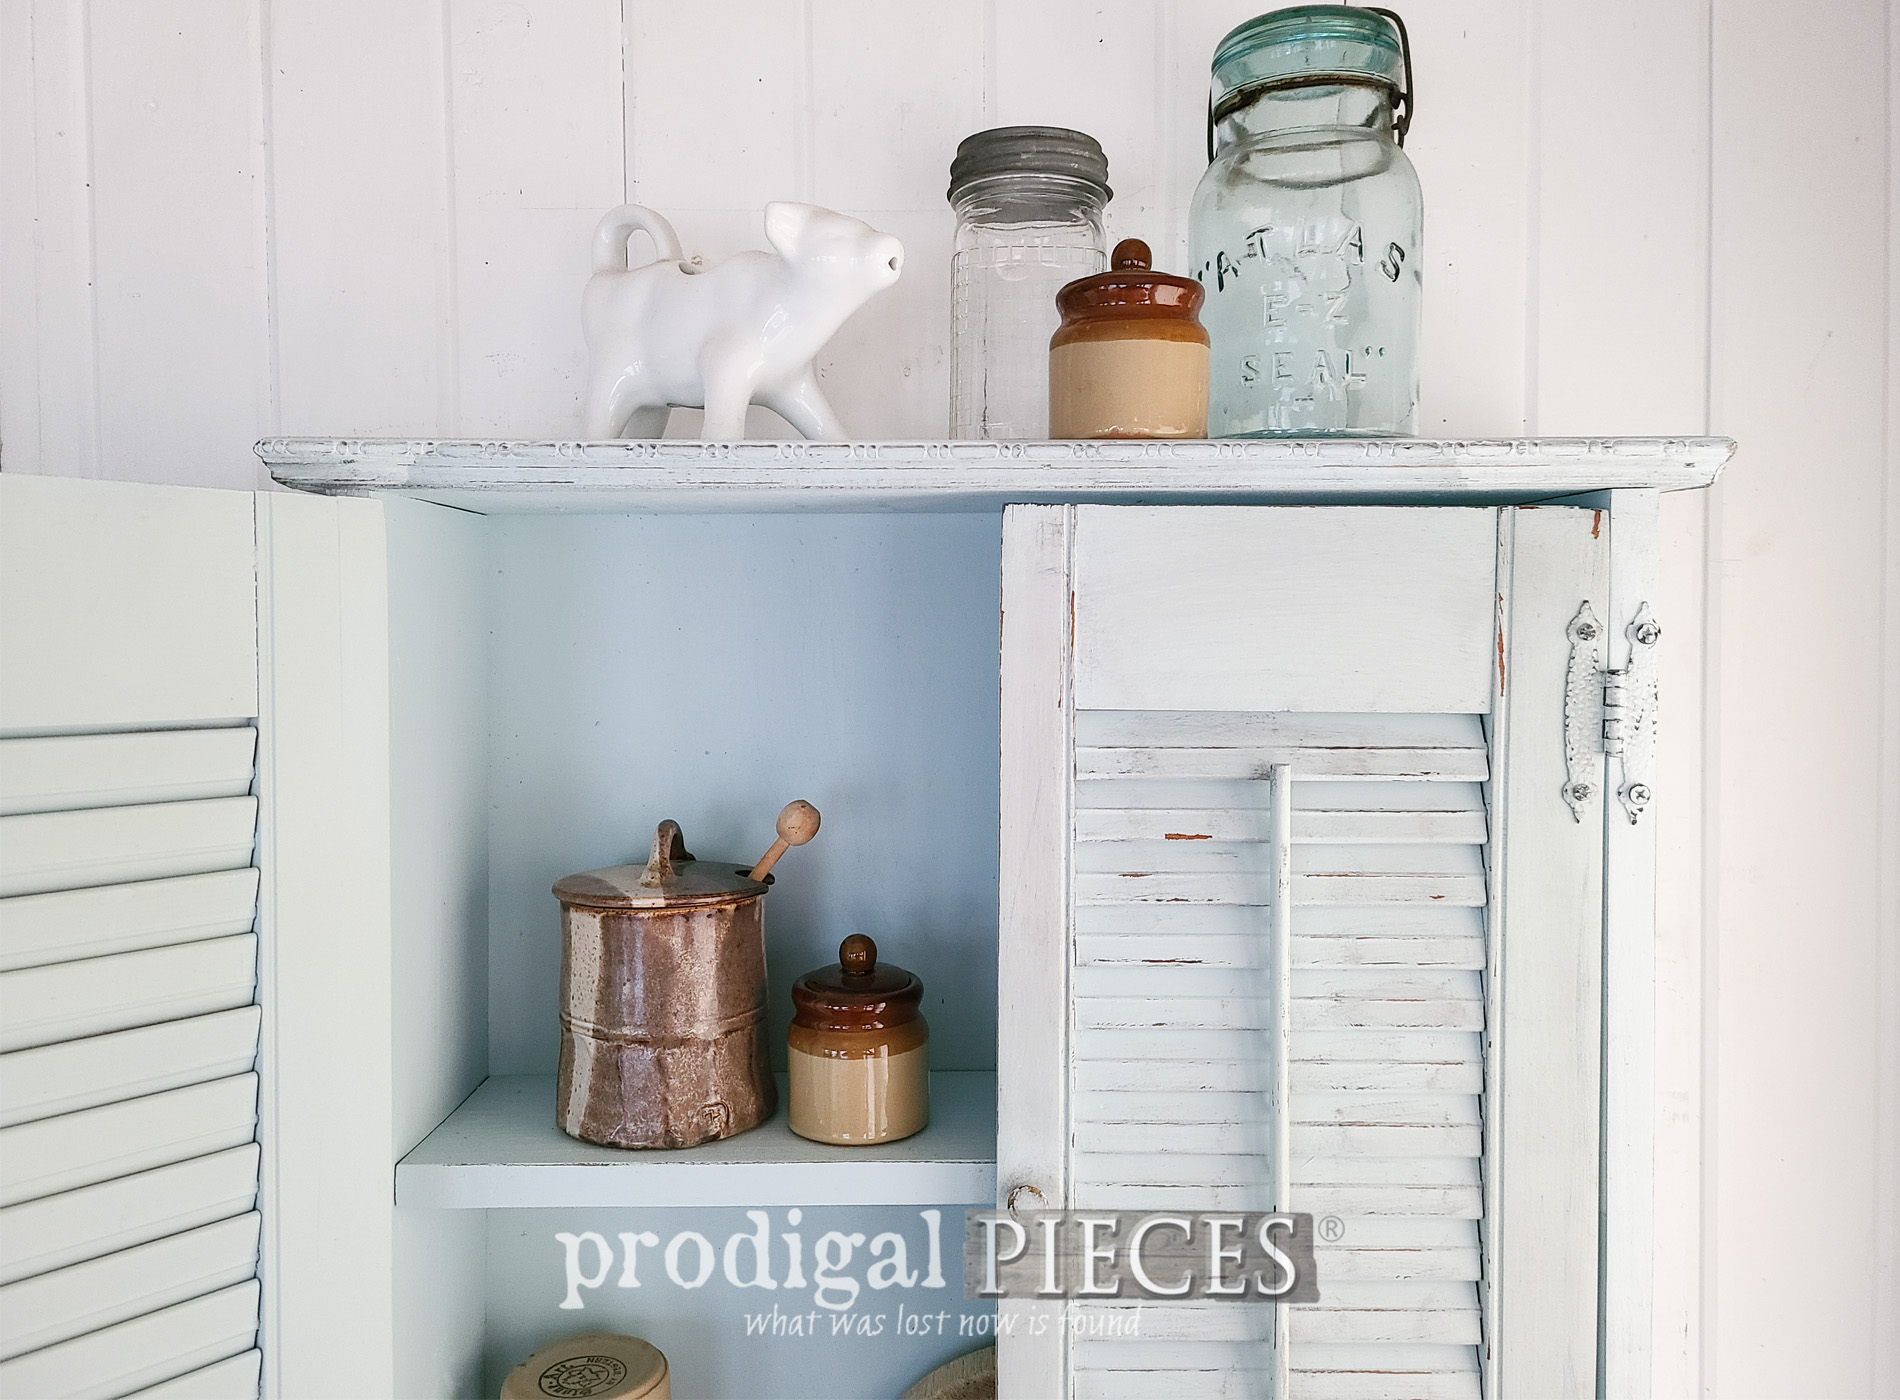
Now for a peek at the inside...


I could have went with a contrasting inside that would peek out the louvers, but I'm so smitten with this Windy Sky color by Benjamin Moore. I used it mixed to my custom color on our kitchen ceiling renovation that I'll share sometime soon. If you'd like to add this to your home story, you can find it and more available in
my online store.


SHARE
Not only would I love to hear your thoughts on my build, but also do pin and share to inspire others to give DIY a try too.

Up next, I have a super sweet
GIVEAWAY for you AND a holiday (super-easy) craft for you using what you see here.
Come take a peek!

To get these DIY tips & tricks in your inbox, be sure to
sign up for my newsletter. Until next time!

 PINTEREST | EMAIL
Also, more projects using louvered finds like my upcycled shutters cabinet: