Many times, I get asked how do I find ways to decorate my home on a budget. Well, the answer is pretty simple...I do it myself. I know not everyone is able to do the same, but if you are able, you should - it's fun! Take for instance this little pile of goodies. I grabbed a couple of empty pickle jars from my recycling bin, and a few wood scraps from my stash. My goal is to turn them into upcycled jar hangers.

One of the things that happens around my house is how I will find scraps tossed in our burn box from someone on projects that I would NEVER throw out. Big surprise, eh? haha. He recently did an amazing job building our custom kitchen range hood using some hand-carved woodwork I found from an 1800's home. Those wood scraps above were remnants from his build that caused me to literally eeeked out loud when I saw them tossed in the burn pile. tsk. Not on my watch.
NO TRASH HERE
Beautiful walnut with patina is rare, so he had to have known I'd find a use...right? One day we may get on the same wavelength - at least one can hope.
Anyhoo, all I did to the wood was add a sawtooth hanger on the back, and a hook to the front. Simple enough.
However, those boring jars totally needed some DIY action to become the upcycled jar hangers I envisioned. First, I gave them a good soak in a bubbly bath to remove the labels.
 TERMS OF USE: when you create these upcycled jar hangers or my other projects, you agree to the following: it cannot be shared or distributed for monetary gain in any way, it may not be modified in any way, and you may not claim the work as your own.
While that may do the trick, sometimes you need to remove the glue residue that remains. Just grab some rubbing alcohol to wipe off the rest. You can see how I used it to transform a collection of thrift store glass
in this post.

NEXT STEPS
Now your jars are ready for some fun. I don't know about you, but I find the uses for hot glue endless! I've made
play stands for my kids, decorative
embellishments for furniture, and the list goes on. Do you have any projects you've created with it?
After I cleaned my jars, I created a simple Fleur de Lis graphic to tape on the inside of my jars. You can use any text or graphic you choose - that's the fun part! Cut out your design in a simple rectangle and tape to the inside of the jar with design facing out.
Next, grab your glue gun. I highly recommend this battery-operated glue gun and these Gorilla Glue sticks. Begin to fill in the design with the glue. The process is similar to icing a cake or cookie.

No worries if your design gets a little wonky. You can use a toothpick to re-position it a bit while it's still hot.

FINISHING UP
Or if your design has cooled and your found a mistake, you can also use an X-Acto knife to trim as needed.

You can also use a hairdryer to re-heat the glue to work with it a bit more. And, in worst case scenario, if you really can't stand how it came out, peel it off and try again. You can do it!
Once you have let your glue cure, it's time to have some fun with paint. yahoo! There's no exact science to this. Just brush it on and let it cure.

I did use a chalk paint with my paint brush in this instance and it adheres wonderfully. Though, as I mentioned before in my other project post, I've used spray paint and latex too. After letting the first coat cure, I did a second coat and let it cure as well. During that time I, like a nut, decided to dig into my stash to create another piece of decor. {{giggles wickedly}}

MORE FUN
No joke - I only had to shorten one of these pieces to create my vision. I feel like a kid in a candy store digging through my
trashure and then find all the pieces mesh together beautifully. It's so exciting!

Once I had it all assembled by adding few pocket hole joints using my Kreg Ji and nailing it together with my nailer, I added some stain. On top of the stain I applied my crackle compound to get the aged effect I was after once I added paint.

I'm going to let that cure then add a whitewash of paint. Hang on and I'll show you the after in a bit.
Back to those upcycled jar hangers... The paint has cured and now it's time to add some dimension to our hot glue design. I chose to apply a gray wax using my round brush. Lightly brush it on and let cure for a few minutes, then buff with a soft cloth, if you like.

For a bit more drama and dimension, I added some silver gilding wax. Who doesn't love a bit of bling?
Last, but not least. I use a length of jute twine to wrap around the jar tops, then thread a length and tie off on the sides.

THE REVEAL
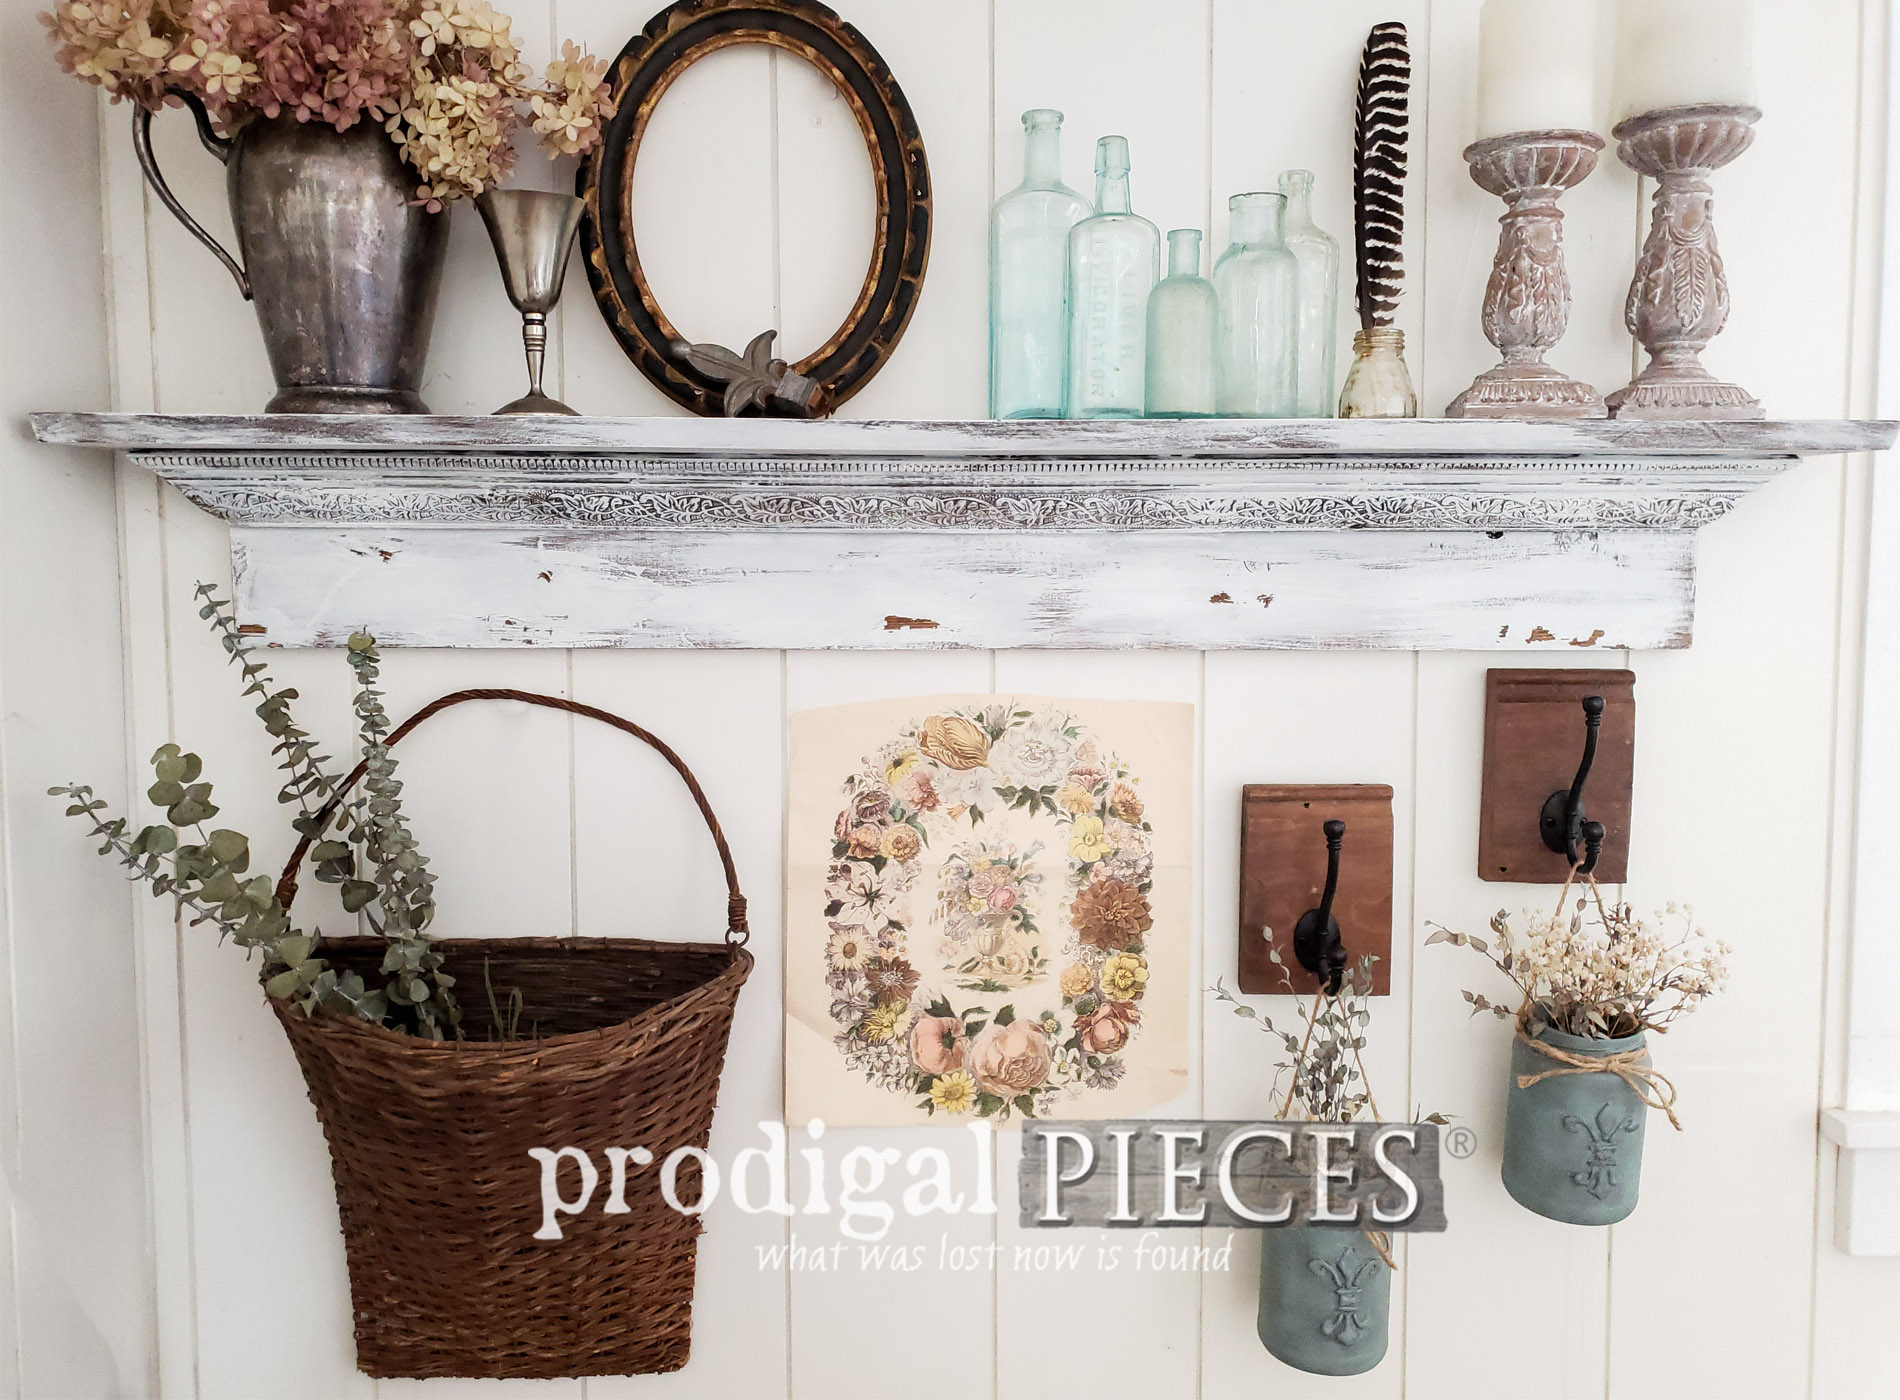
Now it's time to see my upcycled jar hangers put together along with my last-minute scrap build. Are you ready? I am!


Can I just say...this was so fun! My entire vignette is created from found objects either on the curb, at a garage sale, or thrift store. This is my kinds out-of-the-box-store decor. My upcycled jar hangers fit right in, wouldn't you say?

They are nestled in under the quick mantel I built from my wood scraps I described earlier. These kinds of decor items can be showcased in most any room and are pretty simple to build.


My candlesticks on top were a thrifted find that I gave a fresh look to as seen in my video below.

My goal was to inspire you to give DIY a try and I sure hope I did that. Either way, it's fun for me to create and share. If you'd like to purchase the mantel or the jar hangers, you can find them available in
my online shop. Likewise, if you sign up for my newsletter, you'll get an instant discount on your first purchase. Details below.


In addition, pin and share this upcycled jar hanger project to inspire others to repurpose their trashure too. tee hee!

Up next, I'm going to share what becomes of this thrift store bookcase. Any guesses? I bet you'll never guess...mwahahaha.
Head HERE to see.

Before you go, be sure to
sign up for my newsletter. Until next time!

While you're at it, here are more projects like these upcycled jar hangers: