It's not a surprise I love a good challenge. However, this time around, my dad brought me this solitary footboard. I told him I really didn't have room, but I'd take it. Do you feel an upcycled footboard project coming on? {{dramatic music begins}}

My sweet father brought this to me in late summer and I tucked it in for the winter hoping for inspiration to hit by spring. Honestly, I had in the back of my brain to just set it out for spring clean-up if nothing came to mind to do with. Funny, not funny, was I missed spring clean-up and now had this to work on. Maybe that was providential? IDK.
Since I am on a mad dash rush to clean out my entire shop, rebuild it, and start new, I needed to find a life for this. Truthfully, I didn't want to quit on it, but couldn't totally wrap my brain around what to do with it. Maybe Lily could help me?

The limit I placed on myself was that I only wanted to work on it if I could use the entire thing. I don't like creating waste and I figured if I couldn't make use of it all, that I would see if someone needed it. Footboards do break, ya know, and someone may need it.
DIY FUN
Okay, so finally I stared at the parts and came up with a few ideas. Let's see what you think. First, I started by taking it all apart and remove all the trim pieces, and then set out to tackle the posts. However, the screws were stripped on both sides, so I used my circular saw to cut it apart. Not only that, but I am also bummed to see that the center board is particle wood. ugh. I can't stand that stuff.
Then, I used my coping saw to cut off the rest of the center board. This little saw is one of my must-haves as it allows you to make powerful cuts, intricate design cuts, and only costs a couple bucks.

Next, you know that funky hardware needed to come off. And, you'll be happy to know I even saved that for a later purpose.

The vision I had for the posts was to create a set of hanging plant stands. In order to do that I cut off the top finial, again using my coping saw. No worries! Those finials will get a new life in a bit.

FIXIN'
Next, I needed to fill in all the holes and gaps in the post. I used scrap wood and a whole lotta wood filler. Once set, I sanded it down with my sander and we're ready for the next step.


In order for my DIY plant hanger stands to actually stand, I needed to create a base. Afterward, I put in a wood dowel pin and attached a piece of scrap wood.

Last, I attached that base to a bigger base with my nailer for stability and height.

Once the base is assembled, I add some trim, top off with more wood filler, and then stain to have make it cohesive.

UPCYCLE
While the stain is curing, I begin to formulate my other upcycled footboard projects. Secondly, I dive into my thrifted wood project stash I've mentioned in these
past posts and pull out these handmade sconces.

I cut the sconces apart and reassembled them to create these to reclaimed bookends. Do you recognize the parts? They are ready for a new look with paint. My small spray shelter and turn table always come in handy.

While those are drying, I begin assembly of my last upcycled footboard project. I have the center board and trim to make use of. Hmm...it finally hit me to create a flower box. I called in help as I was dealing with a bit of back pain at this point. I cut up the board on my miter saw, and then they finished the cuts of the trim pieces.
THE REVEAL
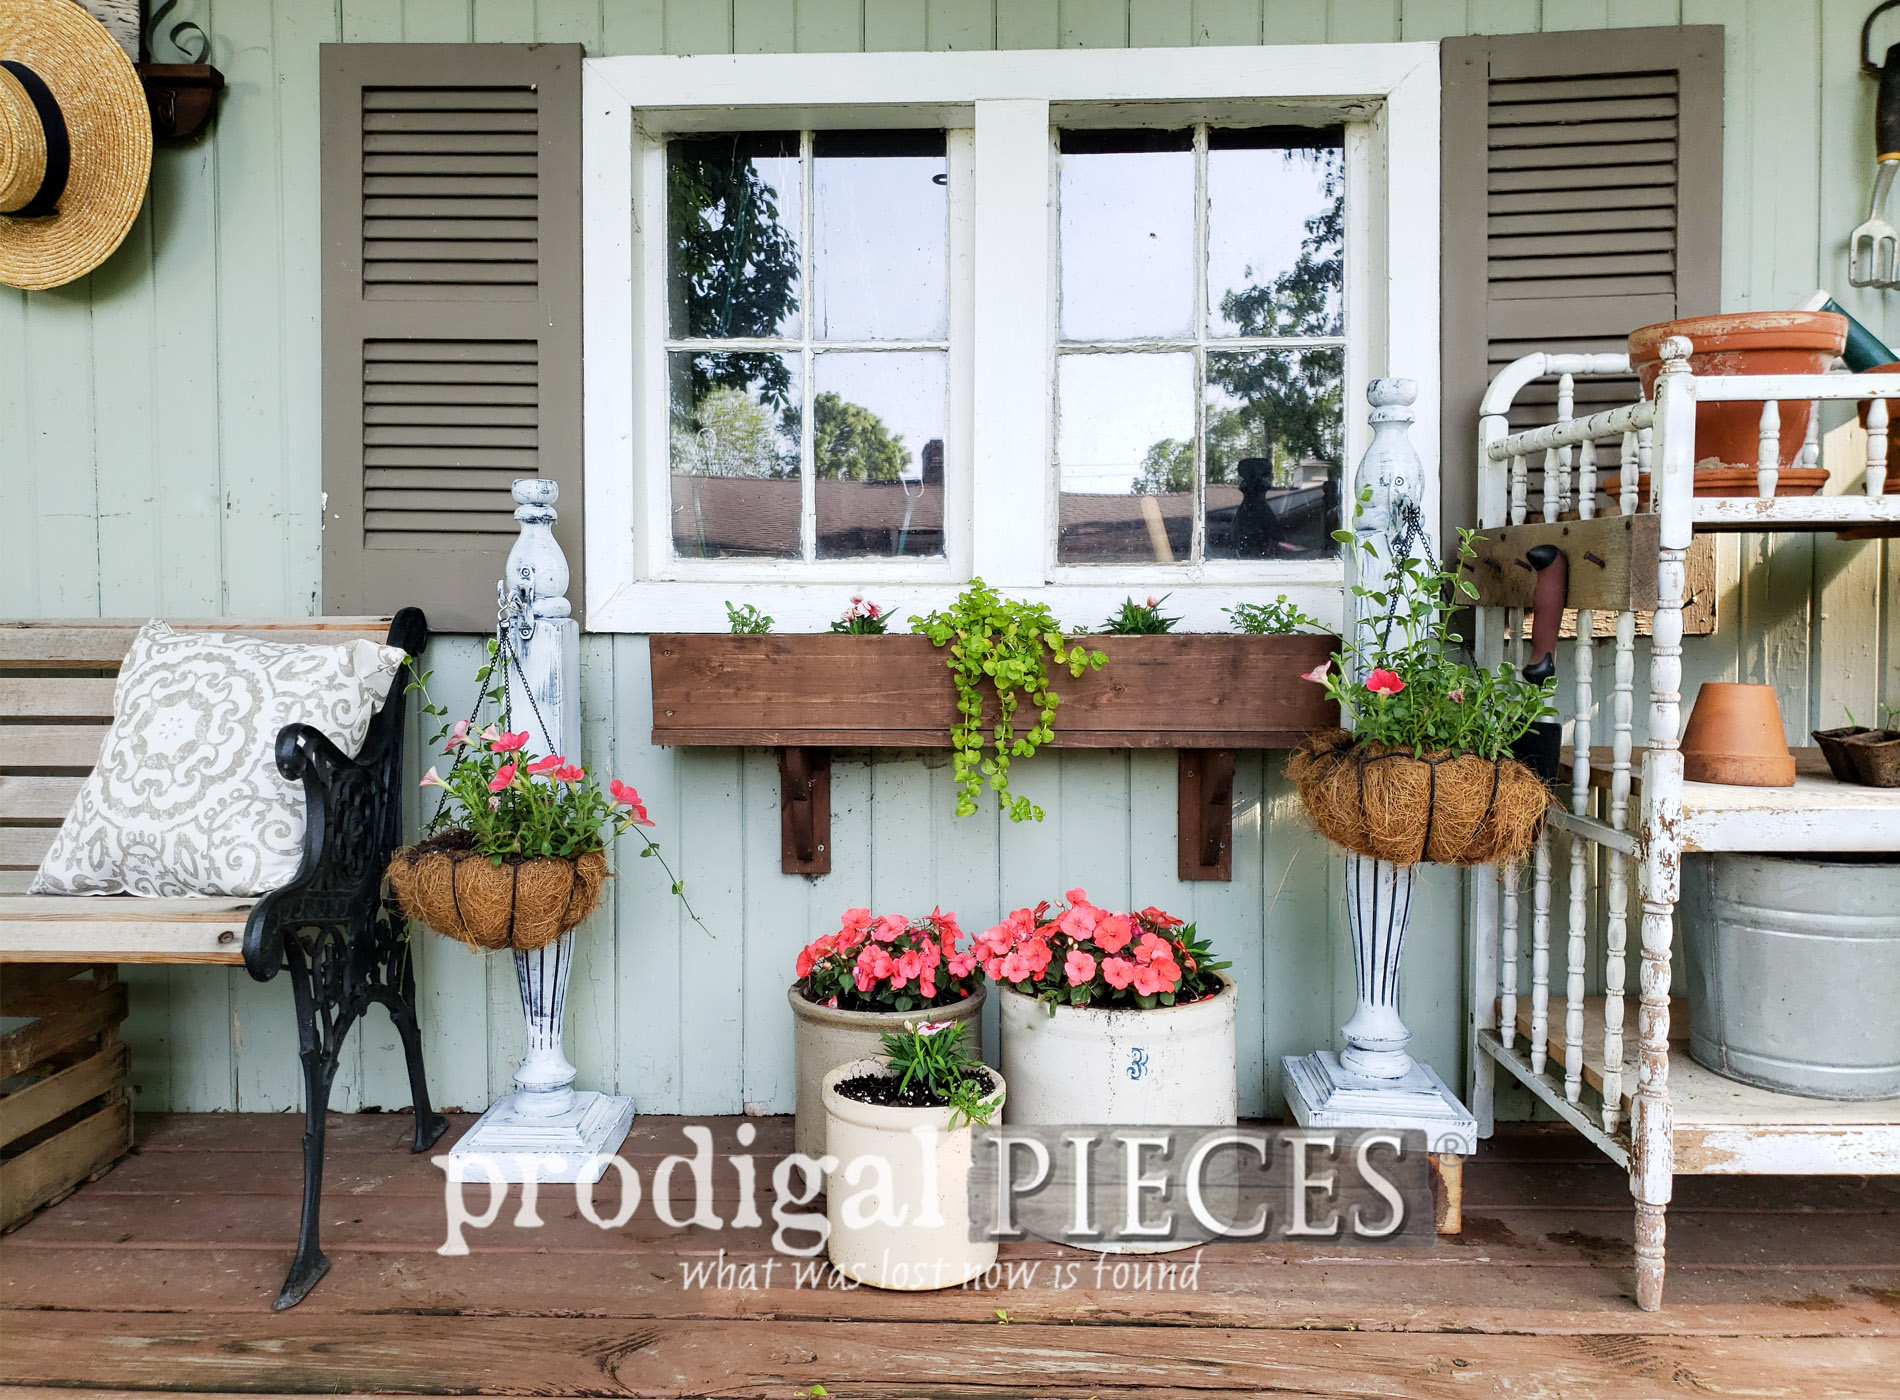
Are you ready to see all my projects in their final state? I'm excited to show you! First, here are my plant hanger stands.


So fun right? I've staged them on my garden shed that got a bit of a makeover last year. (
see HERE) It's due for a complete overhaul on the interior. With that in mind, you can see the
complete remodel HERE.


These DIY plant hanger stands make for fun accents to display in an entry, along a garden path, or even inside your home too. How would you use them?


I don't know about you, but summertime is one of my favorite seasons to be outside and relishing in all of creation. Moreover, our
DIY fire pit is definitely a hot spot (pun intended)

Okay, so what happened to the rest of my upcycled footboard? Well, here are those architectural salvage style bookends.


Don't you think those sconces look much better as bookends? I used every bit of that upcycled footboard in my projects. My brain is so happy to have these ideas out of my head. haha!
Furthermore, I spray paint all of my project pieces in a dark gray, then topped with a flat white to distress for the time-worn effect I adore.

ONE MORE
Last, but not least, here is the rest of the upcycled footboard with every last bit used up.


The planter contains two thrifted vases for my blooms, and I've filled it with cuts from my spring garden beds. I just love this time of year, don't you?

Of course, I had to add some whimsy with typography. Last, but not least, I simply use
my transfer method to apply my design and fill in with a sharpie. You can see my video demo
in this post.

In addition, if you'd like to own any of my pieces, you can find them available in
my online store.

SHARE
Likewise, pin and share to inspire other to take their unwanteds and make them into something new.

Up next, it's
Trash to Treasure Tuesday and I will be making something out of these cart parts.
Come join the fun HERE.

Before you go, be sure to
sign up for my newsletter. Until next time!

 PINTEREST | EMAIL
Additionally, more DIY projects like this upcycled footboard: