If you know me by now, you know I'm a sucker for the wood section of the thrift store. Potential abounds and so do the 80's heart cut-outs! haha! Last time, I showed you a pile of projects I was attempting to update. However, today is all about that bread box. It's about to become an upcycled charging station. Oh yeah!

To catch you up to speed, here is the pile in question. First, we have a laundry bin. Then, a side table bin and a bread bin. Notice the trend here? If you missed what I did with the side table bin, you can see the end result
HERE. I'll be sharing the laundry bin next, but today is all about that bread box.

In
this past post, I've shared what can be done to those heart shapes if you aren't enchanted with them. However, this time I'm all about embracing the hearts.
DIY TIME
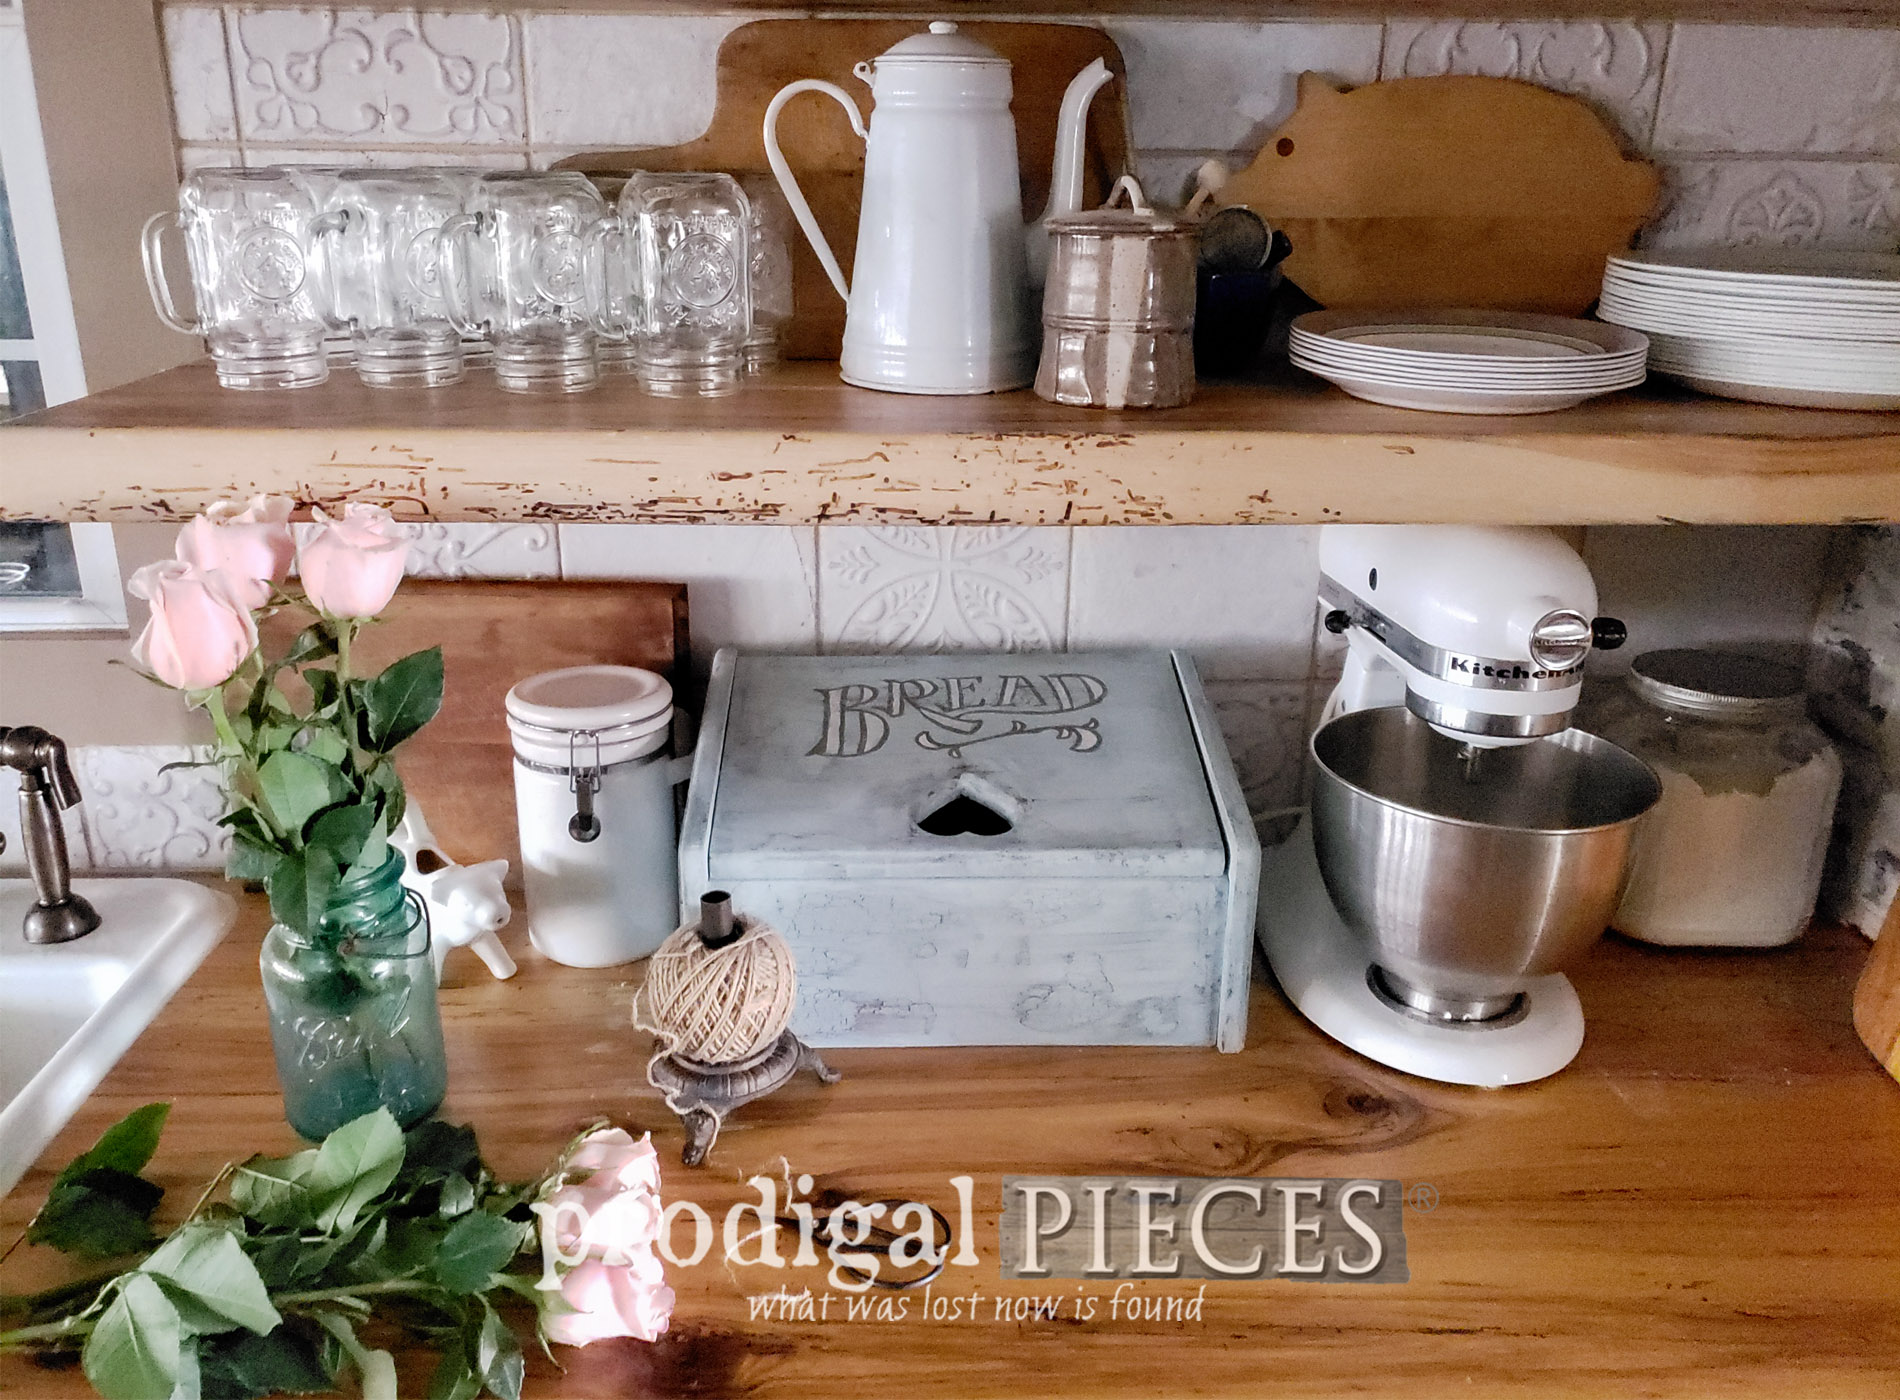
This bread box is in fine shape, but a little drab. However, it could use some whimsy and added function. I've created these
upcycled charging stations in past posts, so this isn't new to me. Each one is different. In like fashion, I thought I'd share a new way of recreating a vintage find.
For those of you that enjoy a video of quirky lil' ol' me creating, or just plain like to see the step-by-steps in live action, I've created a video tutorial below. Otherwise, follow along to create this project yourself.
Just so you know, you need not be limited to using a bread box. Also, anything that will fit a power strip or your devices works. Also, you can see this
spice box I created as an upcycled charging station. Bread boxes work best because they can hold everything inside.
Here's what you'll need to get started:
Materials:
- wooden box - bread box preferred
- power strip
- wood scraps
- screws
- (hook & loop (aka. Velcro) (optional)
- paint or stain (optional) - I used Vintage and Innocence
- crackle medium (optional)
- hot glue sticks
Tools:
- drill
- drill bit - you can use a forstner bit, or hole saw, or spade bit
- paint brush
- cordless hot glue gun
- hair dryer
Step 1
First, I used my drill and forstner bit to make a hole just above the bottom of the inside of the bread box. Make sure you measure and mark so that you don't drill into the bottom board.

Step 2
Next, dry fit your power strip inside your box to make sure it fits. For added function, I like to create a resting place for the devices. A simple piece of scrap wood works. Just glue in and tack down with a couple of brads.

Step 3
At this point, this is where you can have fun with it. For my project, I wanted to create a vintage time-worn look. To do that I applied a crackle medium using my paint brush and let it cure.

While the crackle medium is curing, you can work on painting the inside of your box if you prefer. I used a soft pink I linked to above.
Step 4
Now it's time for our upcycled charging station to get some lovin' on the outside. You can add all the detail to your heart's content on this part. I have a passion for vintage typography, as seen
in these post posts, so that was my end goal.
I used my paint brush to apply a heavy coat of paint. If you're using the crackle applying one heavy coat of paint is key as opposed to two layers. In addition, to make deeper, more evident crackling, use a hairdryer to set the paint.

Step 5
This next step in our upcycled charging station is completely optional, but
totally fun. However, the typography I chose to use actually came off of a vintage bread box I previously sold in my shop. I took my picture and cropped it so that I had just the text to use. Then, I use
my transfer method to complete the rest. I describe it all in my video too.


Step 6
Last to do on our upcycled bread box charging station is to add in the power strip. You could use screws to mount it, but I prefer to use hook & loop (aka. Velcro). Likewise, it makes it easy to remove if need be and a whole lot less fuss to install. For added security, I use my hot glue gun to apply some glue to my already adhesive Velcro. It ensures the Velcro won't come off when I remove the power strip.
And...we're done!


Isn't it pretty? Additionally, the best part is our devices are tucked away inside keeping our counters clutter free. As a result of the added wood rest, I was able to stick our tablet, and five phones in here with no problem.


ALL DONE
In the end, I did end up using a bit of gray wax and light distressing to give it more time-worn wear effect. I'm delighted with the outcome.

Likewise, if you'd like to make this upcycled charging station your own, you can find it available in
my online store.


Also, I invite you to pin and share my upcycled charging station so that you can inspire others to give DIY a try. It makes life fun!

Up next, last part of my 80's heart cut-out project is about to get a new look.
Head HERE to see the laundry bin makeover.

Before you go, be sure to
sign up for my newsletter. Until next time!

 PINTEREST | EMAIL
In addition, more projects like my upcycled charging station: