 If you've hung with me for long, you know I don't pass up wooden pieces. They offer so much potential for creating and tweaking. Likewise, these two are no different. They are blank slates just ready for new life.
DIY TIME
First, I have to say that neither one of my daughters are newbies. They've reworked furniture, decor, and more over the years. You can see Miss C's work in these posts, and Miss S's projects HERE. To get us started, Miss S will be making over this sort of frame with box. When it came into her possession, she made a face and looked at me, "What is it??" Good question! haha. I told her, it's whatever she wants it to be. So, with that she decided to make it a functional decor piece.
Miss S kicks off her makeover by using a simple coat of white paint. However, her intent is to have some of the wood peeking through to create a time-worn feel. Notice her onlooker...so sweet. My 14-year-old Teddy tore his ACL and is recuperating best he can.
When it came into her possession, she made a face and looked at me, "What is it??" Good question! haha. I told her, it's whatever she wants it to be. So, with that she decided to make it a functional decor piece.
Miss S kicks off her makeover by using a simple coat of white paint. However, her intent is to have some of the wood peeking through to create a time-worn feel. Notice her onlooker...so sweet. My 14-year-old Teddy tore his ACL and is recuperating best he can.
 Next, once the paint cures, she makes a panel to fit over the oval opening. She wants to make it a fun laundry decor piece using typography and some of my old clothespins.
Here's her sweet thrifty decor makeovers complete. Isn't it cute?
Next, once the paint cures, she makes a panel to fit over the oval opening. She wants to make it a fun laundry decor piece using typography and some of my old clothespins.
Here's her sweet thrifty decor makeovers complete. Isn't it cute?

 I helped her create the graphic (since I just love graphic design), and she added the time-worn touches. I love it!

NEXT UP
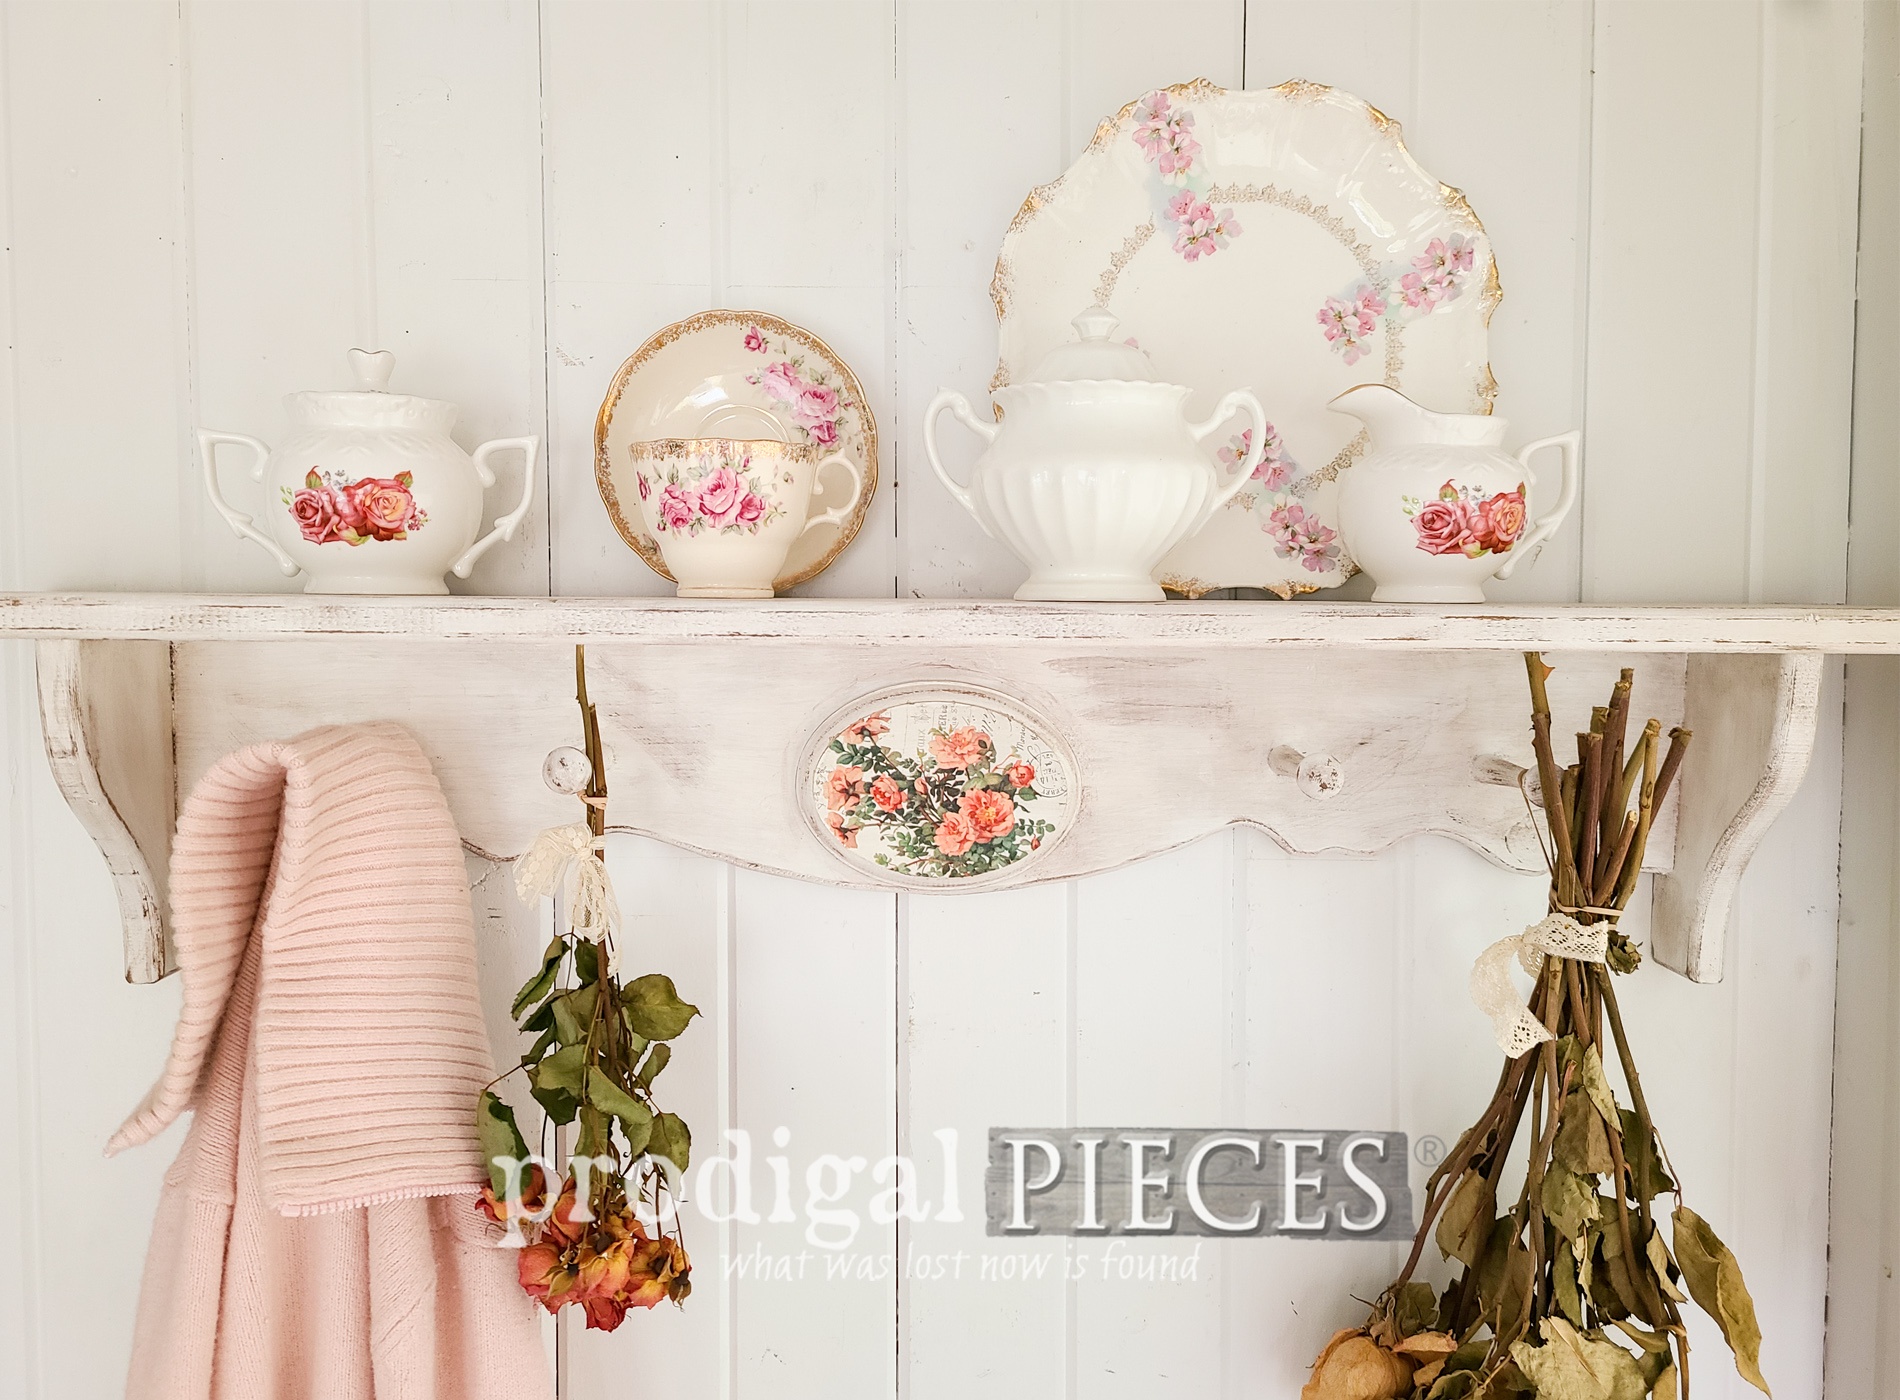
Now, it' time for Miss C's thrifted shelf to get a turn at a new life. Her and I both aren't huge fans of the heart cut-out era of the 80's and 90's. They have their place, as I've shown in these past posts. However, Miss C wants to take them out of the picture for this shelf. In order to do that, first, she affixes a small oval wood plaque over top. Then, she also added a few shaker pegs to add function and style.
 Next, she also gave it a fresh coat of paint, and then added a few fun details to update it.

SECOND REVEAL
Yahoo!! Here is her vintage shelf for our second of the thrifty decor makeovers.
 Goodbye heart cut-outs and hello roses. So much better, don't you think? Miss C used the same decoupage paper that I showcased in my last two posts HERE and also HERE.

 Finally, it's ready for a hall or bath to hang daily grind essentials or to just look pretty. We all need those kinds of things, don't we?
 Not to compare, but we're all curious...which one is your favorite? Or, better yet, what would you have done differently?
Also, if you'd like to own either of these beautiful, functional pieces, you can find them and more available in my online shop.
Not to compare, but we're all curious...which one is your favorite? Or, better yet, what would you have done differently?
Also, if you'd like to own either of these beautiful, functional pieces, you can find them and more available in my online shop.
[metaslider id=30251]
In addition, do pin and share our thrifty decor makeovers to inspire others to make their own home story. Up next, this French provincial beauty is up for a new look. Plus, I'll have a giveaway for you too. See the new look HERE.
 To get these DIY tips & tricks in your inbox, be sure to sign up for my newsletter. PLUS, you will get your FREE Furniture Buying Checklist and special discount to my shop. Until next time!

Also, more DIY fun like my daughter's thrifty decor makeovers:

