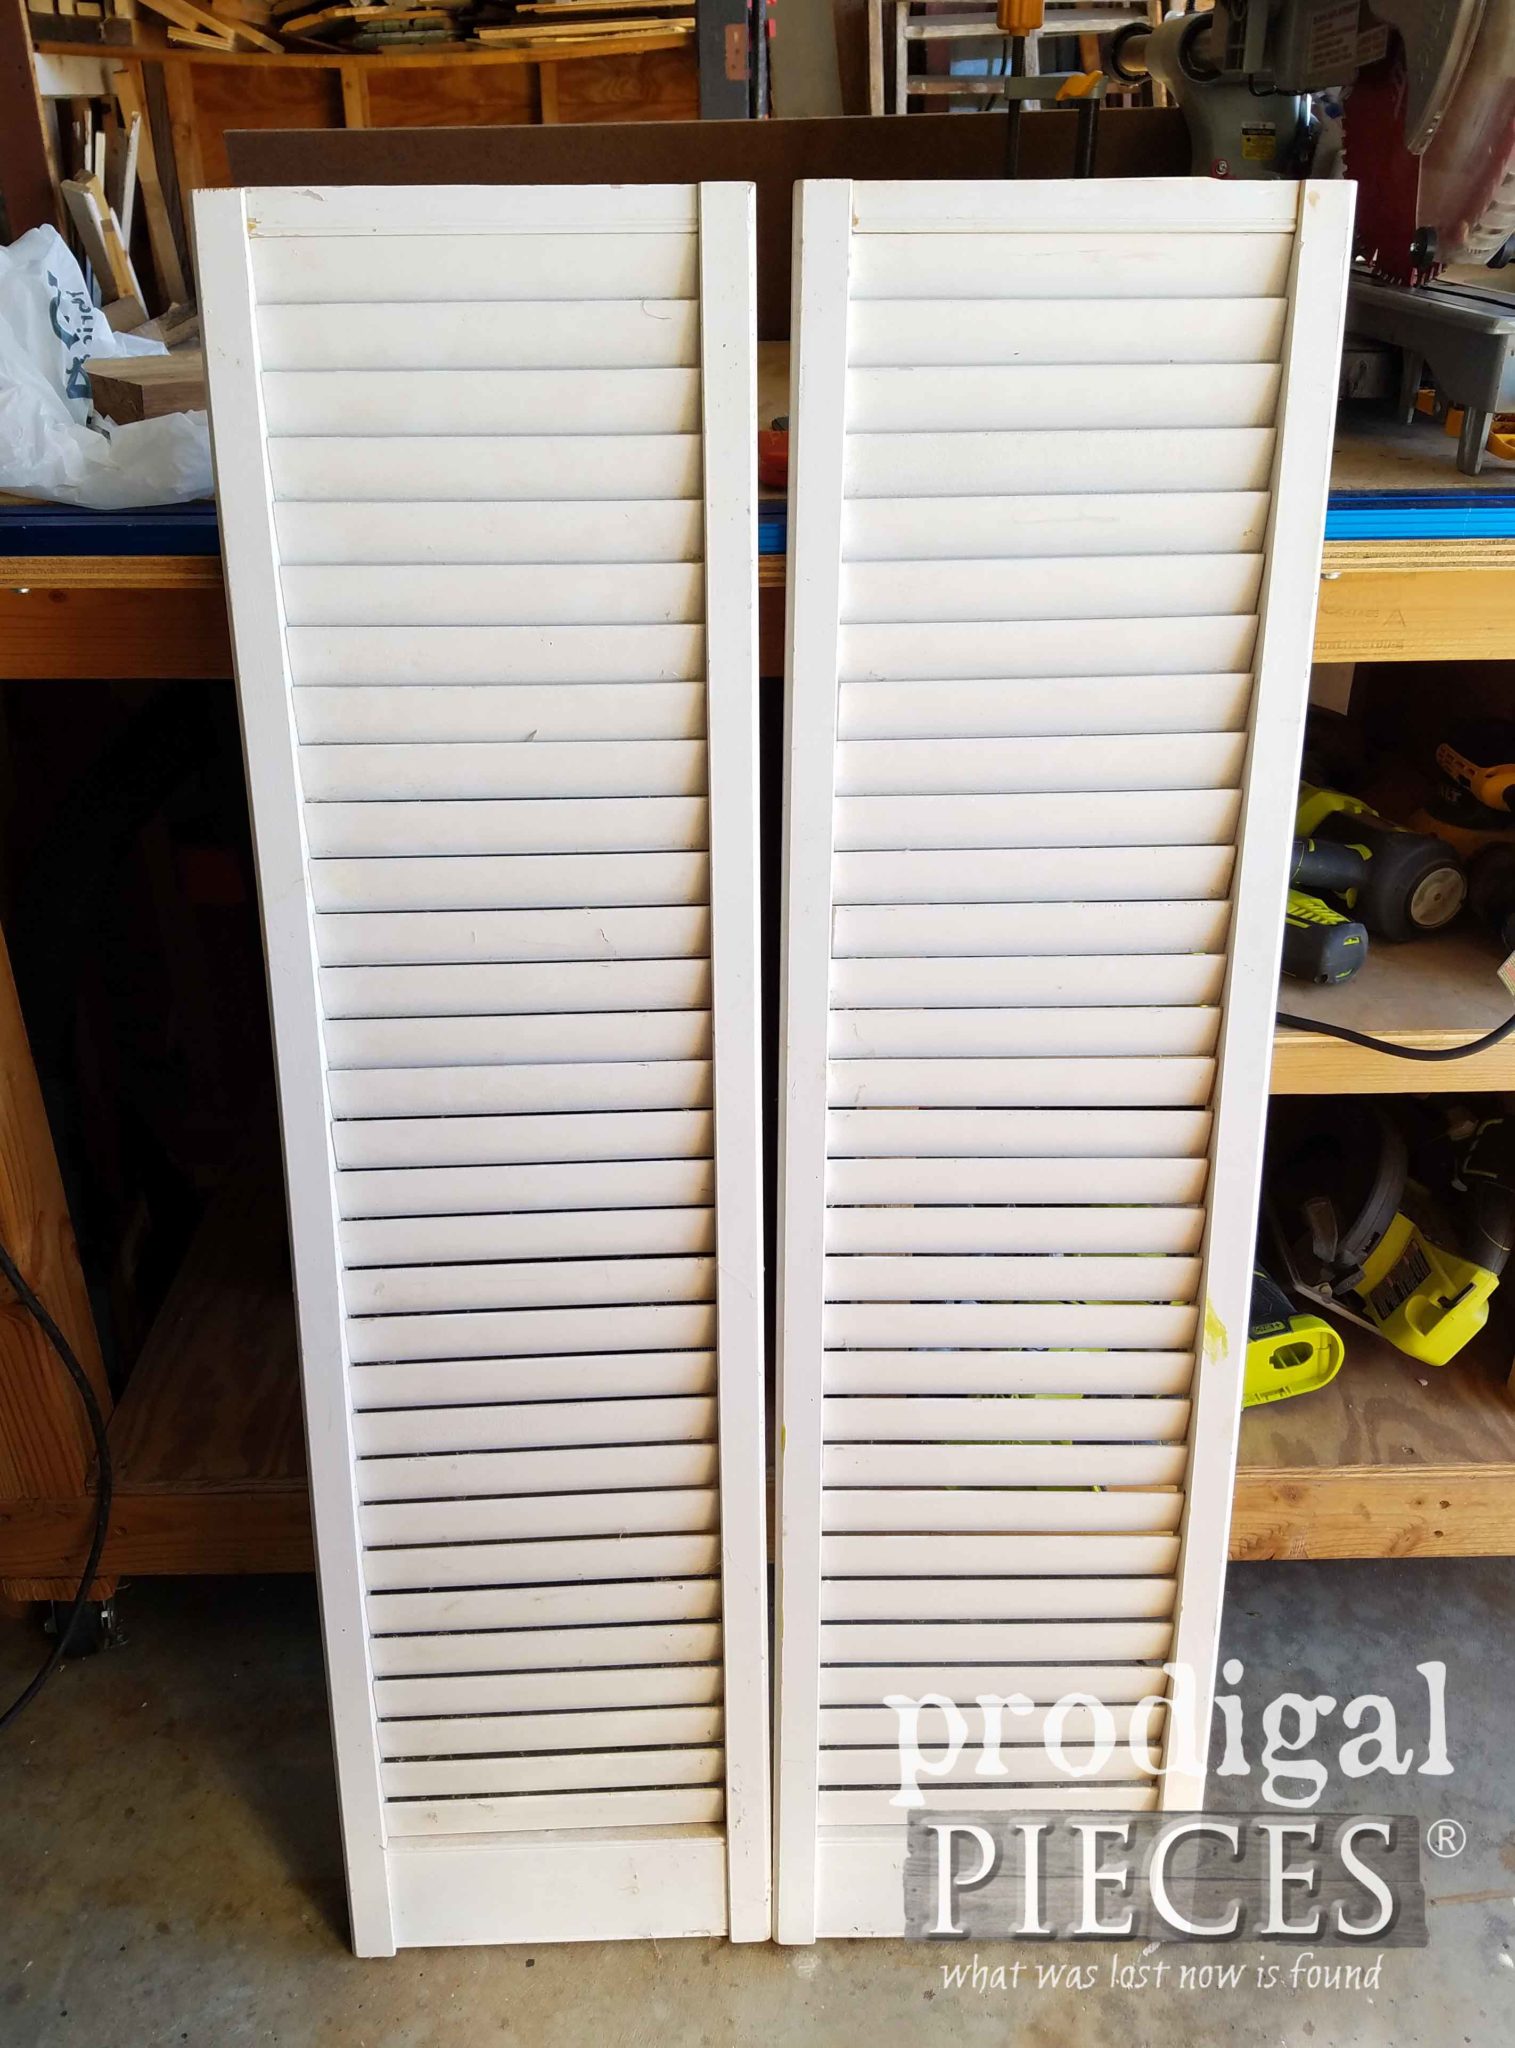
Do you ever have one of those projects that keeps taunting you? Like, when you walk by it keeps begging you to do something and even whispers, "Why are you taking so long??" That's when I want to scream back at it and say, "I haven't decided on THE BEST use yet! sigh... However, ladies and gents, today is a momentous day. Not only because of what I created, but that I finally got time to do it. Now, let me show you what I did with this repurposed louver door set that had been staring me down for months, if not years.
Around a year ago, I showed you what I created with the upper half of this door set. Remember my kitchen island cart? You can read the full post
over here.

I mulled in my mind a thousand time what to use the bottom half of those doors for. However, it wasn't until I found these hooks on clearance at the craft store recently that an idea came to mind. Even the clerk couldn't believe I found them
and found a set of four. SCORE!!

Needless to say, I was not only excited to get those for a good price, but to FINALLY have a vision for these repurposed louver door set. God is so good to send me these sweet blessings.
DIY TIME
First up, I grabbed some weathered wood from my stash. Here's what you're looking at: (1) posts from my garden leftover from
my other butcher block cart I created, (2) the louver doors, and (3) a bit of fencing from the neighbor. Yes, I made JC walk down and grab the door they set out for trash. It even had rusty hinges on it. {{gasp!}} You should have seen the look he gave me. I whispered to him... "
Trashure...".

To begin, I cut it all up with my miter saw and here it is dry-fit and ready to go. In addition, putting it together is made easy-peasy with one of my favorite tools, the Kreg Pocket Hole Jig.

Next, I add them to one side of each louver door, and then connect using my drill. This makes that seam nice and tight.

ALMOST DONE
Last, I created pocket joints to all the reclaimed wood too. Here it is all assembled and looking at the back.

Since it's hard to get the jist from the photo up above. However, I created this pic below so you can get a better view of it. I added an arrow to show you each spot I added a pocket hole. I wasn't kidding that the Kreg Jig is da bomb and why I my motto is toolsoverjewels.

Notice some have double joints to keep the pieces from turning, and added keyhole hanger hardware for wall mounting. But...isn't that cool? Oh, and I had the best little helper clamping and un-clamping all the pieces for me. I love it.
Last, to finish it all up all I needed to do was give the louvers a fresh new coat of paint.

THE REVEAL
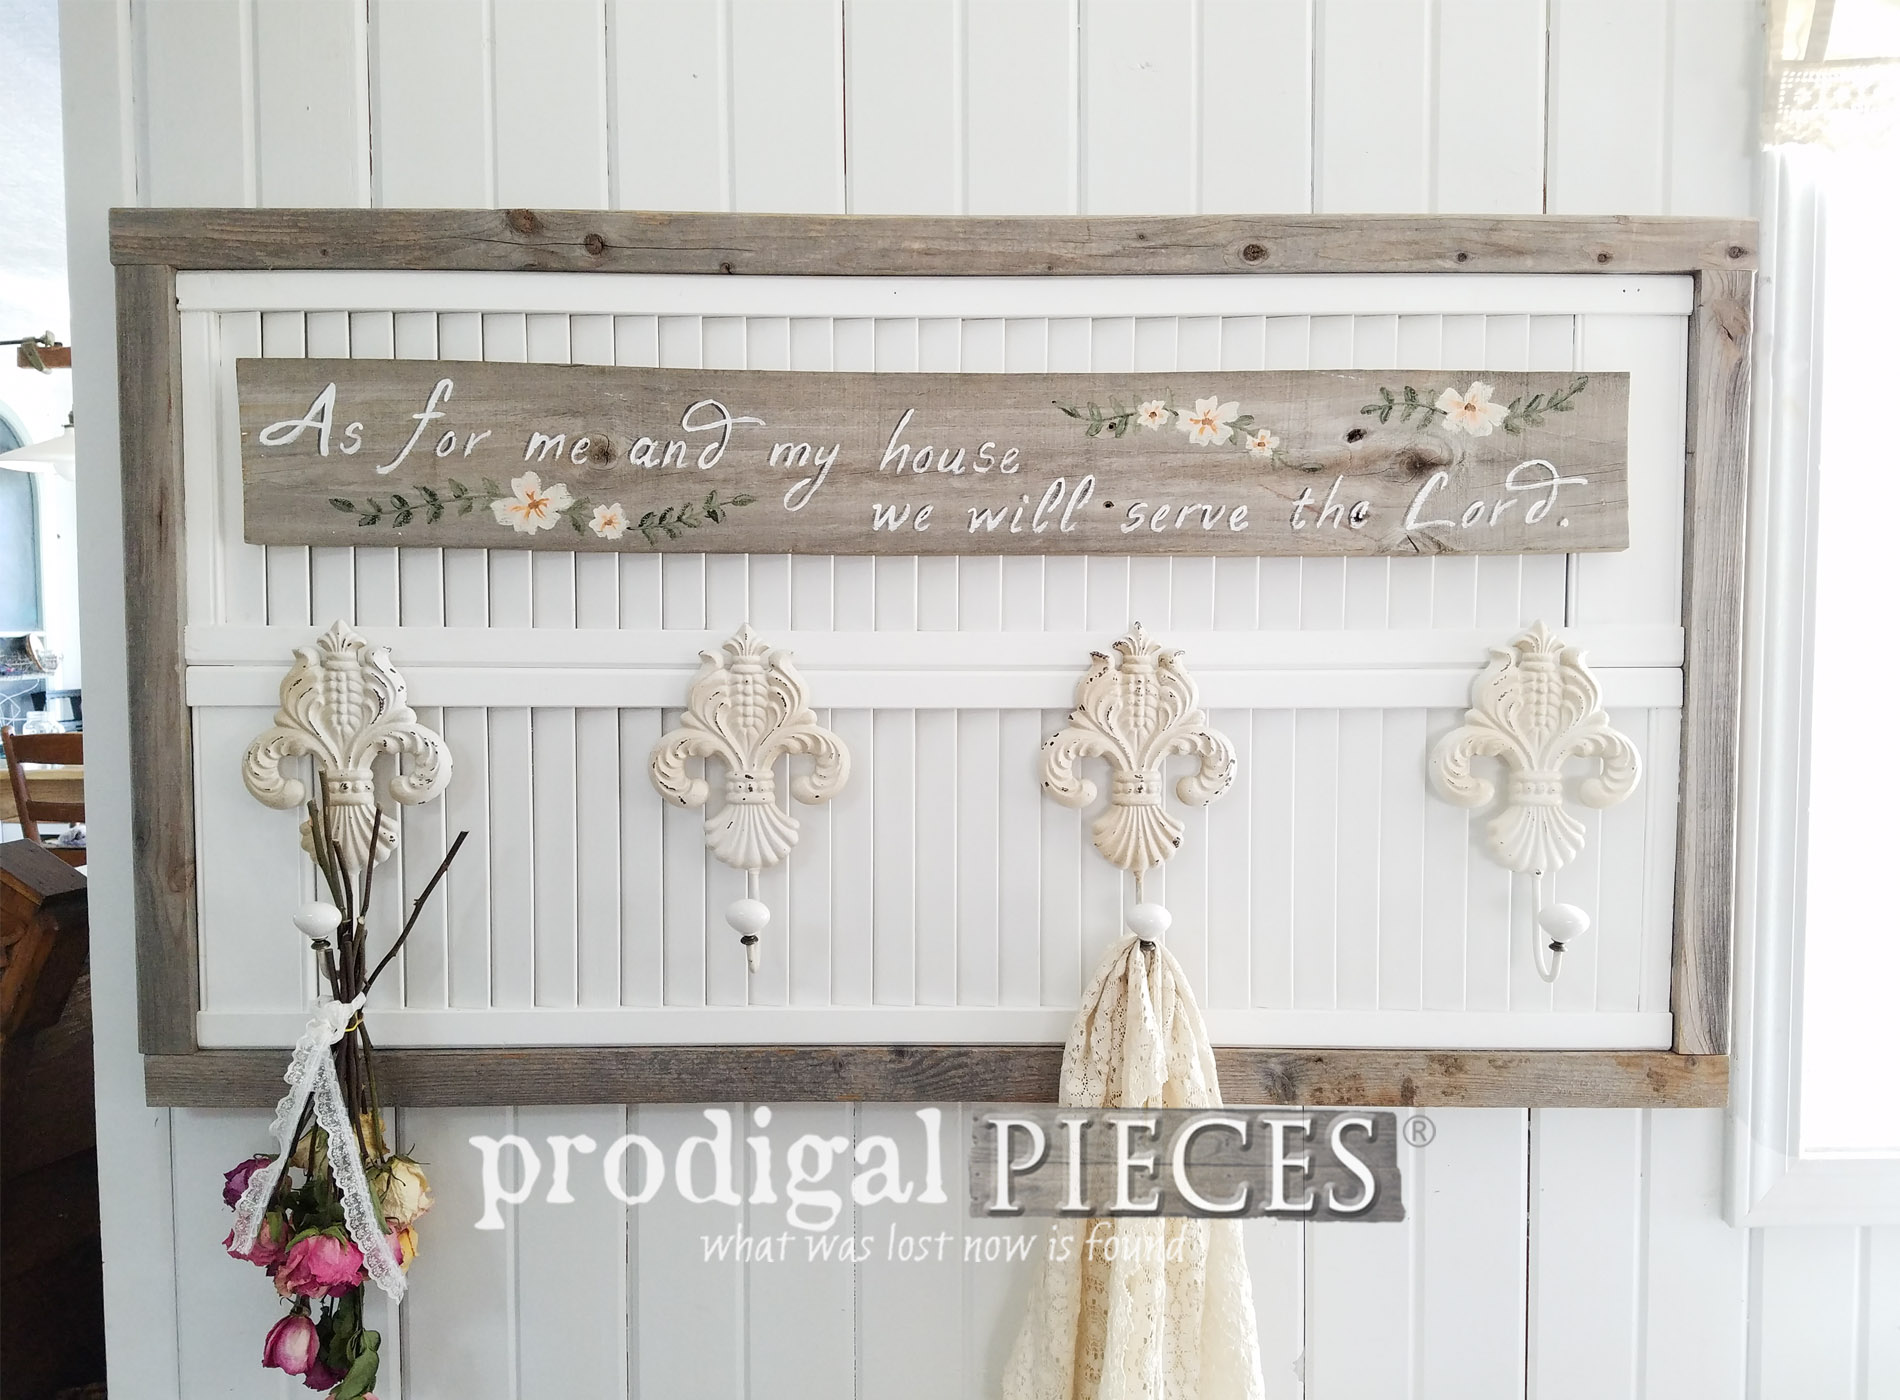
Finally, here is my vision complete and ready to go.


ALL DONE
I decided to hand-paint one of my favorite scripture verses from Joshua 24: 15. It reminds me of my grandparents who had this verse on their dining room wall, and a proud statement I hold dear in my own household.

In addition, the Fleur de Lis hooks add such charm and function to my repurposed louver door wall art. I am delighted to say that you can purchase this from
my online store. I can't wait to see it go to a new home and create memories for a family.


As a result, it sure does pay off to let something speak to you for a while. This repurposed louver door set now has a glorified new life, I hope you love them as much as I do!

Also, pin and share this project to inspire others to not give up when an idea doesn't always strike when you want it to. Trash can talk - just sometimes we just need to listen.

Up next is
Trash to Treasure Tuesday, and this thrifted Mid Century Modern set is about to get updated. Woot! See the after
over HERE.

Before you go, be sure to
sign up for my newsletter. Until next time!

 PINTEREST | EMAIL
Also, more projects like my repurposed louver door wall art: