Hello, my DIY lovin' friends! It's the second Tuesday of the month which means it's
Trash to Treasure Tuesday. {{fist pump}} That means I'm joining my four blogger friends with brand new inspiration for you. You'll see their posts in a bit. However, take a peek at this hand-me-down gal. She's having a rough day, but she's still standing! I feel like having creative fun with this one. How about a repurposed dressing table project? YES!!

The backstory on this antique Art Deco dressing table is simple. She's sat waiting for the right home for many months at a local ministry thrift store. No one wants her and it's time I finally caved to the pull of giving her new life. Now, do you know the era and style of this piece? Its official name is Art Deco since it's from the 30's-40's. Also, it's bears the name "waterfall" for the top front edge curve design.

While I'm not new to the
Art Deco era, or making over
dressing tables, or waterfall furniture (I've redone oodles!), this will be the first time I've had a repurposed dressing table makeover.
BRING IT ON
As you can imagine, I'm eager to have at this and that means it's demo time. First, I need to take apart the dressing table leaving the two sides to stand alone. My cat's paw pry-bar is my favorite must-have tool for all DIY projects around here.

Since these furniture pieces are built to last, it's doesn't come apart easily, but it's all just a matter of steps to do it correctly.

If you look close, you can see I not only removed the middle section, but also the support brace that held it all together. You can see the notch left on the back edge. (oh, and I plan to make use of the rest of it soon too. Stay tuned!)

That space is my ticket to making these two pieces united. I could, however, turn them into nightstands as I did
HERE (see video below as well.

Because I'm already in the groove to create something fun, I decide to unite the two sides into one using that notched space in the back. Then, I cut the original board to length and use my pocket hole jig to make joints to assemble.


Next, I lay the set down and use more scrap from my demo to attach on the inside and bottom making sure they're fully united. Additionally, I use a scrap piece from a past Art Deco waterfall makeover to blend in the blank spot in the top back.


The final step in prep is sanding it all down. The original finish is flaking (obviously) so that came off without much elbow grease. Last, I use my
BIN primer by Zinsser to seal it all in.

STEP IT UP
Here comes the super fun part. woot! I always feel artistic license when I get to rebuild something into new. So, why not totally let creative juices flow, right? Well, much like
my BEEP (my Volkswagen Bus Chest many have copied), or my
Brownie Camera Chest, or
Denim Chest...it's time to amp it up.
First, I create a graphic for
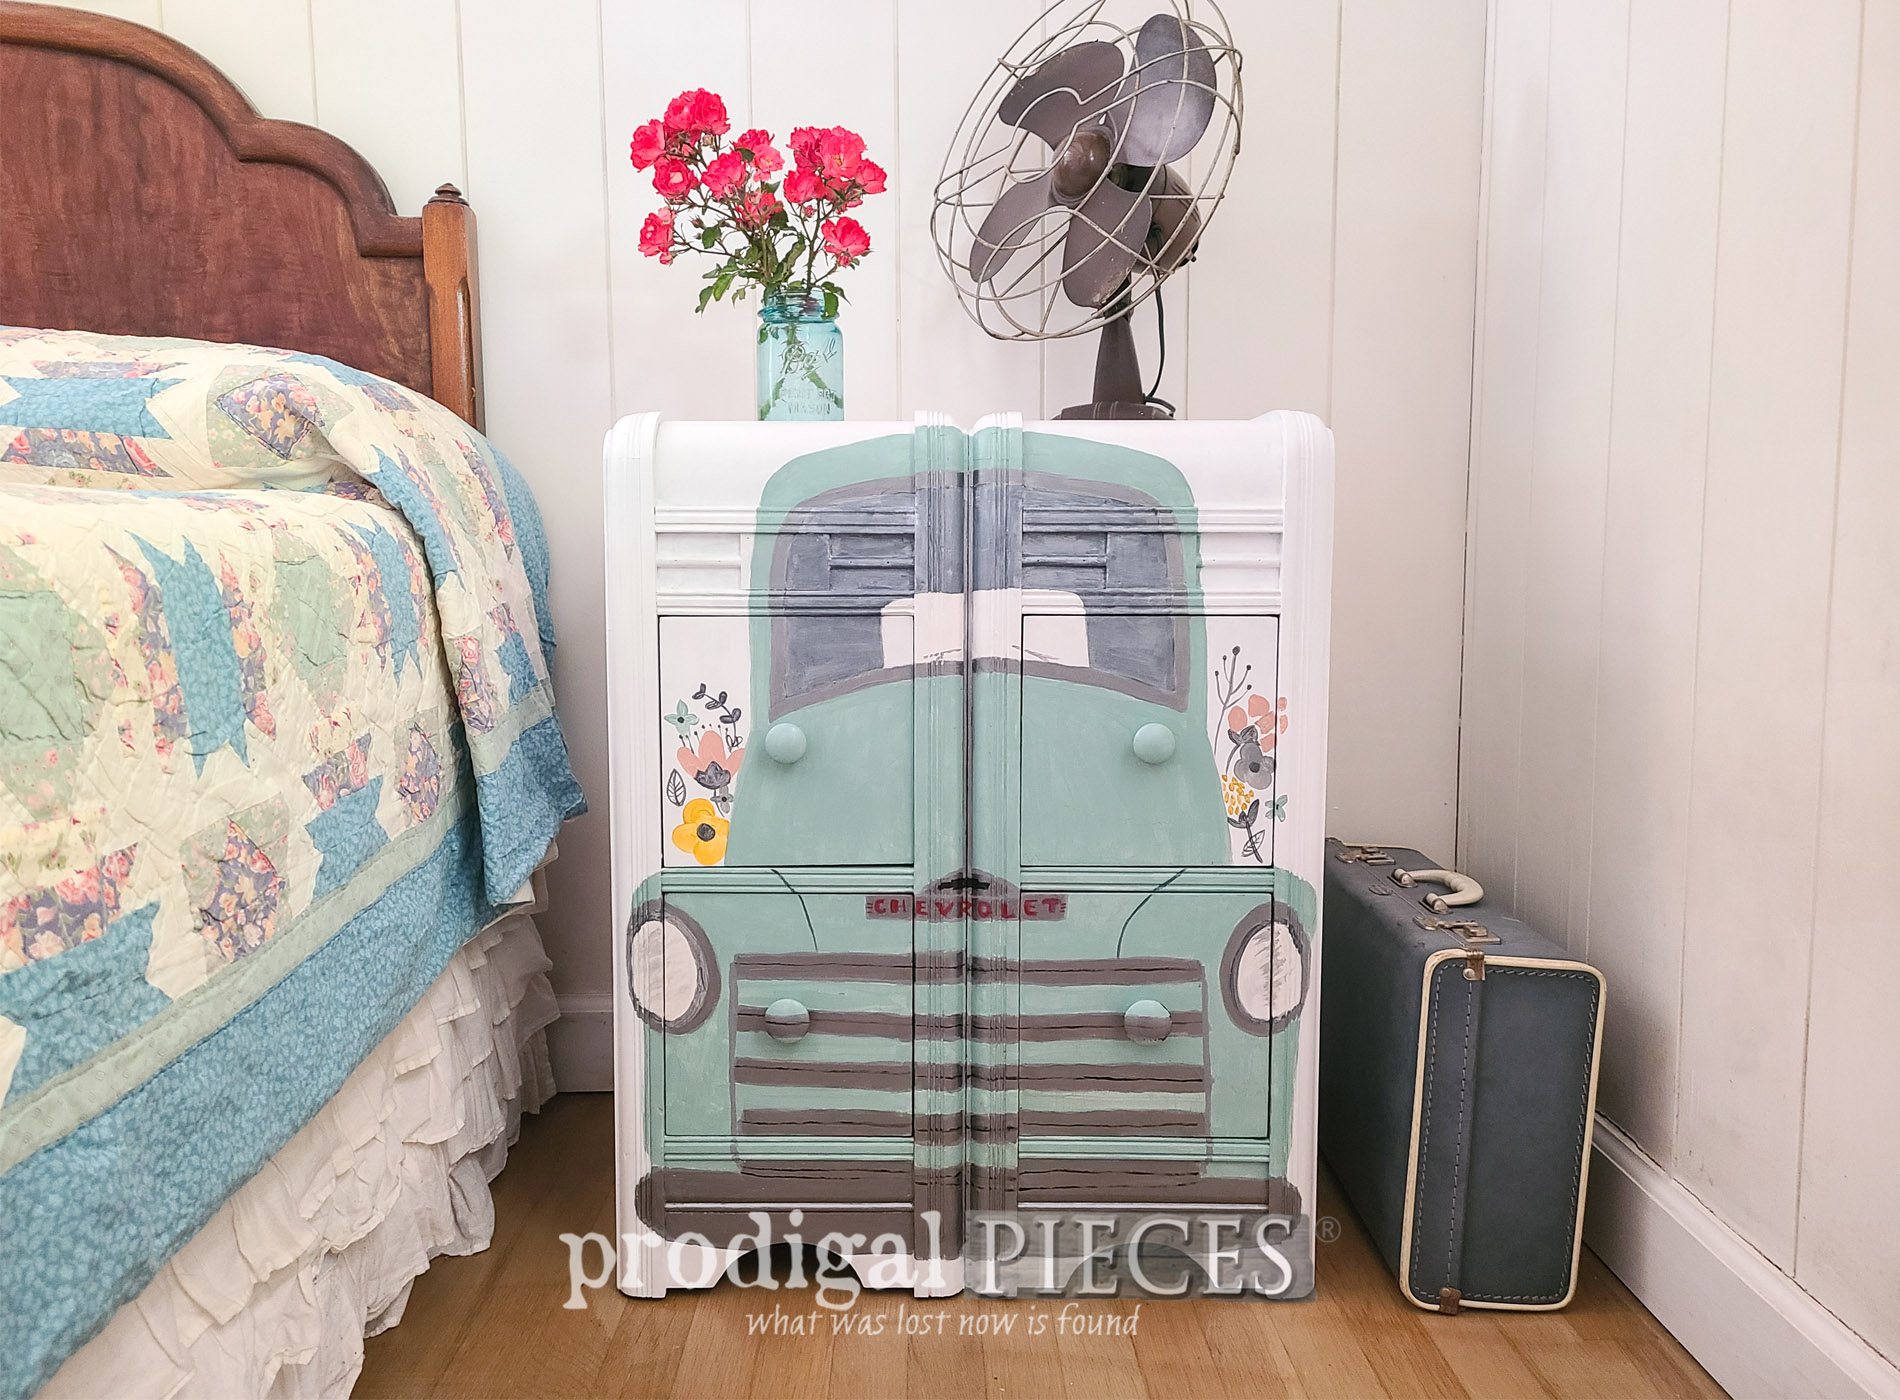
my overhead projector and then trace it on to my repurposed dressing table chest. Then, I take hours - and I mean HOURS - to paint it all in. While it may seem like work, I get lost in the time praying for those I love, mulling over ideas, etc.

At long last, I'm sharing my work with you. eep!


Can you tell I had a teenie weenie bit of fun? hee hee. So, maybe I went over the top, but can you blame me? Even the drawers and sides are decked out.


I know many folks love to use stencils and transfers (even me from time to time), but I'm old school and love to create
my own designs. In the past, many have copied my designs and it's frustrating. However, I continue to be me...the only way to be.


SMILES
Are you smiling? I sure am! Truly, my goal is to always inspire you. Creating is a way to let ourselves peek out now and then. Additionally, I get to share my heart and let myself let go and be. What do you do to live and let go?
If you'd like to make this sweet chest a part of your home story, you can find it and more available in
my online store.

While you're at it, spread the smiles to others too. Pin and share, but also leave me some comment love below.

Then, come see what became of the rest
OVER HERE. Additionally, make sure to
sign up for my FREE newsletter to see what my youngest son does with this...umm...cutie? Take a peek
HERE. It's time to see what my friends have created for Trash to Treasure Tuesday.

 PINTEREST | EMAIL


- Confessions of a Serial DIYer
- Salvaged Inspirations
- Girl in the Garage
- Artsy Chicks Rule
Also, more furniture makeovers like this repurposed dressing table: