Hello friends! I'm eager to share with you my latest find and what I did with it. It isn't often I turn down a chance to take a forlorn piece and transform it into something new. It does happen though! The challenge is fun, and always takes me on an adventure. Take for instance this piece...it's broken, worn, and ready to become my repurposed curio cabinet. Are you ready for this?

Let's assess this piece. First, the listing said "antique" cabinet. Umm...in no way is this piece even older than I am. It's a made in (insert foreign country) with still having the assembly stickers on it. It doesn't have a lick of solid wood. Second, the glass shelves are missing, and also the side doors are gone.

Last, I see potential. Do you?
DIY TIME
It's time to get this repurposed curio cabinet party started! First, I took out the back panel and the mirror. Then, I taped off the front glass because I needed to break it out in order to remove it.

Next, with the snap of a finger, I have the pieces I need to assemble. Huge thank you to JC, my husband, for helping me out. My sore, tired body spent one week in demo of our living room, then the next week reworking all our landscaping. So tuckered, but happy to be able.

NEXT STEPS
Once I had all the pieces, it was just a matter of assembling it all together. My Kreg Jig comes out to play to make pocket hole joints. This tools makes my work so much easier.

After assembling the sides and adding the back panel, my cabinet is finally in the basic bones state.

Before I call it quits there though, I added a bit more texture to the back of the cabinet. I'm gluing strips of luan to the backing made of luan. It's the same stuff I've been showing on social media in my hallway and living room remodel. Plus, it's how we created our
planked bedroom walls and
faux beam ceiling.


In addition, I added a birch veneer to the front edge of my plywood shelves. This will dress it up and make it more durable. This stuff is awesome and so easy to apply with an iron. You can see how I've used it on
this sewing machine cabinet turned desk and this
upcycled desk turned console.

MORE FUN
It's finally time to put the finishing touches on my repurposed curio cabinet. First, I began by applying an antique white stain to the shelving, as well as the back of the cabinet.

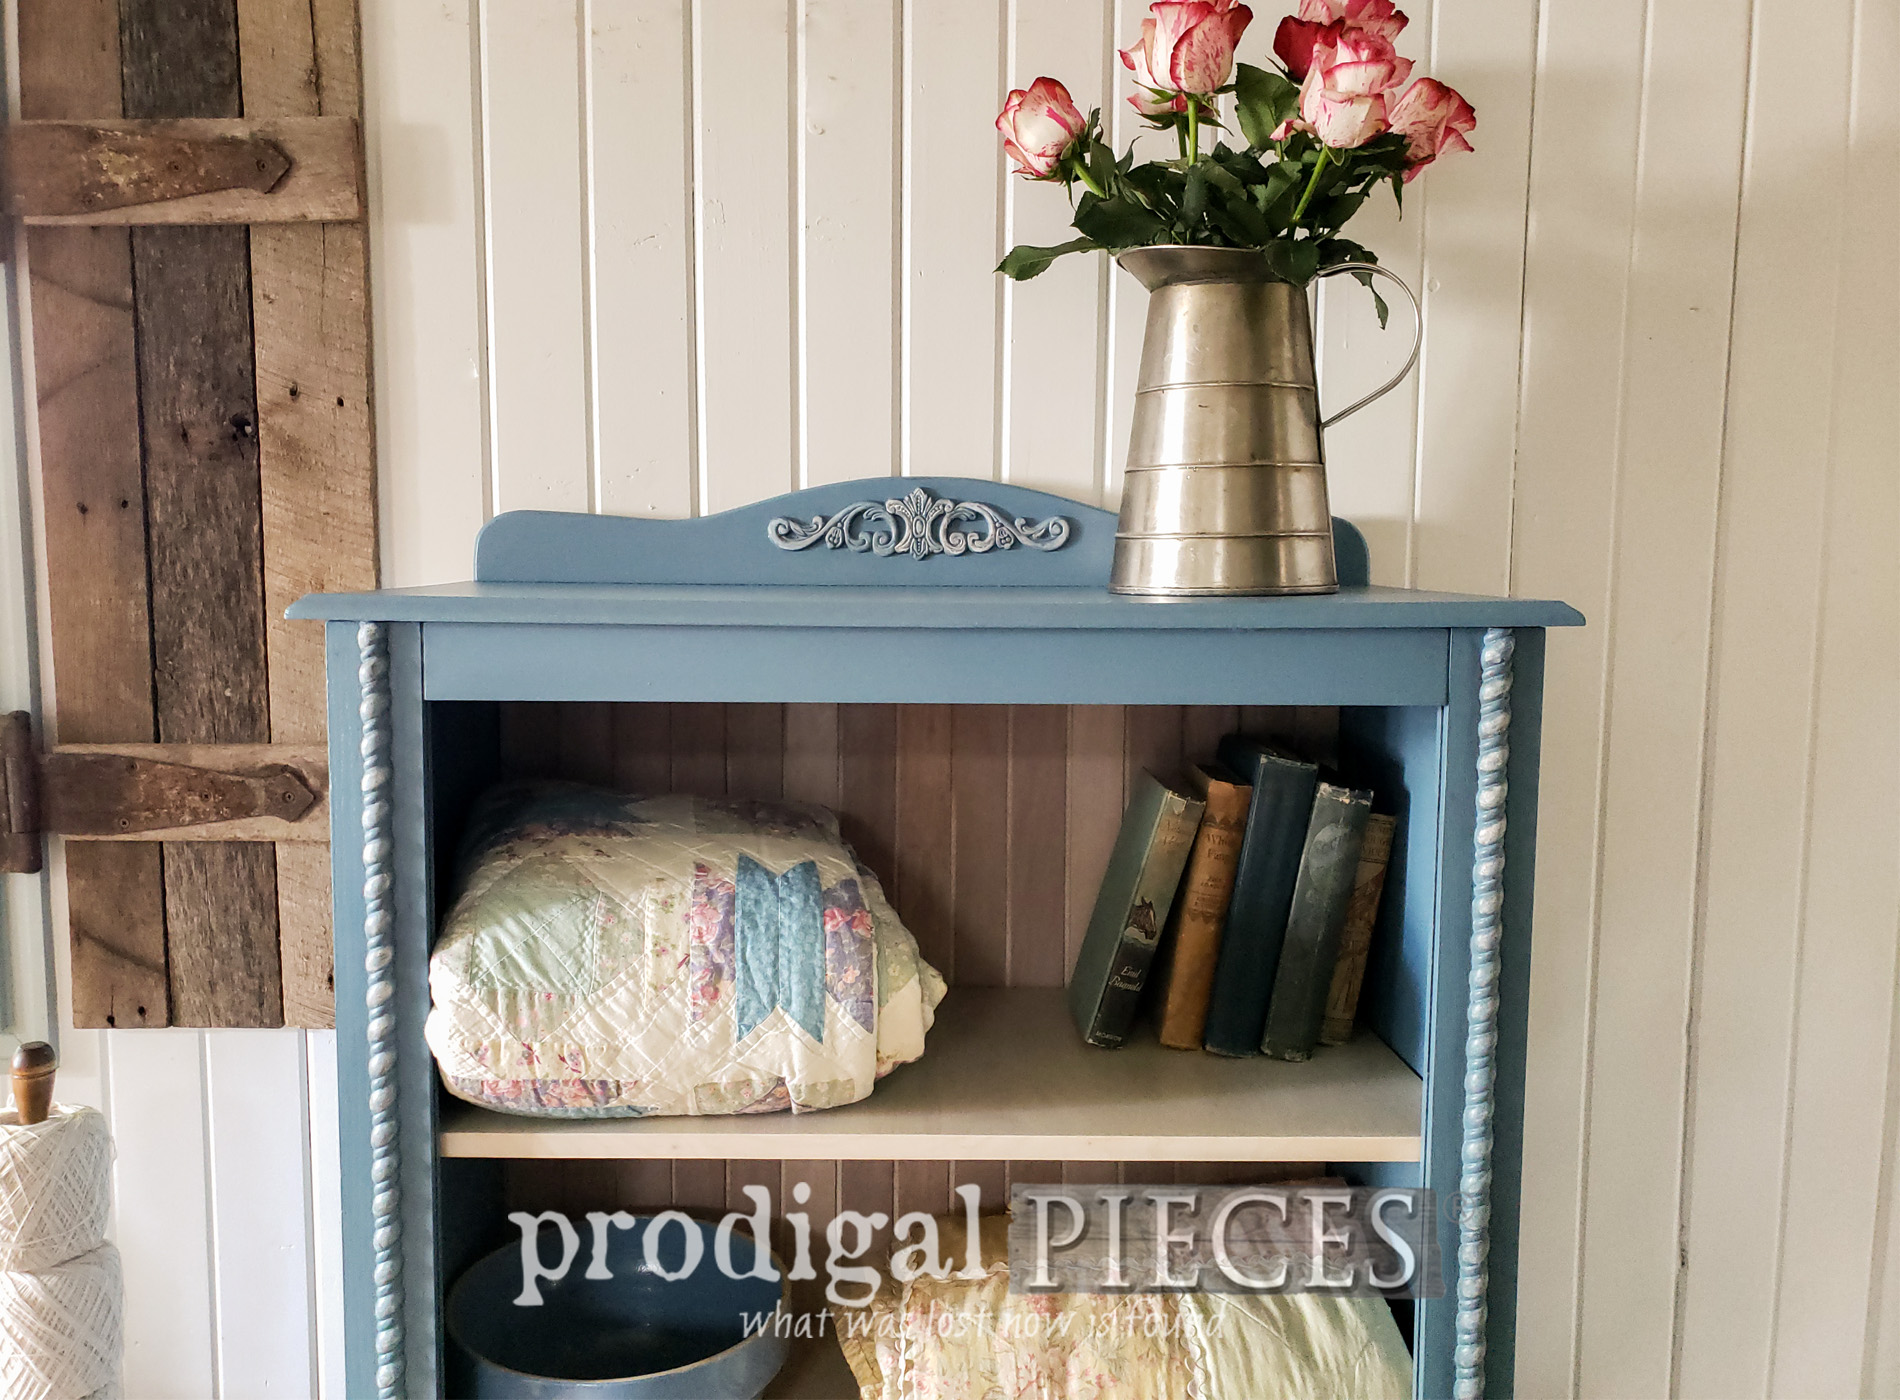
Then, out comes the paint. Isn't this a beautiful blue? It's called blueprint...just like the ones you see when building new. Perfect.


Last, I added a few touches to the braided trip and applique on top to draw it out.
THE REVEAL
Here's my once curio cabinet now turned into a storage unit suited for most any room of your home.


I'm happy with the outcome. Not only is it functional, but also full of style. Yay!


Are you lovin' the blue? I am. Blue is definitely one of my favorite colors to work with. Oh, and don't forget the light that's still there making it even more functional.


If you'd like to make this upcycled curio cabinet a part of your home story, you can find it available in
my online store. We deliver to you...anywhere!


In addition, pin and share to inspire others to look past the broken and see the potential that is there.

Before you go, be sure to
sign up for my newsletter. Until next time!

 PINTEREST | EMAIL
Also, more furniture makeovers like this repurposed curio cabinet: