It's that time again...it's Reduce, Reuse, REFASHION time. woot! That means I'm back with another project making use of textiles that most will overlook and toss aside. You can see my past projects in
my gallery HERE. However, for today, I'm back to one of my favorite textiles...linen. Linen is one of those fabrics that is natural, soft, oh so very wonderful to work with. Check out this blue striped linen top I found secondhand. I've had my eye on a creating a refashioned linen jacket and this shirt needs a new life.


Isn't that blue stripe perfect? This shirt is 100% linen, has pockets, rolled sleeve tie-ups, and plenty of space to do what I'm after.
What I have in mind is a sweet, ruffled, button-up jacket that will allow me to have a flowy frock to use over my dressers and shirts. How does one go about making that happen? Let's grab our sewing scissors and have at it!
CUTTIN' IT UP
While there's nothing wrong with the pockets on this shirt, they weigh it down for what I have in mind. First, I use my seam ripper and take them off. Oh, and don't worry, I save the pockets and all the buttons for a future purpose. My inspiration is a jacket priced at
$184 HERE. eep!! While not in my budget, I can certainly DIY it.

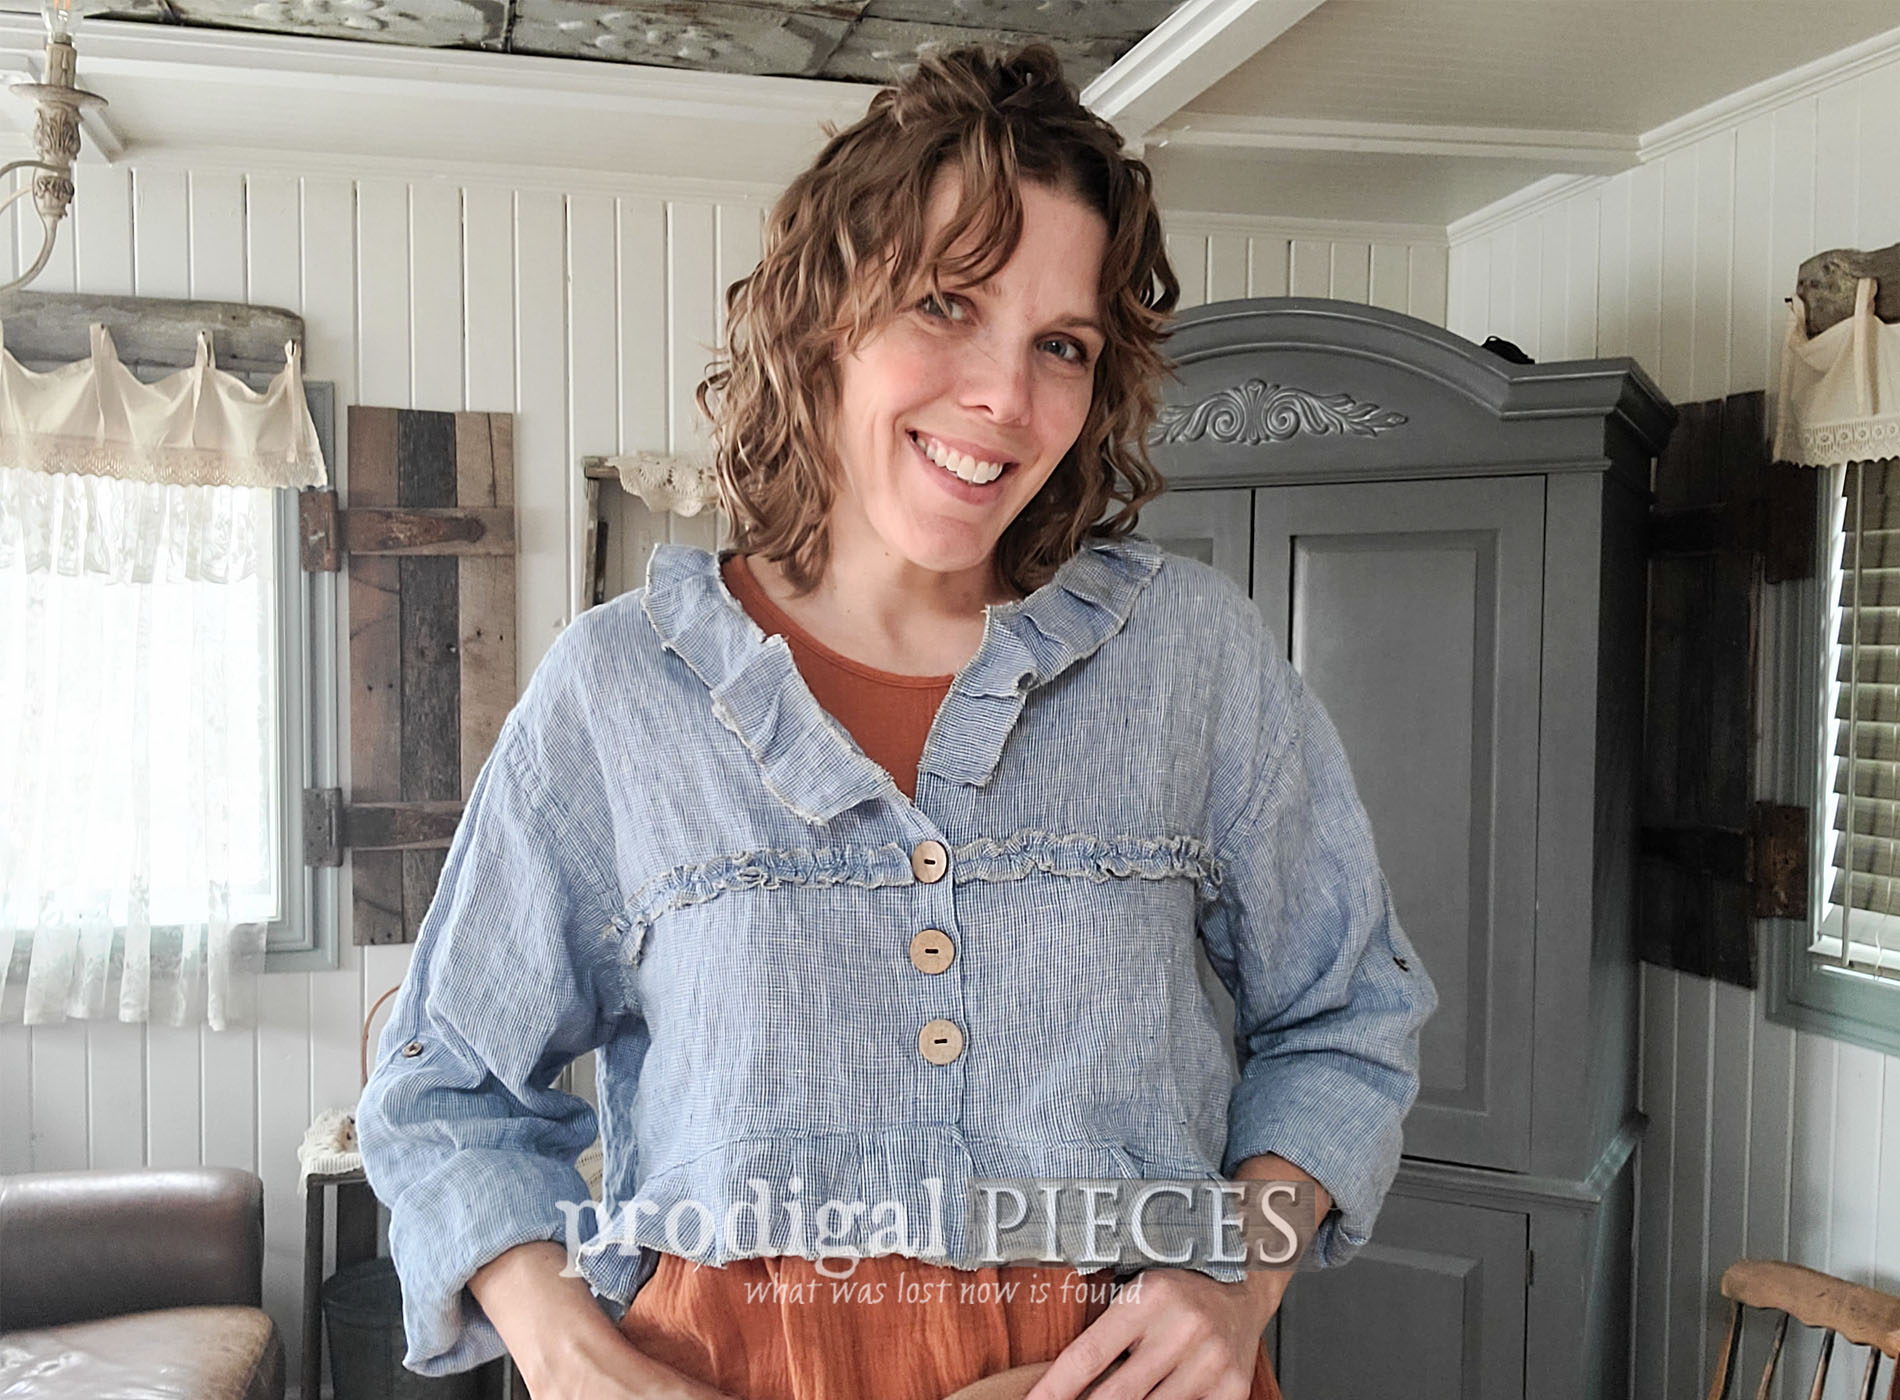
This is the tedious part, but so worth it. Here's a peek at the shirt on myself with the pockets removed. It's ready to go! And, I just have to say I'm still lovin'
my new DIY haircut though some gave me flack! boo hiss.

Next, I take my scissors and cut off the collar.

After that, I take my scissors and cut off the bottom on a slight curve.

Lookin' cute! In my world, it's waste not, want not, so I take the bottom half and cut it into strips to make ruffles.

ASSEMBLY TIME
With my pieces in hand, I head to my sewing machine to attach my two strips short end to short end using a flat felled seam.

Then, once I have my strip, I use my serger to give the ruffle a finished edge.

Instead of a basic gathered ruffle on the bottom, I use a pleat to pin and assemble with my serger. In addition, I also add a ruffle to the neckline.

One last thing...I need to add buttons. While the original buttons were tiny, I want to add larger. In order to do that, I switch up the placket side. I'm old enough to know that ladies' blouse plackets are on the left, while men's are on the right. What's a placket? It's the side of a shirt, coat, or jacket that the buttons are sewn to. I remember when there was a difference, but always wondered why. Well, back in the day, ladies of stature had maids to dress them, so the buttons were sewn onto the left to make it easier for the maid to dress the lady.
For my purposes, I want to switch the placket for two reasons: (1) I want a vintage vibe to my refashioned linen jacket (2) I need to do something about the original buttonholes. In order to do that, I sew my buttons over top of the existing buttonholes.

ONE MORE THING
Before I wrap up this project, I just want to say that I have a literal BLAST creating my own clothes, my own style. I always make my own clothing when I really want to get what I am after -
from pjs to swimsuits,
to accessories, to
everyday clothes. You can do it too as there are oodles of tutorial and patterns bloggers share! To finish my vision, I grab my linen sheet and my super comfy lounge pants to make myself one more thing...

Of course, according to my lot in life, I not only ended up with my kids' head cold, but also, by serger decided to stop working. sigh... Even my sewing machine zig-zag stitch is out of sorts and
sweet pup, Loula, begs for attention.

That leaves me to assemble using a basic stitch with intent to serge when it is repaired. Not only does a gal
not quit, but head to the finish with a smile. Am I right?
STYLIN'
While I create these two items in a couple of hours, I'm so stoked to be able to share this refashioned linen jacket with matching bloomers (or pantaloons - however you see it). ta da!


Yes, I'm a sucker for all things linen (and all natural textiles, actually) - they can't be beat! Because this is a thrifted shirt in like-new condition, it is softer than new, and is perfect for what I'm after.


And how about those blooms!?!

Talk about soooo comfy. Notice they don't have finished edges, but I don't mind the carefree look. In addition, I just have to say my entire outfit (including my wool hat
found HERE) costs less than $70. Whereas my inspiration jacket and bloomers alone would cost me over $350 - not even including my boots, dress, and hat!! BAM!! Plus, I even save the ribbon that my washcloths come wrapped in and it perfectly suited as belt to keep me modest. ahem.


Next, the cherry on top is being able to call these my own. One label is custom made, but the other I iron on to satin ribbon and place in seam.


Finally, I'm happy as a lark in my newly refashioned clothes because they're (1) comfy (2) are designed to fit ME (3) beautiful (4) and oh so budget friendly.


SHARE
Now, it's your turn to dish...have you ever refashioned any clothing or thoughts on my inspiration here? Let me hear it! Leave me some comment love below. Likewise, pin and share to inspire others to think outside the chain store clothes and give DIY a try.

Additionally, before you go, be sure to
sign up for my FREE newsletter to see what happens to this hidden gem.
Come take a peek HERE!

Until next time!

 PINTEREST | EMAIL
Also, more refashion fun like my refashioned linen jacket: