Remember my motivation is on track as a
middle-aged mama? I'm still on that track and trying to make healthy changes in house and heart. As a result, I'm heading back to my latest DIY project in my garage where I built from scrap a
tilt-out recycling bin and storage as well as a
gravity-fed pet food storage bins. To wrap-up this part of cleaning up this space, I am building a plastic grocery bag holder for me and free to you. Consequently, this mess below is all I can handle. ugh.

If you recall, I did make a fabric plastic grocery bag holder that I used for many years. See it hanging on my makeshift shelf?

After building the recycling and pet food storage, here's what I ended up with. I love it!

However, I gave up my bag holder and let another family have it. You can make that too, if that's what you prefer. Previously, I was given bag-fulls of quilting strips years ago and sewed them into this holder with elasticized top and bottom.

Since making better is my goal, I want to create something a little more functional, like this...


BUILDING
First, my inspiration is that I want something sturdy, easy to use, and pleasing on the eye. I have this bit of scrap leftover from building my pet food storage out of the cornhole board tops I made. Not only is it more than enough for my project, but also sanded and ready to go.

If you want to make this plastic grocery bag holder too, here's what you'll need:
TOOLS & MATERIALS
- ½" sanded or cabinet-grade plywood or similar
- 1" brads and nailer
- jigsaw (all cuts can be made with this if need be, using a straight edge guide)
- circular saw or table saw are also handy
- tape measure
- builder's square or straight edge
- pencil
- wood glue
- sandpaper
- paint or stain of choice
STEP 1
Initially, here are the finished dimensions of your holder: 6" W x 5" D x 14" H.

Additionally, here is the layout of the pieces you'll need. Sand down rough edges and any fraying.

- 3 - 14" x 6" back and side pieces
- 1 - 12" x 6" front
- 1 - 4½" x 5" bottom
For me, I used my circular saw and straight edge to cut the plywood.

Next, when I have my three 14" pieces, I take the two side pieces and measure 2" down on one side so I can cut the corner off to make that angled top. This is because the back is 14" and the front is 12".
STEP 2
Before we assemble, we need to cut the slot on the front. What is more, I use a small container with 1 ½" diameter to trace 2" in from each short edge of the 12" front. However, I don't trace the full circle, but only a half.

After that, I connect the half-circles with straight edge lines.

Subsequently, we need to cut the opening. I use my drill to make a pilot hole, and then finish the opening with my jigsaw.


STEP 3
Then, take your cut pieces and begin to assemble by using your brad nailer (or hammer and nails or screws). Subsequently, begin with sides attached to the back, then attach the front followed by the bottom.


Last, you can it's at this point you can finish as you like. Use paint or stain, add graphics or text... you get the idea. Have fun with it!
SANE STORAGE
Finally, my sanity is restored as my kids can no longer just dump bags on the floor without somewhere to put the bags. This sucker holds up to 50 squished bags!
To mount it to the cabinet, I simply attached with screws. However, you can also use keyhole hardware to hang it wherever you choose.


In addition, the best part is this can go in your kitchen, laundry, mudroom, and even on your counter or in a cupboard. Where would you put one?

 SHARE
SHARE
Likewise, after leaving some comment love below, do pin and share to get others creating and building to make their house their home.

Before you go, be sure to
sign up for my FREE newsletter to see what I do with this funky, thrifted, potato bin.

Until next time!

 PINTEREST | EMAIL
While you're at it, here are other free build plans like my plastic grocery bag holder:


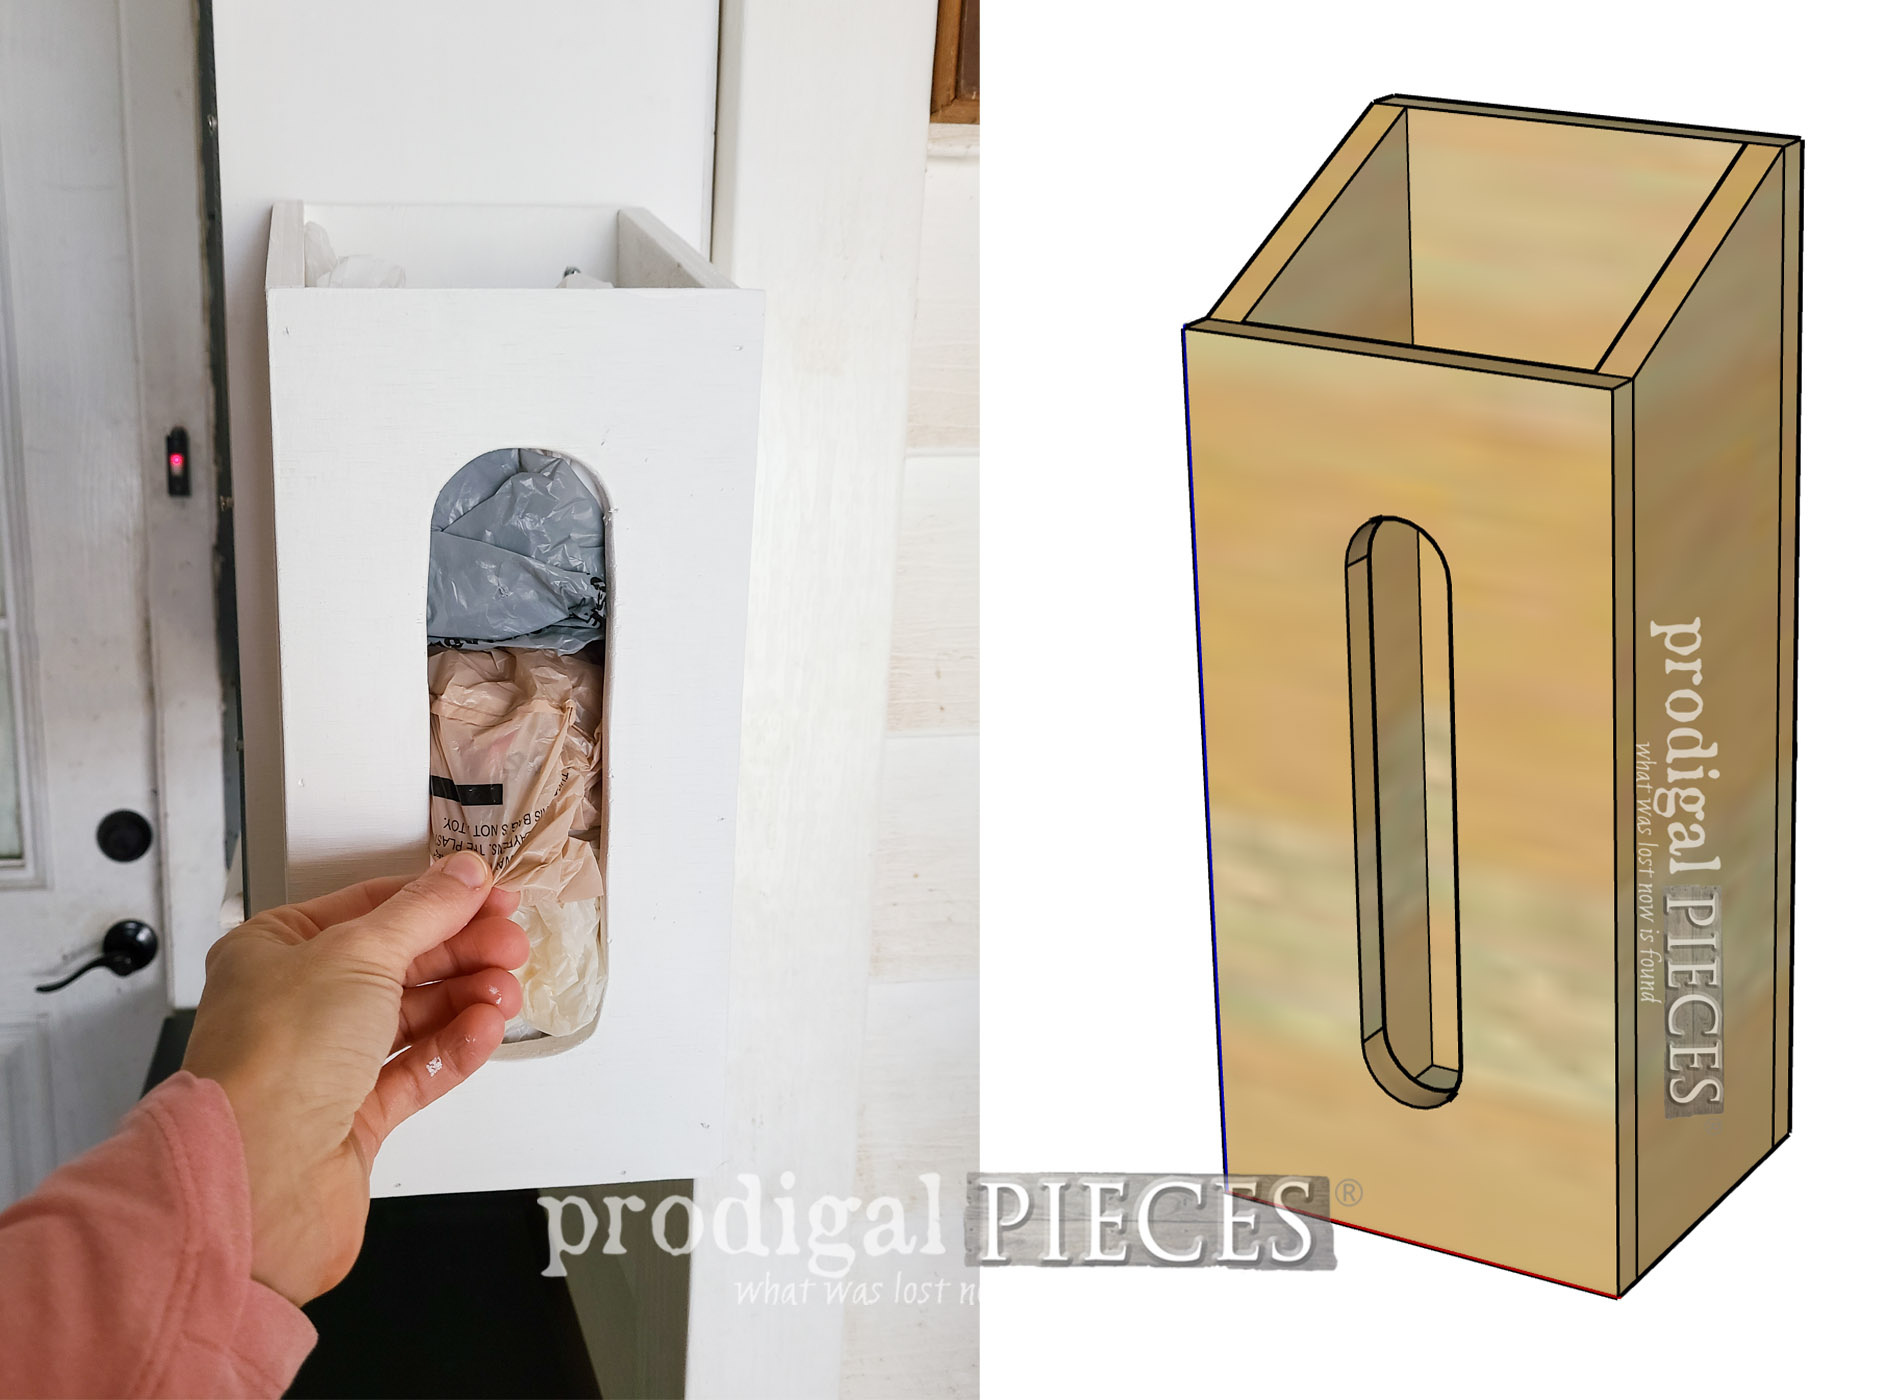
 Since making better is my goal, I want to create something a little more functional, like this...
