One thing's for sure, I definitely have a soft spot for the broken and damaged. When I was in the thrift store just looking around, I found 3 "tables" that decidedly jump in my car begging for a makeover. What's funny is that this little guy is actually a Mid Century modern bench seat. Part 2 of my trio of makeovers is for today. Thrifted Mid Century Modern Bench Seat Before | prodigalpieces.com Trio Set of Thrifted Tables | prodigalpieces.com You can see Part 1 in this post last week (it's a fun one!) and then Part 3 in this post. For today, I'm working on the little bench on top. Yes, it's in rough shape, especially once you start taking a closer look. Mid Century Modern Bench Top Before | prodigalpieces.com

DIY TIME

At first glance, you can see it has paint and stains, but also the top is starting to split from being so parched. However, there are also several joints where the dowel pins are broken making it unsafe. It comes apart easily and I'm better able to see what I need to do. Damaged Mid Century Modern Bench Legs & Skirt | prodigalpieces.com Also, I sand down the seat top to see what I'm up against there too. The wear is enough that I set it up with glue and figure it will be getting a paint job. Gluing Mid Century Modern Bench Top | prodigalpieces.com Then, the legs and skirt also get a sanding along with new dowel pins. After that I glue and assemble it too.
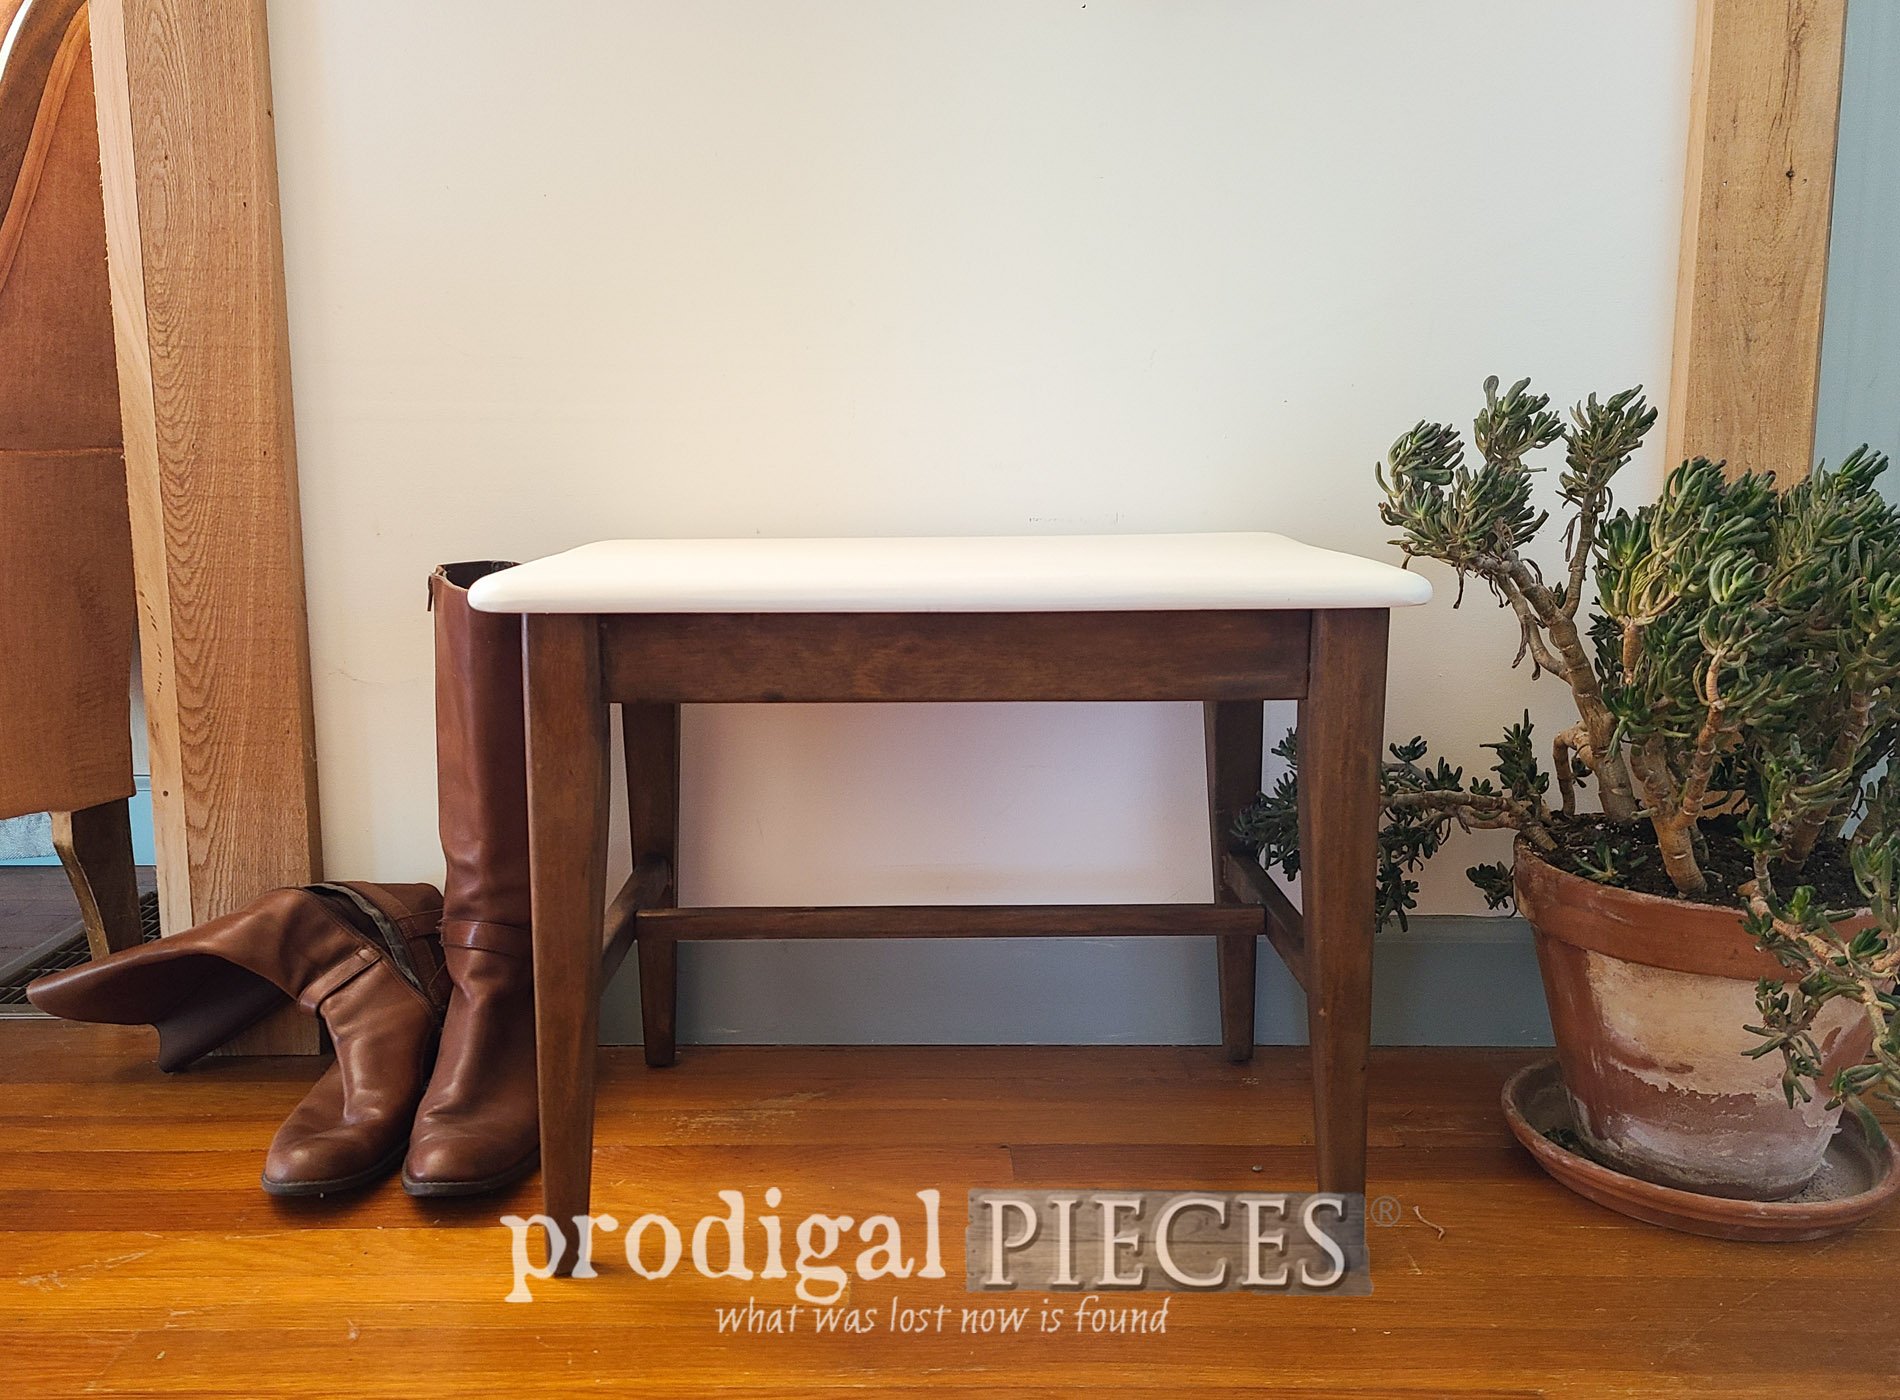
 Replacement Wood Dowel Plug for Mid Century Modern Bench | prodigalpieces.com

THE REVEAL

Finally, after stain and paint and a bit of patience, my Mid Century modern bench is now ready for many more years. I'd say it looks much better than the before, don't you? Vintage Mid Century Modern Bench Seat with Updated Makeover by Larissa of Prodigal Pieces | prodigalpieces.com prodigalpieces vintage midcentury modern White & Stain Mid Century Modern Bench Makeover by Larissa of Prodigal Pieces | prodigalpieces.com prodigalpieces furniture vintage midcentury I have no doubt that it originally came from a lovely desk or dressing table set, which I'd love to see. However, for now it's looking good even if I do say so myself. I will always have a sweet spot for Mid Century modern furniture. The lines are crisp and clean with a sleek appeal. In addition, you can see my past furniture makeovers of that era in these past posts HERE. Vintage Mid Century Modern Bench Seat Makeover by Larissa of Prodigal Pieces | prodigalpieces.com prodigalpieces midcentury furniture home diy DIY Mid Century Modern Bench Seat by Larissa of Prodigal Pieces | prodigalpieces.com prodigalpieces midcentury modern diy Mid Century Modern Bench Seat Makeover with Paint by Larissa of Prodigal Pieces | prodigalpieces.com prodigalpieces vintage midcentury modern boho As with most of the makeovers that I would love to keep, this one is also available in my online shop.

[metaslider id=30251]

In addition, do pin and share this mini makeover to inspire others to see past the paint, damage, and brokenness. There is always something waiting for revival! From damaged to delightful, this Mid Century modern bench seat now has style. See the tutorial at Prodigal Pieces | prodigalpieces.com prodigalpieces midcentury modern boho diy furniture

UP NEXT

Up next, I'm sharing how to deal with buyer's remorse...ahem. See the three new projects HERE. Damaged Bar Stool Before Upcycle | prodigalpieces.com To get these DIY tips & tricks in your inbox, be sure to sign up for my newsletter. PLUS, you will get your FREE Furniture Buying Checklist and special discount to my shop. Until next time! blog signature

let's get socialMEWE | PINTEREST | GAB

Also, similar bench makeovers like my Mid Century modern bench:

How fun! A dilapidated antique empire chest of drawers is repurposed into an upholstered bench by Larissa of Prodigal Pieces | See the DIY at prodigalpieces.com prodigalpieces diy home furniture homedecor handmade upholsteryA curbside piano bench and music rest become a DIY Folding Lap Desk with Storage created by Larissa at Prodigal Pieces | prodigalpieces.com


Rebecca - NC

Shared publicly - 2021-09-30 07:01:01

How sweet!! It looks so good next to your entryway that I would be hard pressed to want to part with it! ?

Larissa

Shared publicly - 2021-09-30 08:03:41

Thanks! My barn beam bench usually resides there or else I would. ;) Have a great day!

Rose Cocchiarella

Shared publicly - 2021-09-30 08:22:40

Loving this sweet bench! Can you explain how you used glue in the top? Im having a similar issue in a dresser. It’s got a slight split on the top but the split doesn’t go all the way through. It’s a surface split. How did you repair yours?

Rebecca - NC

Shared publicly - 2021-09-30 10:23:05

You too!! ☀️

Larissa

Shared publicly - 2021-09-30 14:05:00

Thank you, Rose. My splits were such that I could pry it apart an get my glue in (a syringe helps). Then, I just clamped together and sanded smooth. Hope that helps!

Carroll Xavier

Shared publicly - 2021-09-30 18:17:47

Cannot believe that is the same bench! TLC sure goes a long way :) Thanks for sharing.

Larissa

Shared publicly - 2021-09-30 19:22:28

Hooray! That just made my day, Carroll. Thank you!

Michele M.

Shared publicly - 2021-09-30 20:30:18

Larrisa you did a fab job with that next bench - it is a perfect sturdy beautiful little bench. Well done.

Marie - Interior Frugalista

Shared publicly - 2021-10-01 08:52:41

Nice save, Larissa! If only the previous owner could see their bench now. Pinned :)

Larissa

Shared publicly - 2021-10-02 05:49:38

MIchele, you are so sweet to say so. Thank you for that.

Larissa

Shared publicly - 2021-10-02 05:50:41

I've always thought it would be fun to reconnect pieces with their last owners. Thanks, girl!

Mary

Shared publicly - 2021-10-06 00:31:48

Oh wow! She is a stately again!.Wonderful transformation Larissa! I didn't know one could fix the dowels or the split; so appreciated that you shared that. Thank you for saving another gorgeous, real wood furniture piece from the landfill :)

Larissa

Shared publicly - 2021-10-06 05:31:13

How fun to hear, Mary. Thank you! Yes, I use a forstner bit to drill out the broken nubs and then just replace the pins. It's one of those things I like to have on hand just in case.

Sign Up To Comment