Sometimes there are projects that you envision in your head the minute you spy something. Maybe that doesn't always happen, but when it does it is fantastically fun to get it done. That's what happened to me when I spied this beauty below. Did I need a headboard...no. Did I need another project...not really. But...did I want to take this vintage gem and create a French Provincial headboard bench...YES!

A local lady posted this on Craigslist, and I couldn't resist the opportunity to check it out. The caning alone is what caught my attention, but I've always had a heart for French Provincial style. You can see why in my past makeovers
in these posts.
This isn't my first time I've built a headboard bench, but the last one was from a
bookcase headboard and had a totally different spin on it. There are dozens of headboard benches out there, so why would I want to take this one on? Well, because not many have this design to them, and I love taking on a new challenge.
FIRST STEPS
Okay, so making the bench is pretty simple and straightforward - you're adding a frame to the front of the headboard. I'm not going to reinvent the wheel and make a tutorial but will share a few tips that I learned along the way. First, having the right tools is key.

To make a solid frame, my must-have is my pocket-hole jig I can create joints in any form on any size material that will be strong and tight. I love it! You can see all the ways I use it in
my past projects.

I could have just stuck a plain board across the front as the bench skirt, but I wanted to make this look custom. My goal was to recreate the lines of the headboard, so I lay it on its back and traced it onto paper.

Once I had it traced and cut out, I transferred my tracing to a 1" x 6" board and cut it out with my jigsaw.
My workbench with Kreg Klamp Trak System< makes this a breeze.

No worries about a mess, my clean-up crew was eager and waiting to suck up any debris the minute it hit my shop floor. haha. I love it!

MORE FUN
In another adventure, a few months ago I was doing my normal thrift store checks and found these set of 3 beautiful unfinished table legs. They weren't price marked, but I grabbed them anyway.

When I went to check out the guy said, "You do realize there are only 3 here, right?" I shook my head yes and told him I had plans for them. He replied, "There is a set of four over there too." I had seen them, but they were heavily painted and nowhere near as pretty as these. I asked him how much for the triplets, and he answered, "How does a buck sound?" In Ohio language that's $1. Which also translates to...SCORE!
side note: In case you've ever wondered where the term "buck" is came from, it's because the Native Americans and settlers would trade buck skins for goods. That was their cash.
BUILDING TIME
Initially, while originally I had planned to build a half-circle table with the legs, I found they came in handy for what I wanted to build with this headboard. Since it is a king size bed, I needed to have more than two feet supporting my front frame. I buzzed them into pieces with my miter saw and here is what I had assembled thus far.

I've added a 1"x 4" spreader at the back, two side supports, three legs, and a front skirt. Next, I added slats to span from front to back, just like I did on my recent
workbench built from reclaimed bed drawers.
BUILDING
Oh, and no worries as I had plans for the rest of those table legs. Likewise, stick around to see where they end up. tee hee.

Next up on the French Provincial headboard bench was to add some arms. I could have stopped with it the way it was. However, I wanted some class added to this beauty. I pulled this bed rail from my stash of curbside hauls and knew it was the right thickness and depth for what I needed.

To make the design, I traced what I wanted on paper and then transferred it to my wood. Using my jigsaw again, I cut it out and sanded it down with my sander and finished with hand-sanding.

Having repaired and torn apart many furniture pieces, I knew how to assemble the rest of the bench with spiral pegs and joints. I used my Klamp Trak along with my drill and forstner bits to make the holes straight and clean. Last, I assembled with wood glue and clamps and let cure. By the way, if you ever wanted to see what's in my tool arsenal, you can check it out.

BRING ON PAINT
Time for some paint fun! Obviously, to add cohesiveness to my bench I wanted to paint. There was no way I was going to break out a brush for this, especially with that caning. Instead, I decid to spray.

I began by placing the bench on its back to hit the underside first. My sprayer is set up with the blue tip and black nozzle for a fine finish. I'm also using an eggshell latex paint by Glidden in an Elephant Gray color. Kinda fitting, isn't it? This thing is BIG like an elephant!

Then, after the bottom is sprayed, I flipped the bench up and coated the rest. In total I did three coats of paint.

One of the beauties of this sprayer is that you can adjust the spray to horizontal or vertical positions. Plus, it can spray even when facing downward. Here it is in the horizontal position for my long pieces and caning...

...and in the vertical position for my upright pieces. My dad had come over while I was spraying and commented, "That sure does a great job. Looks fantastic." I agree - it's an awesome tool! You can see it how I've used in
many past projects as well as the how-to in my video below.


While my first coat is curing, I tried my hand at sewing a French tufted mattress. Yeah...I'm crazy like that. I plan to make one for our built-in window seat, so I needed some practice. I've done similar things before, just not on this scale.
SEW MUCH FUN
Off to the fabric store I head to get my supplies and have at it. Again, I'm not going to reinvent the wheel as there are many tutorials out there on how to make one of these. I would say I referenced
this one the most. It's fairly simple, just time-consuming.

I found this beautiful striped fabric.

Everything was sewn and it was time to not only hand-stitch the cushion closed but add the side stitches and the tufting. Again, my littlest is in tow handing me pins and whatnot. She decided while perched on the cushion that I needed a picture of me sewing. I agree.

If you've ever done any heavy sewing like this, you know gloves are a must or your hands will pay dearly. And of course I had to add my own personal touch to the mattress.

The mattress is complete, and I just need to add a few finishing touches to the bench. Next, I added depth and dimension by highlighting and glazing a few spots. First, I used this a white glazing and my brush to go over the caning.

Once that cured, I used my gray wax and a second brush to shade in the caning on the outer edges and hit the carved accents as well.

THE REVEAL
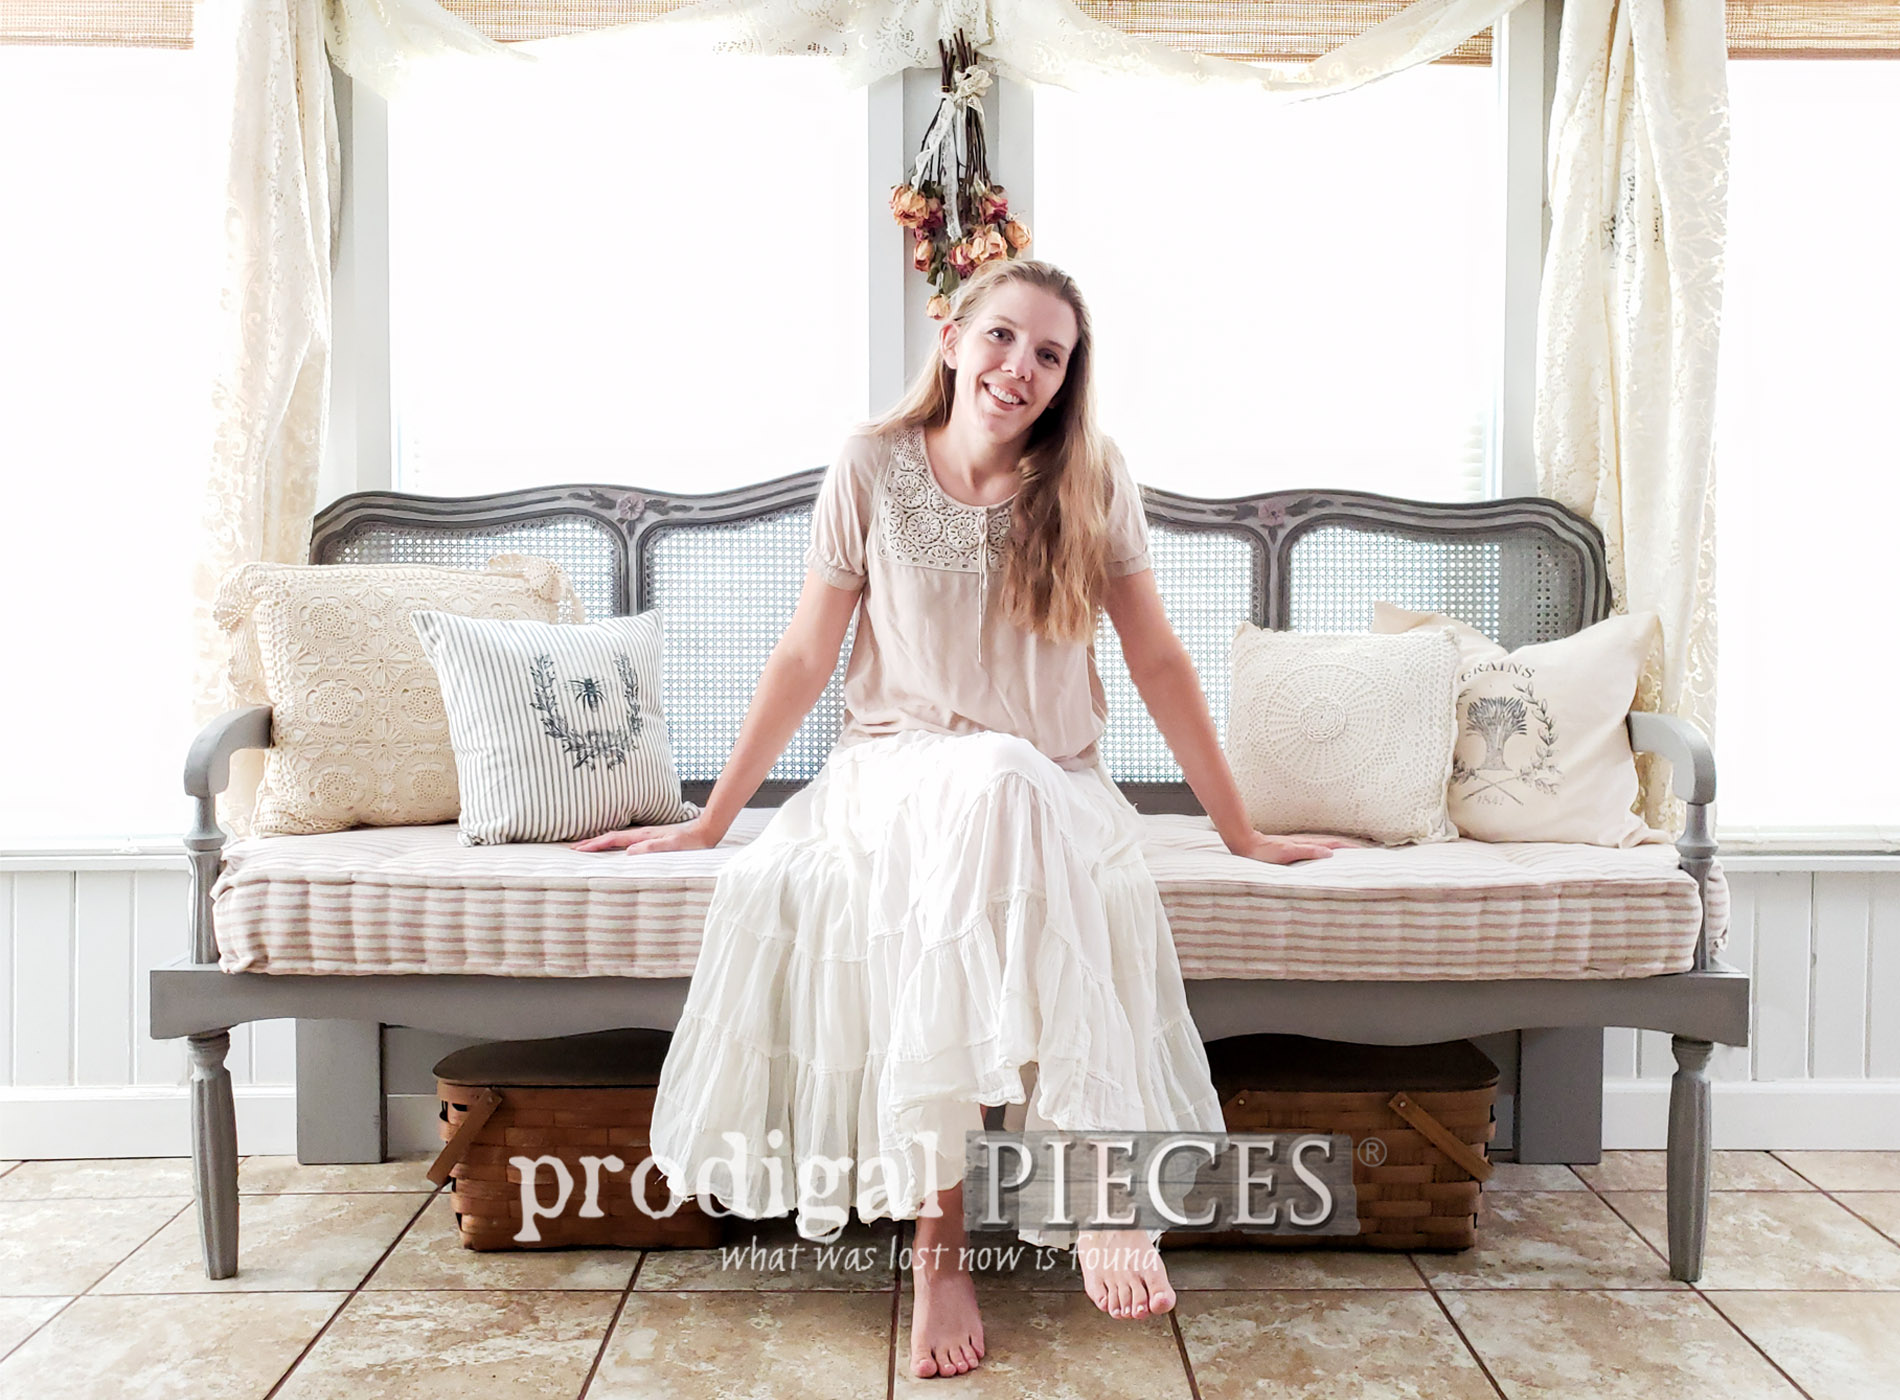
Ready to see my French Provincial headboard bench complete? Let's take a peek...


How exciting to see my vision come to life after many days of work. It came out as I had hoped, maybe even better because I hadn't done this before.


CUSHY GOODNESS
And how about that cushion? woot! Not too shabby, I say. I wanted to create the corners around those arms to hold the mattress in place. Notice how I used the rest of the legs I chopped. I told ya I would use them! tee hee.

Call me crazy, but I even decided to whip up a few pillows to place on my bench. Which pillow is your favorite? The vintage feed sack grain pillow or the ticking with the laurel wreath and bee?


I adore them both and they helped make my French Provincial headboard bench more fun, don't you think?

It was a must for me to get a picture sitting on my new creation. So many times, I forget to snap a shot and I nearly forgot again this time. Huge thanks to JC and my six awesome kids for putting up with me while I built and sewed. I couldn't do it without my team.

I create for fun and while I'd like to tuck this into a corner somewhere, I'm making it available in
my online store. Stop by to see all there is to offer!

SHARE
What is more, pin and share my French Provincial headboard bench to inspire others. My goal is to inspire others to give DIY a try and it shows me love when you share. Thank you!

UP NEXT
Up next, this...err...lovely clock my dad gave me is undergoing a transformation. See the after
HERE.

To get these DIY tips & tricks in your inbox, be sure to
sign up for my newsletter. Until next time!

 PINTEREST | EMAIL
Also, more projects like my French Provincial headboard bench: