 It was kinda like if you give a mouse a cookie story (much like my patio makeover), except this is the thrifted message center sort of ballooning project. The idea was to show you how to get organized, but then it grew and I'm so happy it did because here is what I did with it...
TEE HEE

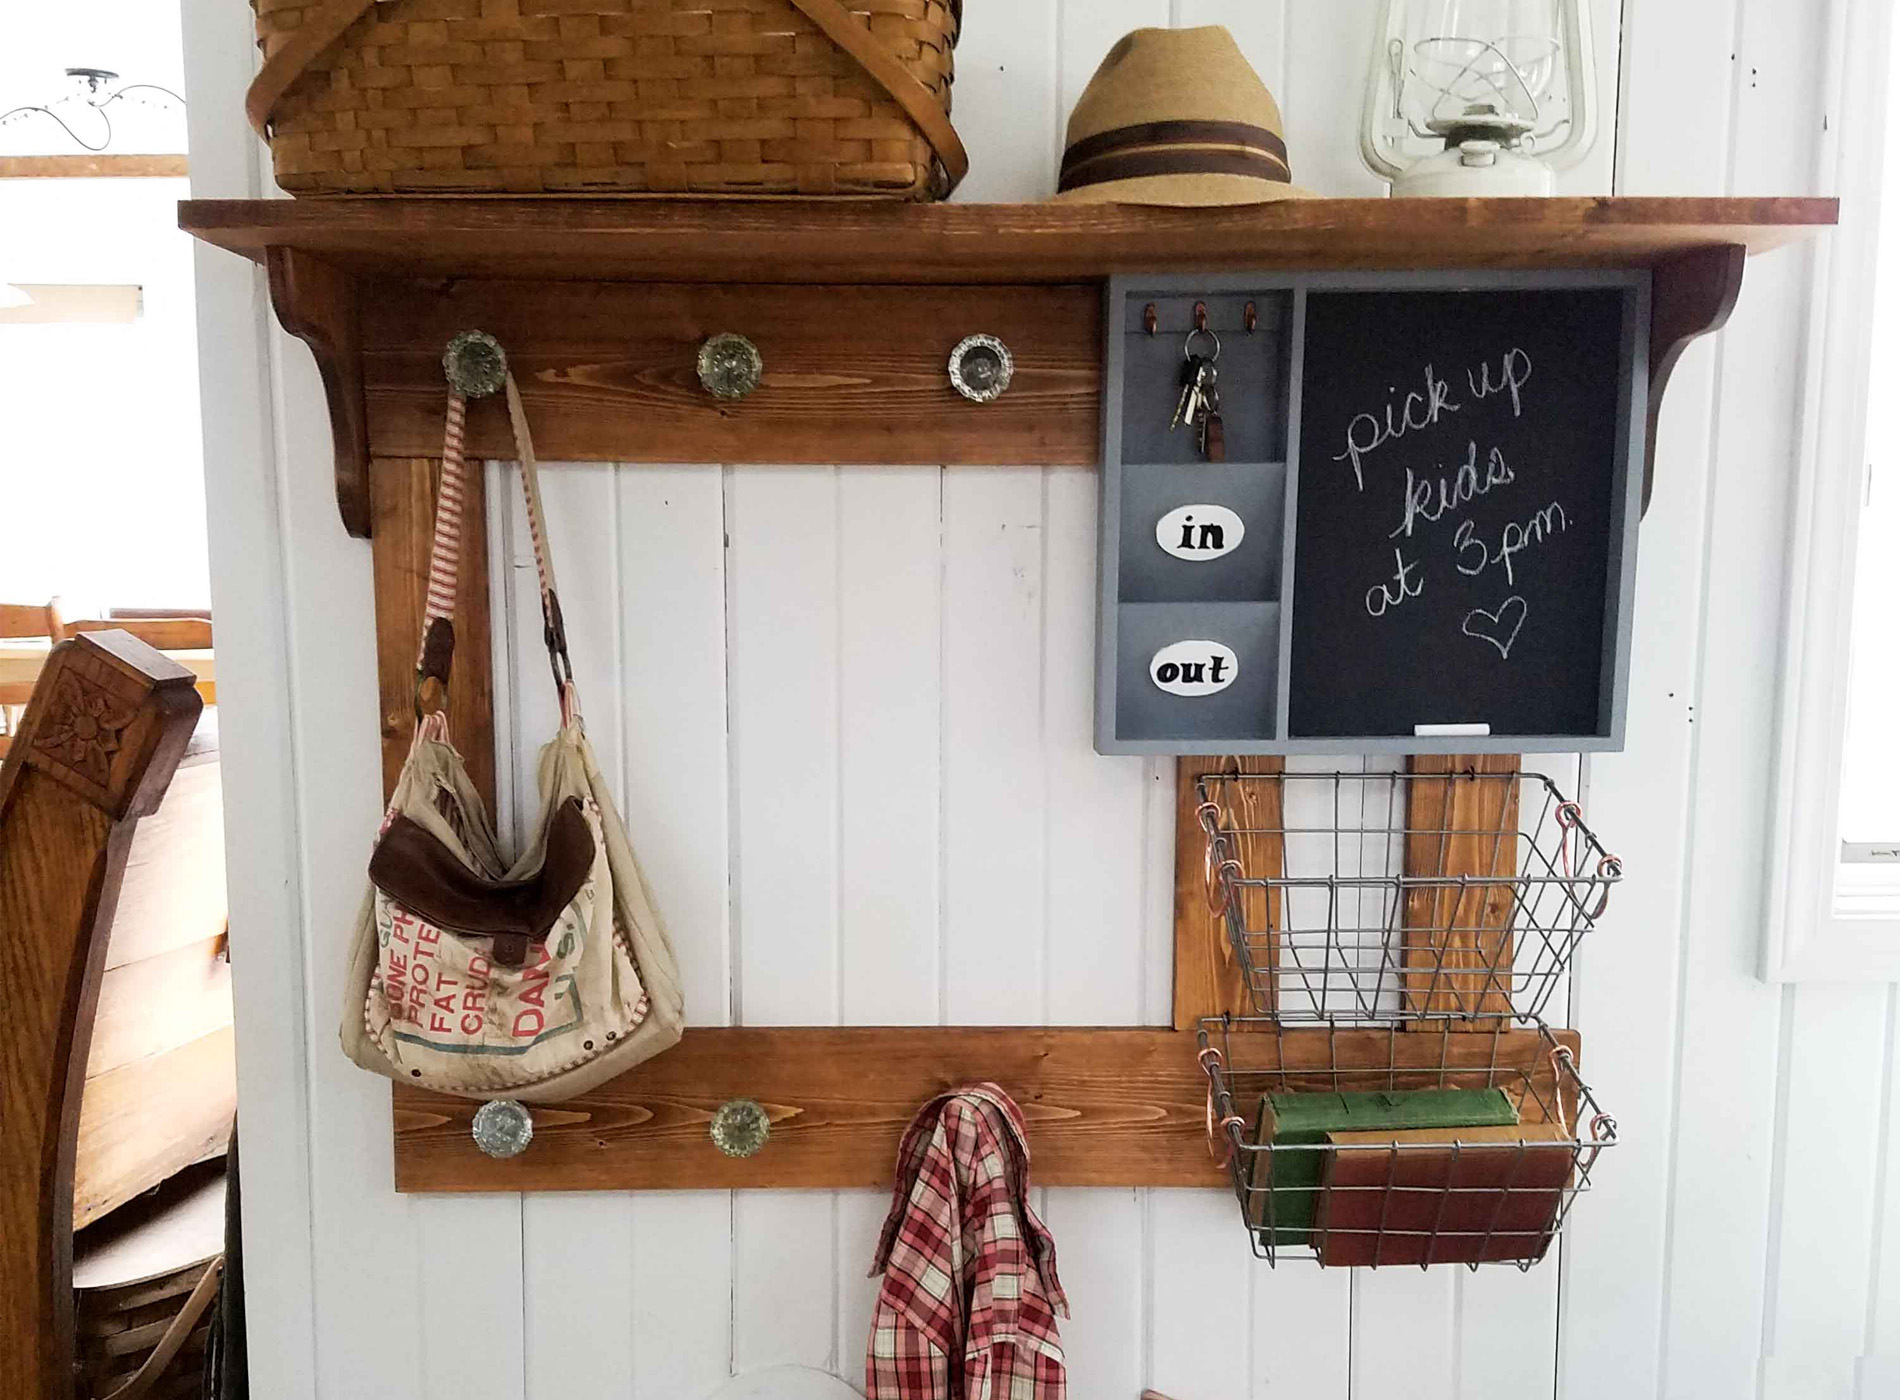
See, I told you I ran with it. tee hee hee. Okay, so the whole idea of me doing this was to inspire you to try it too. Incidentally, I made this out of some pine boards, thrifted corbels (same as I used on my mug rack) and message center, and a pair of baskets from the dollar store. Oh, and don't forget those gorgeous glass doorknobs for hooks from my friend.

Want to try one too? Take a closer look at my design...it has the potential to be adjust to just about any space and can be tweaked to your hearts content. Not only can you add length, height, change up the accessories to suit your needs, but I also understand not everyone wants or is able to DIY. So, if you love the entry storage, just head to my online shop where you can purchase it for your home.

For those of you ready to give this a try, here is what you'll need:
Materials:
- 2 - 1" x 6" x 8' boards cut into lengths shown below
- 1 - 1" x 4" x 8' board cut into lengths shown below
- 1 ¼" screws
- spray shelter
- spray paint of choice
- stain of choice (I used Early American - my favorite seen HERE.)
- foam brush for stain
- wood glue
- hooks, baskets, message center - plus hardware to hang items (optional)
- 2 - corbels (optional for top shelf)
- Kreg Jig
- saw - circular saw, jig saw, miter saw, or table saw
- drill
- tape measure
- quick square
- level
Step 1
Paint the thrifted items to be used (baskets, old picture frames turned chalkboards, etc). Grab your can of spray paint and give it a fresh coat. When you are done with your first coat, allow your paint to cure. Then repeat with a second coat if necessary.
Step 2
First, cut wood boards using diagram below. This is where you can tweak the design to meet your needs. If you like the shelf on top, cut two additional 6" boards at 45" long. Feel free to play with it.

Step 3
Then, using your Kreg Jig, add two pocket holes to the end of each upright board. And, if using corbels, add two pocket holes to both ends of your top 40" board if adding a shelf.

Step 4
Next, assemble wood pieces as shown using wood glue and screws. This picture shows pocket holes for the side corbels if you desire. Likewise, just add them on the sides and then add two top boards measuring. However, it helps to have a large flat surface to keep joints flush.

Step 5
Last, stain the wood with your choice of stain. Be sure to do this in a well-ventilated area.

Step 6
After that, add flush mount hardware to the back. There are many different kinds of hardware to use.

Step 7
Finally, you're ready to add your storage essentials to your entry storage. Whether it's coat hooks, baskets, a chalkboard or message center of some sort, it is totally up to you and what your family needs. What is more, this unit would also work well in a bathroom for towels, and toiletries. The options are limitless, really.


I hope you've enjoyed this tutorial and find that it can lead you to less days of chaos and more days of time to enjoy what matters most. In addition, pin and share this project to inspire others to give DIY a try too.

Before you go, don't forget to sign up for my newsletter to get updates in your inbox. Up next, I have some crafty goodness coming at you...stay tuned!

While you're at it, here are more builds like my entry storage plan:

