A couple of weeks ago I shared a freebie garage sale dresser (an Art Deco waterfall piece) turned Volkswagen bus that stole my heart.
Meet BEEP.Now it's time for a dumpster dresser revival.

He's been featured by in numerous spots, went viral many times, and has taken the internet by a storm. In that same post, I shared my other waterfall dresser...my dumpster dresser damsel in distress (say that five times fast!)

This sad piece isfound by a good friend of mine next to a dumpster in the middle of winter. Bleak, cold, and sad looking, isn't it? My friend asks me if I want it, and though she thought me nuts, I told her yes. I just couldn't leave it there!
Finally, I'm able to give it the much-needed attention it so desired and the makeover begins. YAY!
DIY TIME
Let's take a look at the damage. Obviously, a missing drawer...

...badly damaged veneer with chunks missing all over...


...a rotted-out foot...

...and falling apart at the seams. So sad.

When I got it home, I thought to myself, "Oh girl, you got yourself a hot mess" and "What did you get yourself into?" Nothing like rolling up your sleeves and getting down to business. Can I get an amen?
To get started, I used my
towel soak method to remove the veneer from the drawer fronts. Since we are building a new one, I wanted all the faces to be the same.
NEXT STEPS
Once all that veneer is removed, I rebuild the drawers that are basically torn apart, and haphazardly put back together. Bottoms falling out, dovetails messed up, and out of square. Fun times for sure.
The cabinet of the dresser was my second project. Let's just say a hammer became my best friend. I had to beat this thing back together, remove oodles of interior veneer and replace that rotted foot. A hot mess, I tell ya!

I nearly ran through a whole tub of wood filler repairing that damaged veneer, but it was worth it. After a whole lotta sanding with my favorite sander, here it is ready for a facelift.


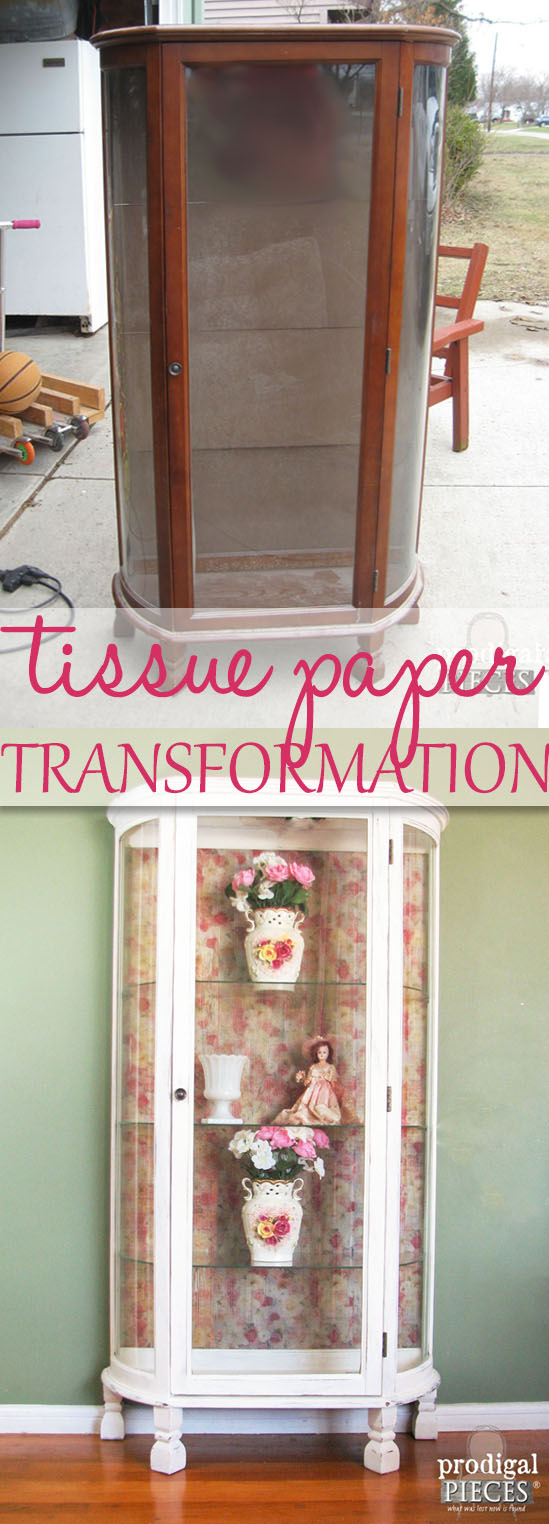
I gave the cabinet two coats of blue, and the drawers two coats of green. I could have stopped there, but I wanted to take it to the next level. This lady needed some oooh's and ahhh's for all its been through. So, I grab some dollar store tissue paper and did my
tissue paper treatment to the drawer fronts with some Elmer's glue and a bit of water (no need to buy that expensive découpage stuff).

PAINT TIME
Next, I pull out a scrap of thrift store tablecloth (I grab those whenever I can because I use them to sew, craft, whatever) and lay it over the drawer fronts. Then, I use my silver paint (same stuff I used on my VW Bus) to spray through the fabric and create a stenciled effect.


I bet you're getting curious as to the final result! I'm excited to show you!
For added dimension, I used a metallic wax, and then sealed it all in with the matte topcoat. Before reinserting the drawers of any piece I work on, I use an old candle to wax the guides and rails, drawer bottoms, etc. to make the drawer move easier in and out.

Are you ready to see my dumpster dresser turned DIVA??
THE REVEAL
Finally, here she is...♥

I am in love with how she came out - so pretty and delicate.

Not only are the colors perfect, but also the silver metallic overlay and feminine pulls just finish it off right.


Normally it would be at this point that I tell you this lovely lady is available in
my online store, but my friend who found her has snatched her up - as it should be.

Likewise, I hope you've enjoyed this transformation as much as I have. Also, pin and share to inspire to think twice before leaving a dumpster dresser in distress.

Before you go, be sure to
sign up for my newsletter. Until next time!

 PINTEREST | EMAIL
While you're at it, if you've loved this makeover, then I know you'll enjoy these too!

 He's been featured by in numerous spots, went viral many times, and has taken the internet by a storm. In that same post, I shared my other waterfall dresser...my dumpster dresser damsel in distress (say that five times fast!)
 This sad piece isfound by a good friend of mine next to a dumpster in the middle of winter. Bleak, cold, and sad looking, isn't it? My friend asks me if I want it, and though she thought me nuts, I told her yes. I just couldn't leave it there!
Finally, I'm able to give it the much-needed attention it so desired and the makeover begins. YAY!
This sad piece isfound by a good friend of mine next to a dumpster in the middle of winter. Bleak, cold, and sad looking, isn't it? My friend asks me if I want it, and though she thought me nuts, I told her yes. I just couldn't leave it there!
Finally, I'm able to give it the much-needed attention it so desired and the makeover begins. YAY!

 Are you ready to see my dumpster dresser turned DIVA??
 Before you go, be sure to sign up for my newsletter. Until next time!


