 At first glance, this is pretty and really nothing wrong with it except for the busted/missing leather hinge straps and general wear.
 In addition, it came with a liner that I had removed and was in the process of cleaning. The shiny, orangey wicker didn't do it for me and my love of farmhouse style. So...I decided to take it up a notch. As in...paint. Don't faint now, I'm not painting the entire thing, rather giving it a wash to deflect the shiny and create texture.
TIME FOR PAINT
First, I use my paint brush and a soft white paint to dry brush the basket. What's dry brush you say? It's where you're moving around paint with a brush that has only enough paint on it to slightly wet it. You're not soaking your brush to get full coverage. All you need is a smidgen of paint and follow the flow of the basket lines to brush it on. Keep it light and brush it out. After about 30 minutes, the paint has cured enough that I can continue. Because I wanted this DIY rolling laundry cart to actually roll (hahaha), I add some casters. Also, if you don't know me enough already, I add casters to most anything. Why not? It makes life easier - trust me.
So, how does one go about adding casters to a basket? Well, it's pretty simple. This method never fails me as I do it all the time to wire baskets, wicker, anything! You just need a stash of zip ties (aka. cable ties) and some cute swivel casters with plates.
After about 30 minutes, the paint has cured enough that I can continue. Because I wanted this DIY rolling laundry cart to actually roll (hahaha), I add some casters. Also, if you don't know me enough already, I add casters to most anything. Why not? It makes life easier - trust me.
So, how does one go about adding casters to a basket? Well, it's pretty simple. This method never fails me as I do it all the time to wire baskets, wicker, anything! You just need a stash of zip ties (aka. cable ties) and some cute swivel casters with plates.
 To get the casters on I simply stick the right size and color zip tie through the weaving, making sure to wrap it around a couple strands of basket for strength. While you're at it, leave them poking out where the holes of the casters would be.
 Then, simply pull through the caster holes and tighten down. Last, use a pair of scissors to snip the excess off and you're done!

TEXTURE
Now time to add a bit of dimension to the whitewashed layer we created. I didn't want this to look like a brand spankin' new basket, so I grabbed my old paint brush to add a light coat of wax here and there. Once that's complete, it's time to put the lid back on this DIY rolling laundry cart. Thankfully, I had scrap leather left over from my Pottery Barn bench knock-off, so I just cut a couple of pieces and grabbed my Crop-A-Dile. Here's the steps to get it attach using eyelets:

- Punch the leather with the size punch of your choosing on the Crop-A-Dile
- Insert an eyelet making sure it is in both layers of leather
- Press the eyelet with the Crop-A-Dile to attach
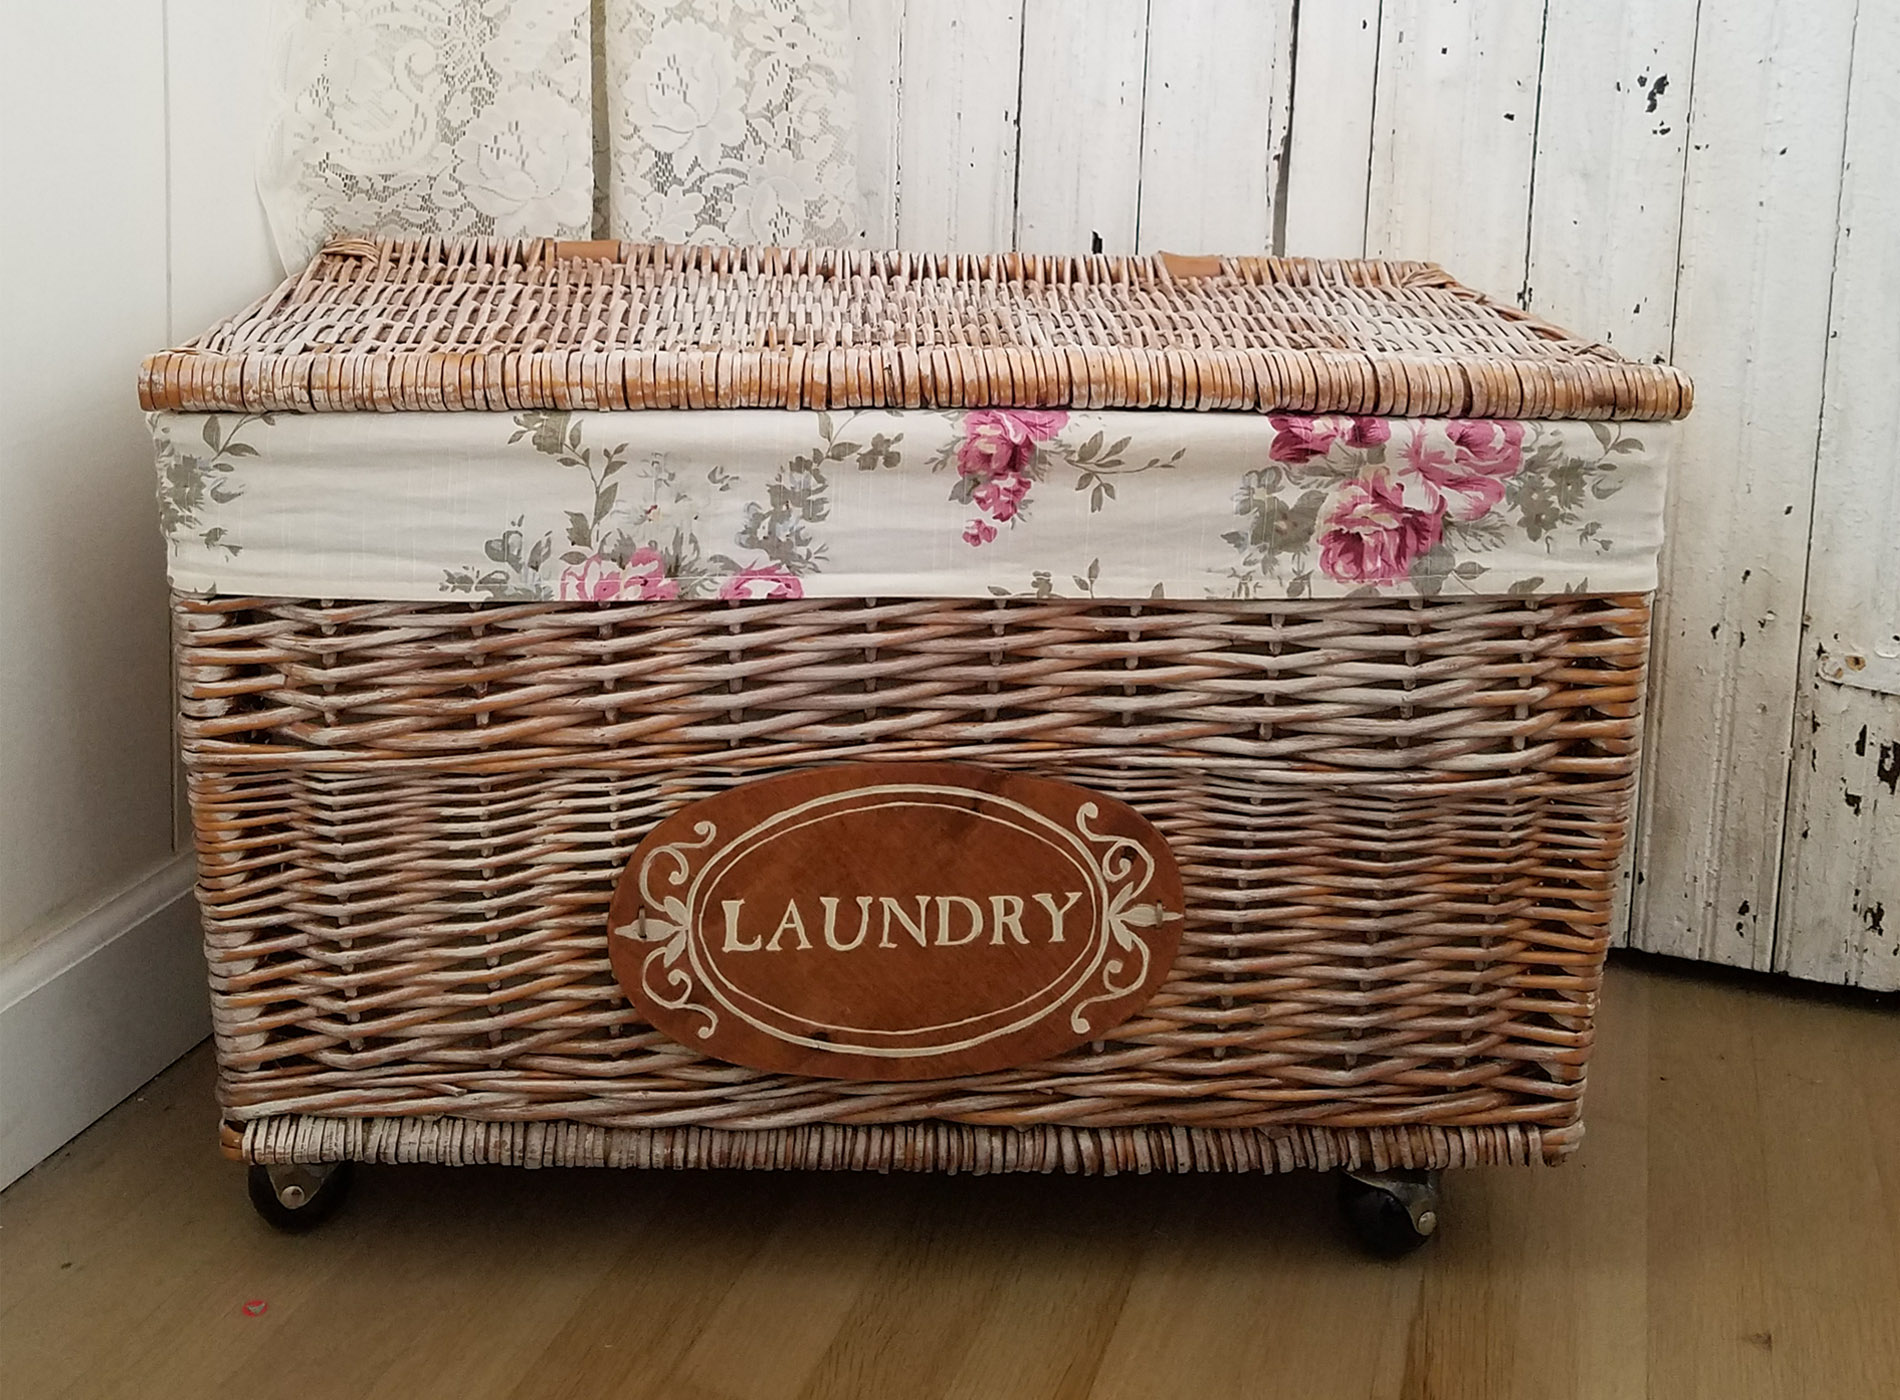
 Finally, one last thing to add to this makeover. We have the DIY part, we have the rolling part, now we need the laundry part, right? Last, to add a bit more flair, I cut out a piece of scrap luan (thin plywood) from my stash with my jig saw and used my transfer method to create a graphic. Then, I hand-painted it in and attached the sign with zip ties too. Seriously, aren't zip ties awesome?!
THE REVEAL
And our basket complete DIY rolling laundry cart is done. I love it! The liner was in excellent shape. All I did was launder it and give it a refresh. Also, the roses make this piece so pretty, doesn't it? I was tempted to make a ticking lining, but decided to just leave it as is.

 In addition, the leather hinges I created make the basket functional again and add a sort of rustic feel.
 The extra touch of the sign just makes it something fun to look at. And who knows? Maybe the kids will actually put their dirty clothes in there...right? That is if they are old enough to read - ha!
 Baskets in all shapes and sizes are a pure addiction of mine. It's easy to see why - they have endless uses! Do you agree?
 As much as I'd like to keep this gem, I have decided to offer it in my shop. Someone better purchase it fast before I choose to keep it! hee hee hee.
[metaslider id=30251]
SHARE
Additionally, pin and share this simple tutorial for a DIY rolling laundry cart. These things make life so much simpler! Meanwhile, stay tuned and be sure to sign up for my newsletter. Until next time!

Also, more projects like my DIY rolling laundry cart:

