Fall is just around the corner and it's one of my favorite seasons. For me, living in farm country, it means harvest time! All the wonders of creation performing their grand finale and we get to reap the benefit of such splendor. There's nothing like a cup of hot cider on a cool fall evening, a hearty pile of pumpkins, or a long hayride with our loved ones. That's what I envisioned when deciding what to create for this month's Power Tool Challenge. (there's all sorts of DIY goodies for you at the bottom of this post!) Here is my treat to you, a fall harvest sign.

For my project, I wanted a rustic harvest sign that would bring back memories and also create them too.
DIY TIME
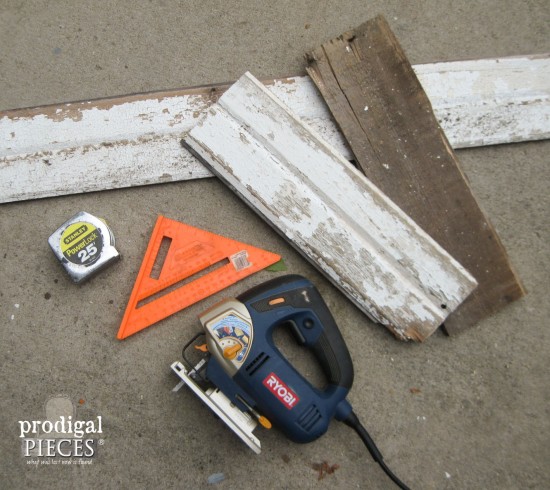
Want to create one of your very own? I've got the DIY details for you! Just grab your jigsaw, some scrap or new lumber and let's get to work.
 (note: I used chippy siding for my project and this is totally up to your interpretation. Have fun with it and mix it up if you'd like. I've added the details for using a 1" x 6" x 8' raw pine board in the materials list below. Home Depot can cut the boards for you for free.)
Here's what you'll need to make a harvest sign:
- jigsaw
- 2 - 1" x 6" boards 24" long
- 2 - 1" x 6" boards 18" long
- woodworking square
- tape measure
- 5" x 7" paperboard for template (a cereal box, notepad backing, etc)
- pencil
- sandpaper
- safety goggles
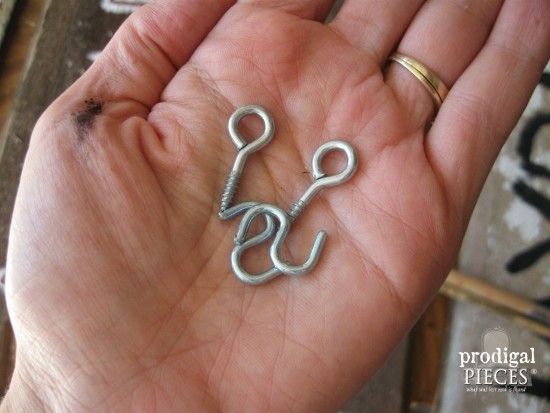
- hook and eye hangers (6 hooks, 6 eyes) - you could also use wire or an old hanger cut up.
- flush mount picture hangers
- chalk
- paint/paint brush
- stain (if using raw lumber)
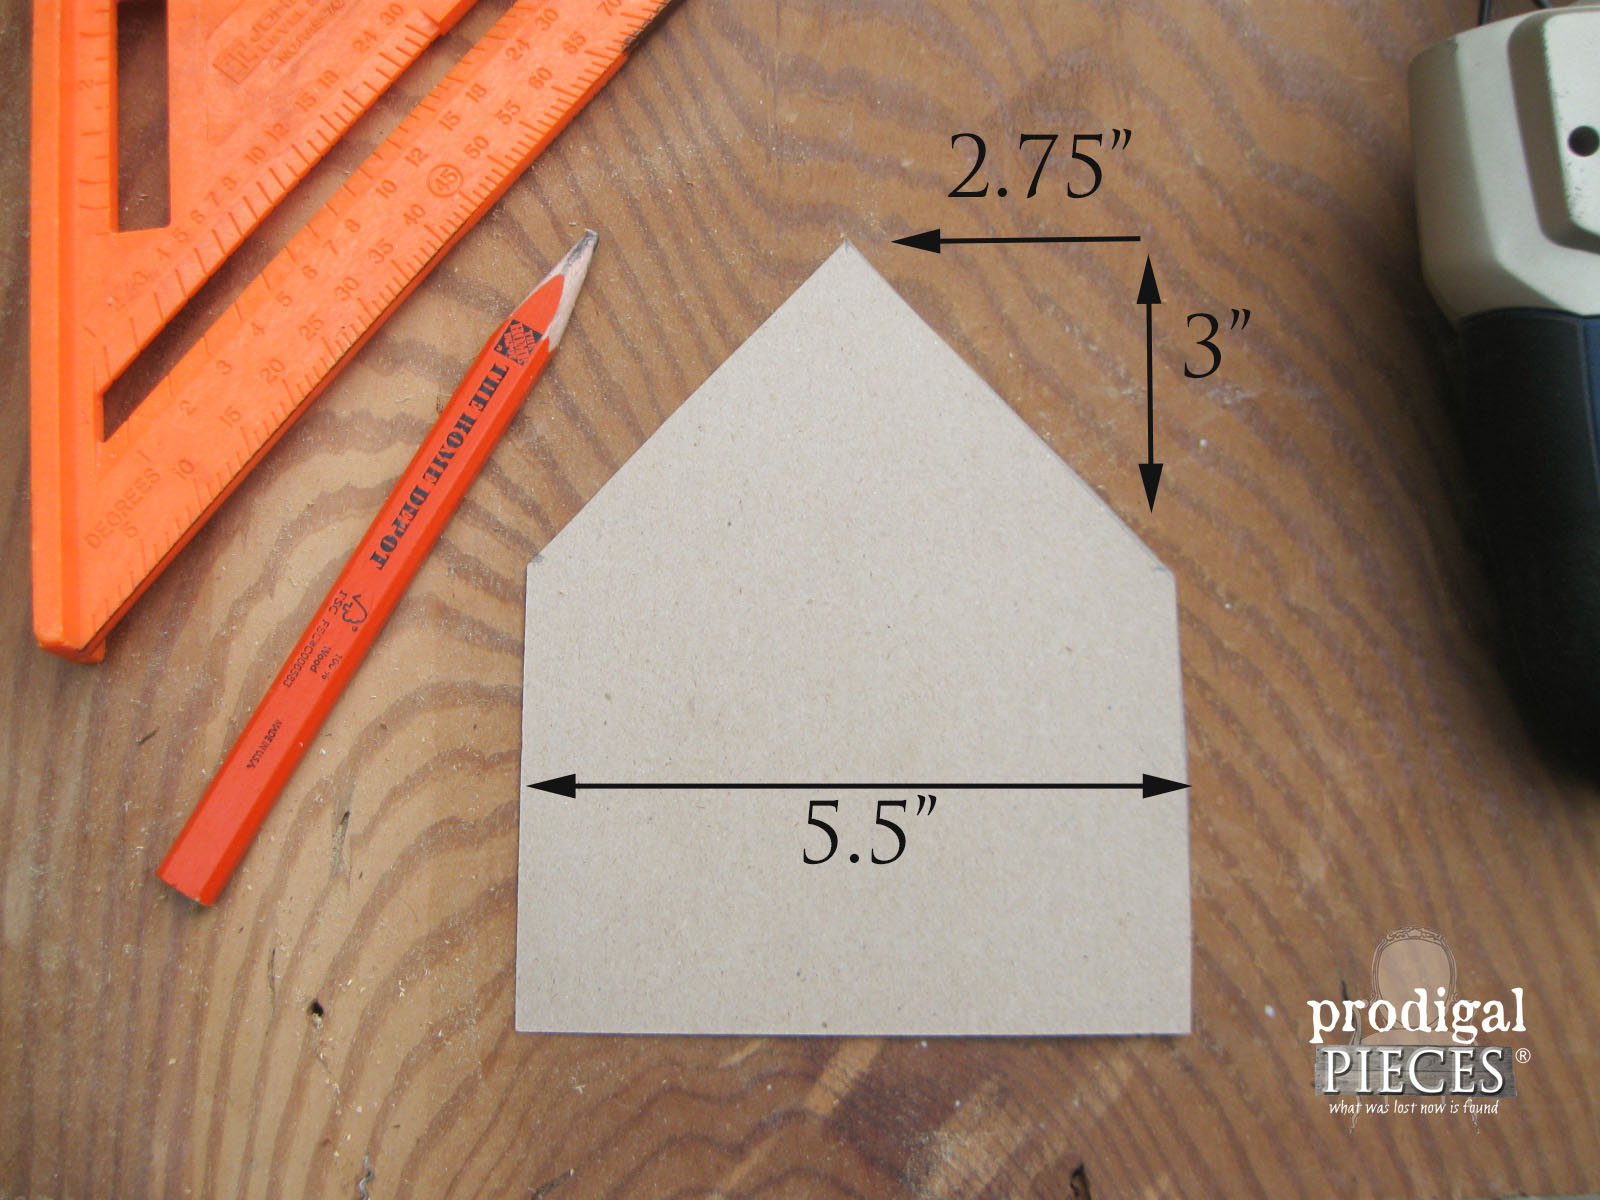
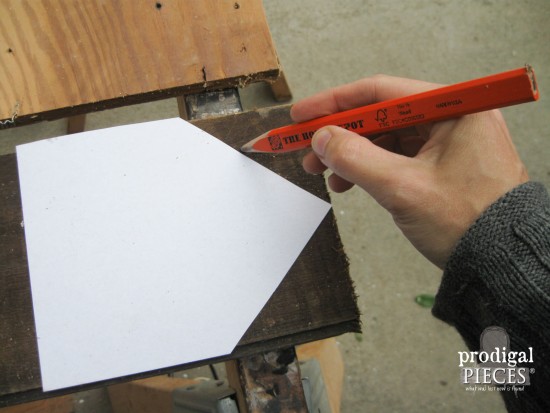
Let's make your template first. First, grab your paperboard and follow the sizing in the picture to cut it into a house shape:
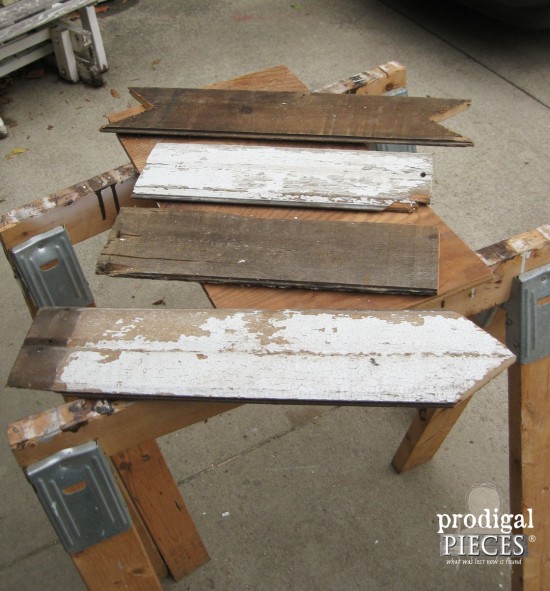
Now that you've got your template, let's put it to work. You will be using this to create two different boards. Then, for the first 24" board, you will put the template with point facing outward (like an arrow) and lined up to the edge and trace.
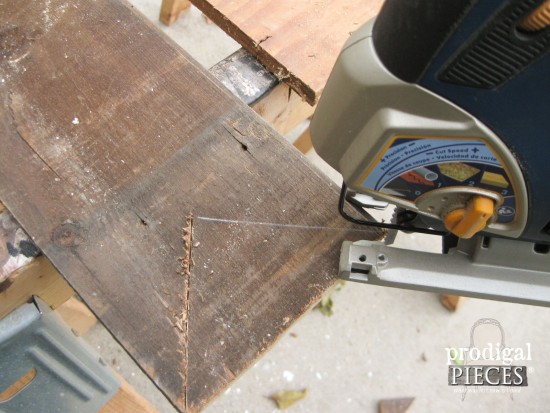
Next, cut off corners, and lightly sand to remove rough edges. One board done!
NEXT STEPS
First, grab your second 24" board and place the template facing inward and lined up with the outside edge. Then, trace and cut. When cutting, run your saw down in one side, and then come back out and start a fresh-cut going down the other. That will give you a nice, crisp, point. Also, do this to both ends and lightly sand again.
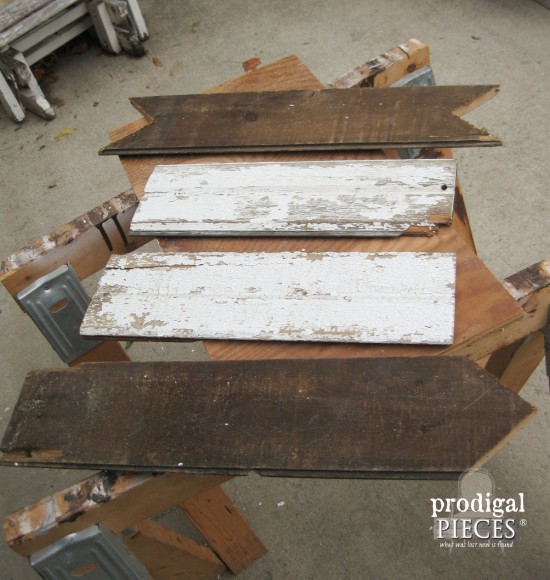
All your boards should be cut and you're ready to decorate. Yay!
If you're starting with raw lumber and want to create an aged effect, just head to
my layering tutorial and choose the colors you would like. Also, to mimic the look on my sign, you would want a dark stain (any old stain will do) and a flat white paint.
Feel free to play with the layout. We took a vote in my family on which we preferred, but here are some options:
In the end, the effect we're going for is a rustic sign that looks like the farmer grabbed up some scrap wood and put this together to sell his goods. Likewise, you most certainly can get funky with it and use fonts and such to transfer typography (I had a hard time not doing that, but wanted to keep it easy to follow). I have a tutorial on how to do that
here.
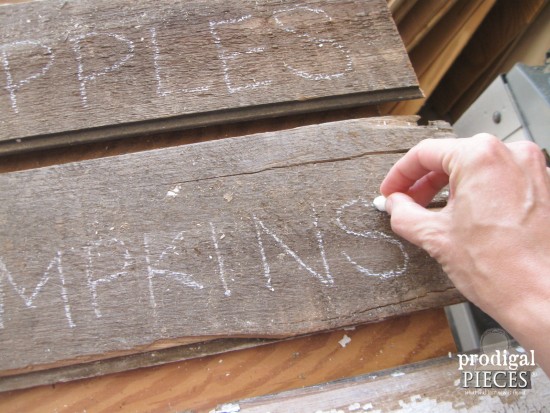
Just grab some chalk (blackboard or sidewalk chalk will do), and lay out your design. Feel free to change-up the text too - make it suit your style and home.
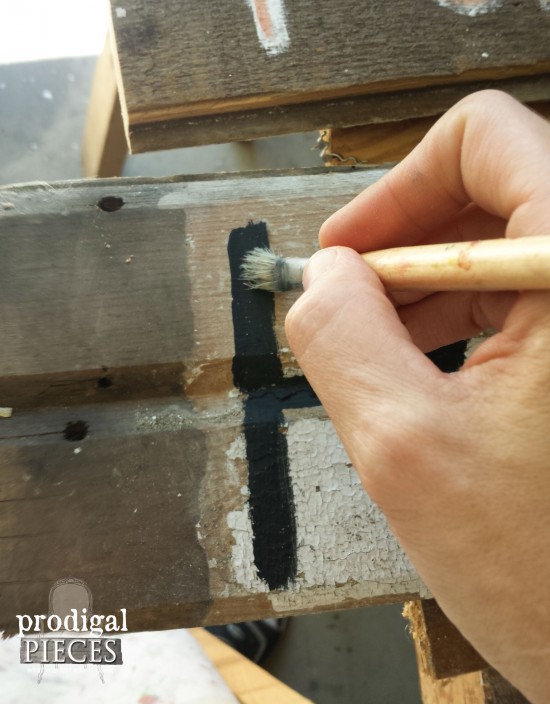
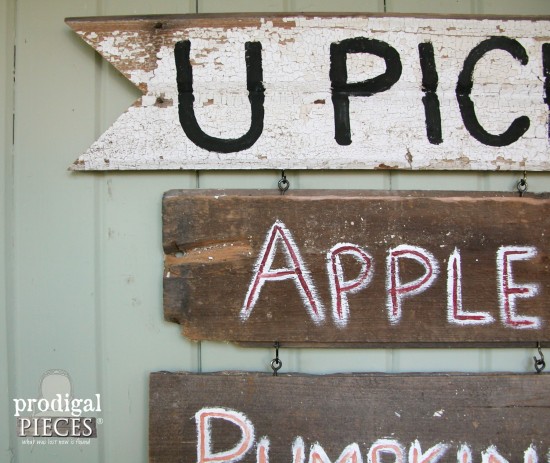
However, since I have contrasting boards, I used black paint on the white boards with a square brush.
...and white with colored inset on the darker boards.
ASSEMBLY
Finally, to hang your boards together, use the hooks and eyes to connect, as seen in the picture above. I've got eye hooks and s-hooks shown below, but I had hooks on hand and used those instead. When using hooks, just make sure one is facing forward and the other facing backward so your sign stays on if you're hanging it in the wind.
Finally, for the mounting hardware, just place your picture hangers 8" in from the ends of your top board and ¼" down from the top edge.

THE REVEAL
Now you're ready to hang and enjoy! Isn't it cute?
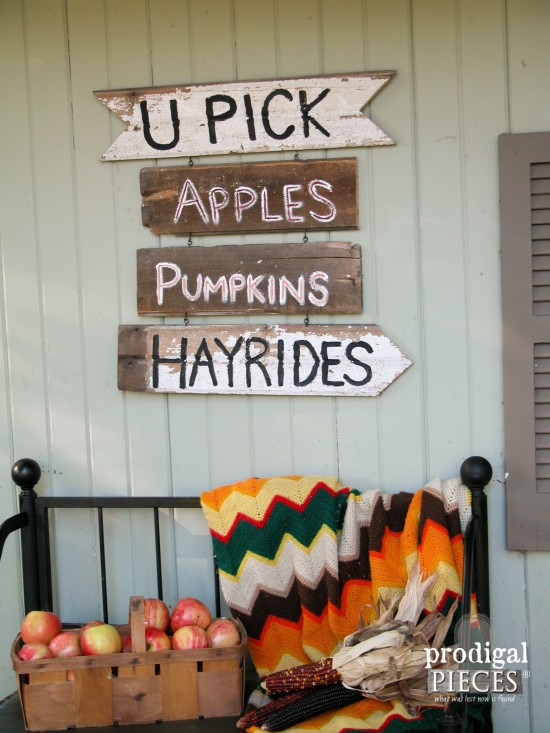
In addition, you could even add eye hooks to the top edge and mount it off of a post as a directional sign. Your family will love it! ♥ Not the DIY type? Then you can find this sign available in
my shop.

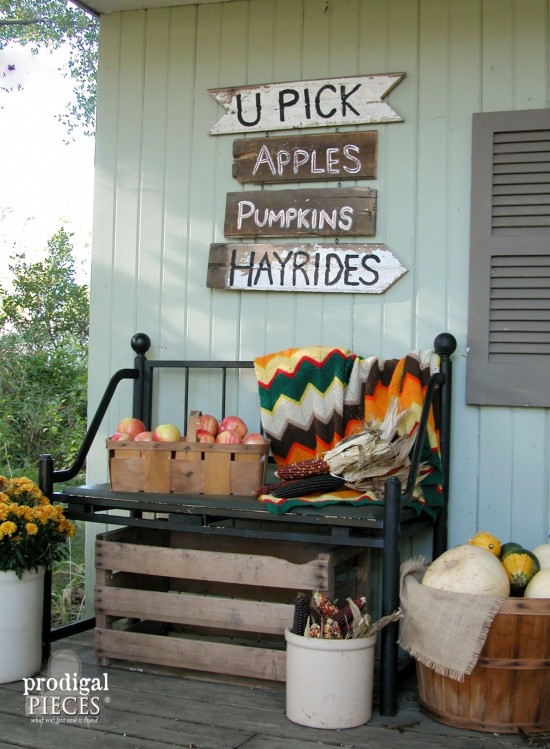
I hope you had fun with this harvest sign project. In addition, pin and share so others can build too! Head below for the Power Tool Challenge DIYs.

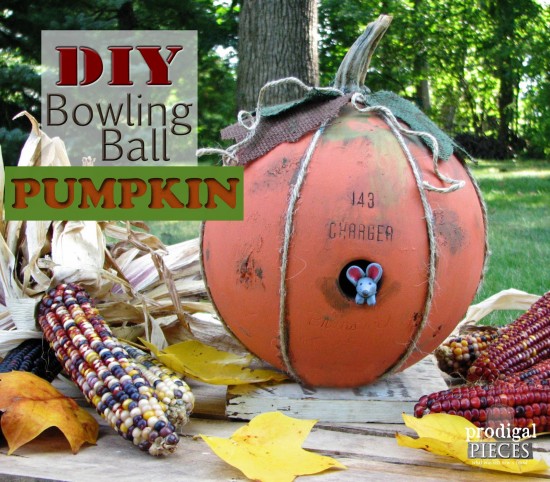
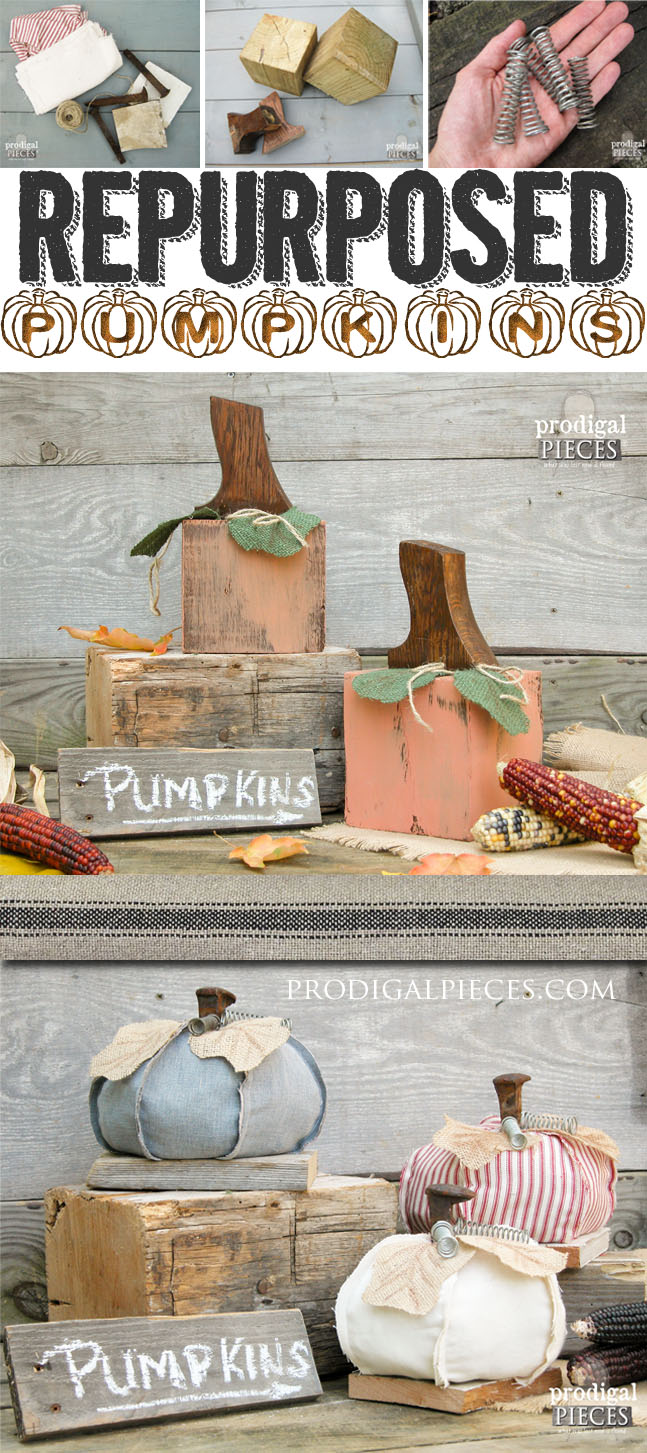
Also, more of my fall DIYs like my harvest sign:
Now before you head off, take a stroll through DIY lane. I know you'll be whipping out your tools when you see all this fall goodness from my blogging friends.

 For my project, I wanted a rustic harvest sign that would bring back memories and also create them too.
 (note: I used chippy siding for my project and this is totally up to your interpretation. Have fun with it and mix it up if you'd like. I've added the details for using a 1" x 6" x 8' raw pine board in the materials list below. Home Depot can cut the boards for you for free.)
 Now that you've got your template, let's put it to work. You will be using this to create two different boards. Then, for the first 24" board, you will put the template with point facing outward (like an arrow) and lined up to the edge and trace.
 Next, cut off corners, and lightly sand to remove rough edges. One board done!
 All your boards should be cut and you're ready to decorate. Yay!
If you're starting with raw lumber and want to create an aged effect, just head to my layering tutorial and choose the colors you would like. Also, to mimic the look on my sign, you would want a dark stain (any old stain will do) and a flat white paint.
Feel free to play with the layout. We took a vote in my family on which we preferred, but here are some options:
All your boards should be cut and you're ready to decorate. Yay!
If you're starting with raw lumber and want to create an aged effect, just head to my layering tutorial and choose the colors you would like. Also, to mimic the look on my sign, you would want a dark stain (any old stain will do) and a flat white paint.
Feel free to play with the layout. We took a vote in my family on which we preferred, but here are some options:

 In the end, the effect we're going for is a rustic sign that looks like the farmer grabbed up some scrap wood and put this together to sell his goods. Likewise, you most certainly can get funky with it and use fonts and such to transfer typography (I had a hard time not doing that, but wanted to keep it easy to follow). I have a tutorial on how to do that here.
Just grab some chalk (blackboard or sidewalk chalk will do), and lay out your design. Feel free to change-up the text too - make it suit your style and home.
In the end, the effect we're going for is a rustic sign that looks like the farmer grabbed up some scrap wood and put this together to sell his goods. Likewise, you most certainly can get funky with it and use fonts and such to transfer typography (I had a hard time not doing that, but wanted to keep it easy to follow). I have a tutorial on how to do that here.
Just grab some chalk (blackboard or sidewalk chalk will do), and lay out your design. Feel free to change-up the text too - make it suit your style and home.
 However, since I have contrasting boards, I used black paint on the white boards with a square brush.
 ...and white with colored inset on the darker boards.

 Finally, for the mounting hardware, just place your picture hangers 8" in from the ends of your top board and ¼" down from the top edge.

 In addition, you could even add eye hooks to the top edge and mount it off of a post as a directional sign. Your family will love it! ♥ Not the DIY type? Then you can find this sign available in my shop.
 I hope you had fun with this harvest sign project. In addition, pin and share so others can build too! Head below for the Power Tool Challenge DIYs.


 Now before you head off, take a stroll through DIY lane. I know you'll be whipping out your tools when you see all this fall goodness from my blogging friends.