 About seven years ago we set this up when we added our DIY raised garden beds to collect water for our needs. Its super handy and we enjoy having it in our garden arsenal. However, there are a few things we learned that would make things easier, but I also tend to take things to the next level...literally.
Our rain barrel can be seen from the curb, so it was key for me to keep it working with our design. If you haven't figured it out yet, my barrel is a food-grade 55 gallon drum that used to house apple juice. I bought two drums, one for this and the other for a compost tumbler we built. So, that means that you can do this too!
About seven years ago we set this up when we added our DIY raised garden beds to collect water for our needs. Its super handy and we enjoy having it in our garden arsenal. However, there are a few things we learned that would make things easier, but I also tend to take things to the next level...literally.
Our rain barrel can be seen from the curb, so it was key for me to keep it working with our design. If you haven't figured it out yet, my barrel is a food-grade 55 gallon drum that used to house apple juice. I bought two drums, one for this and the other for a compost tumbler we built. So, that means that you can do this too!
DIY TIME
First, if you want to set up a DIY rain barrel of your very own, consider finding a food-grade 55 gallon drum. I paid about $40 for one, so this is definitely affordable as opposed to those expensive store-bought ones. Second, you'll want to purchase a diverter kit. It fits standard home downspouts. However, you'll also want to make sure you are legally allowed to collect water in your city. Some, unfortunately, have limitations. Next, you can use your drum as-is or dress it up. I used second-hand paint many moons ago, but now I'm going to make this puppy sing. haha. In order to do that, I need some fun tools.Materials
*post sponsored by HomeRight see full disclosure
-
- exterior paint of choice: I used Maple Glaze for base, and a Charcoal for wood grain, Black for the rings
- paint brush
- diverter kit
- painter's tape
- chalk
- foam paint brush
- plastic primer (optional)
Tools:
- sprayer
- wood graining tool set
STEP 1
Let's get started! First, I begin by cleaning my barrel inside and out. Plus, I make sure all peeling paint is removed. To quickly coat my barrel, I break out my Quick Finish Sprayer, and fill up with an exterior paint. Before beginning to spray, I practice on the cardboard to get my flow settings as I like. Then, I apply one coat. With my sprayer, I knock out the first coat in minutes. See it at work in my video below.


STEP 2
Next, while the paint needs to cure for approximately 2 hours, I clean up my sprayer. Then, I use the cure time to spray paint my diverter. Back in the fall, I painted my downspouts to a metallic finish and want my accessories to match. Specifically for the hose, I used this plastic primer to make it ready for paint.

STEP 3
Then, after the second coat is cured, it's time to add the fun. (if you want to). For me, I wanted my rain barrel to have a rustic effect, so I wanted to add wood grain to make it look like an old wooden barrel. Using school chalk, I eyeball lines down the side and across the top to help me get my visual. Notice I'm making them kind of bow out from center to make the barrel look more rotund. When you're happy with the line placement, use your foam brush and charcoal paint to make the lines. No need to be picky on how good they are, just get them on, and let them cure.

STEP 4
Grab your wood-graining tools and let's have some fun! This part is totally free-for-all. you've been following along to my remodel on social media, you can see how I've been using this tool to rework our interior door. The basic jist is to paint on a stripe of paint, then use the tool to run it over the paint, walking it back and forth as you go. You can see it in action over in this post HERE. With the rounded surface, it's best to run the tool over the area in strips. However, if the surface was flat, it would just be one pass. Make sure to let the paint cure before moving on.
STEP 5
Last, but not least, we want to add rings to our DIY rain barrel to give it the authentic feel. I use my painter's tape to mark off rings. My barrel already has some raised rings, but if yours doesn't, just measure and mark. Then, using the paint brush, apply the black paint (or whatever color you choose) to the rings. I used two coats for a solid effect.
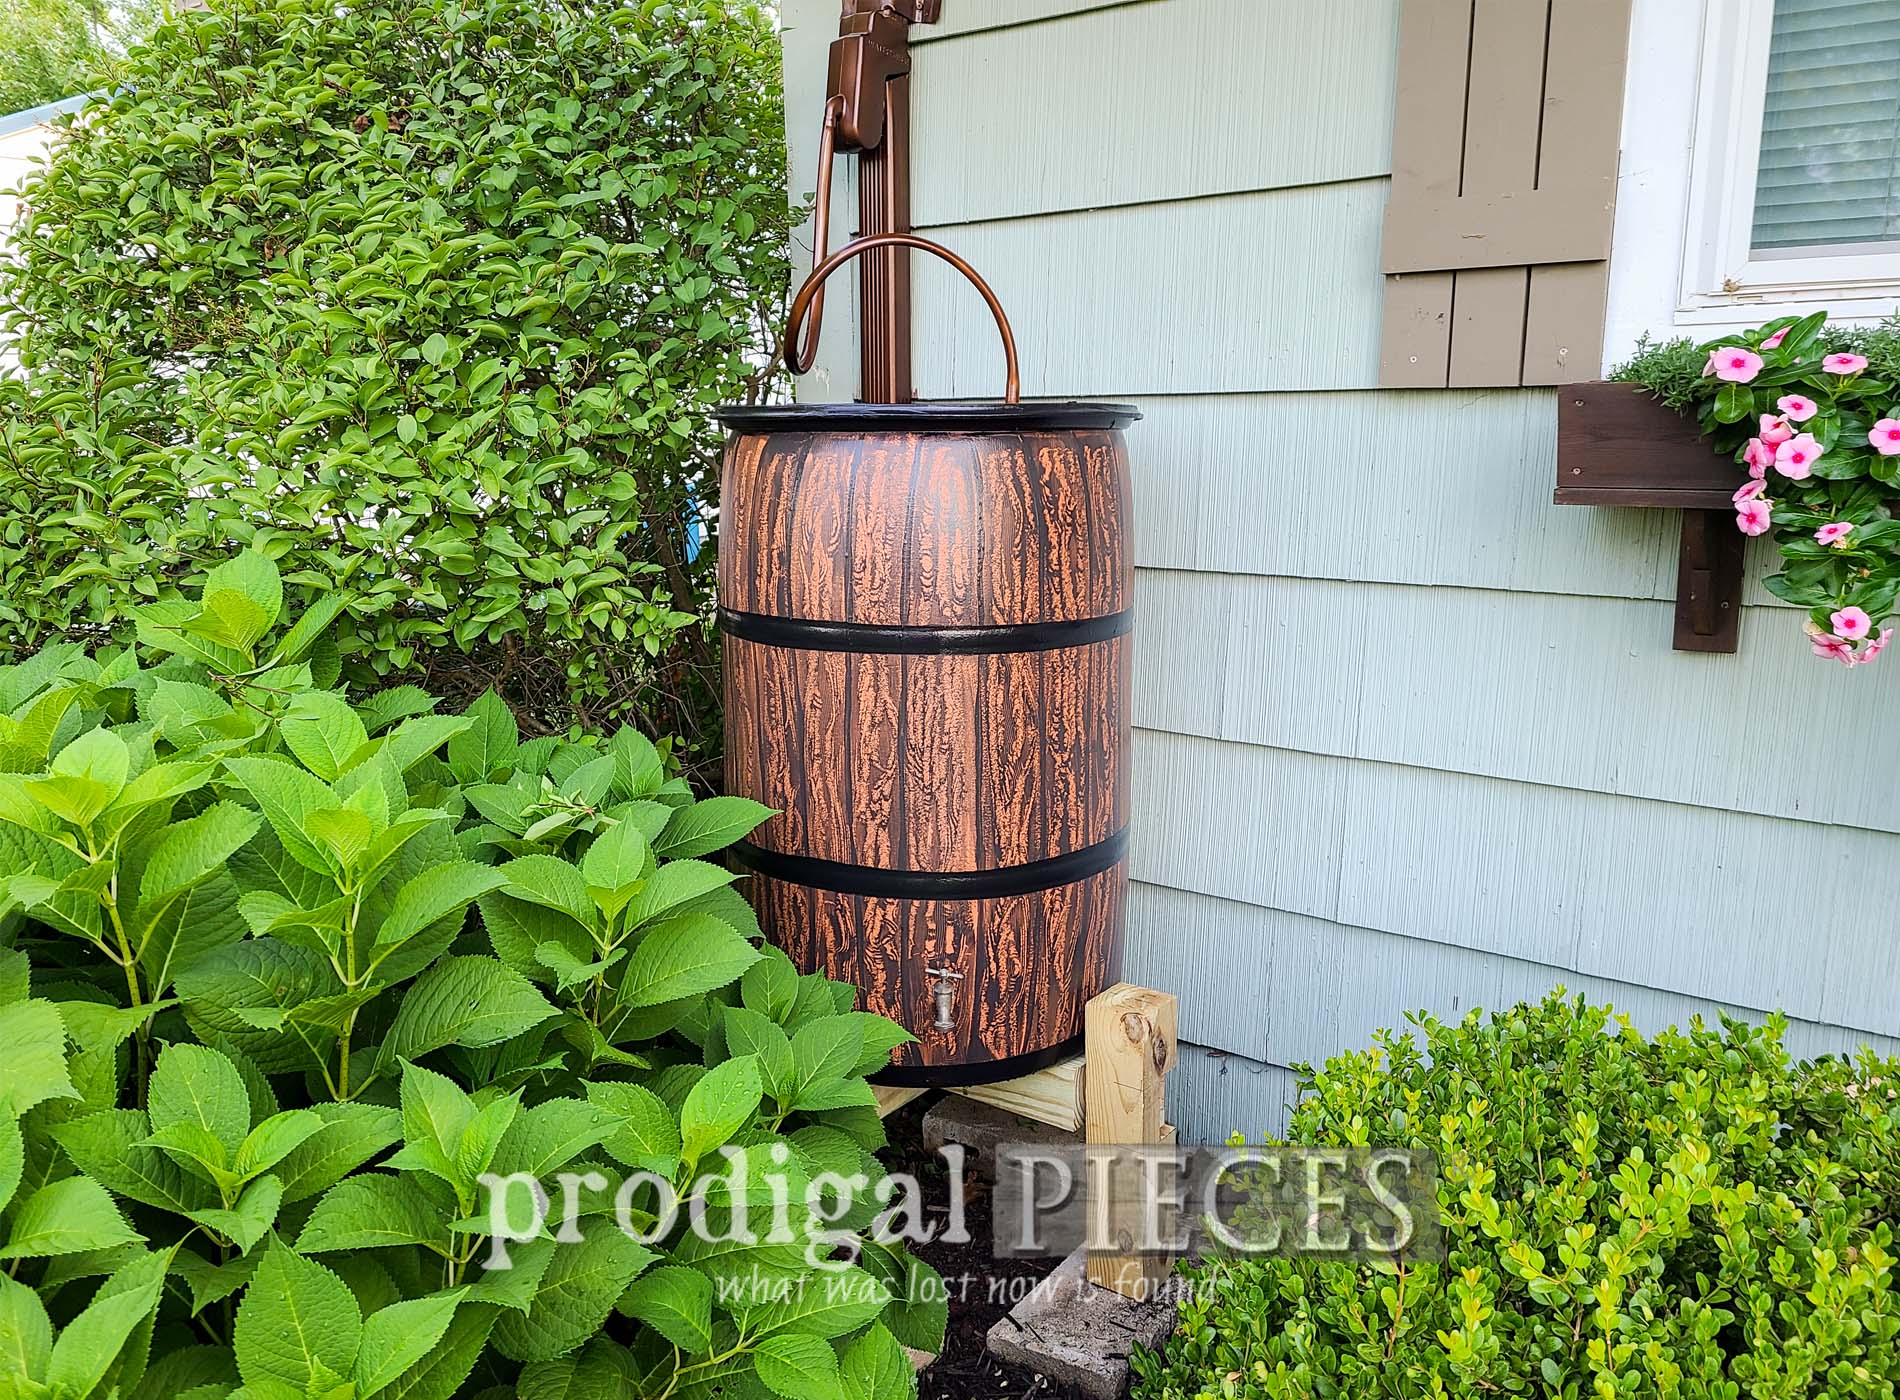
THE REVEAL
Here is my DIY rain barrel with the faux wood grain look. I love it!
 Did you notice the stand? I want our barrel to be taller to fit 5-gallon buckets under it as well as aid in gravity flow.
I got the plans for this at The Handyman's Daughter. Their plan is easy and adjustable, so I saw no reason to reinvent the wheel. The wood is still green, so when it cures, we will stain and dress it up a bit.
Did you notice the stand? I want our barrel to be taller to fit 5-gallon buckets under it as well as aid in gravity flow.
I got the plans for this at The Handyman's Daughter. Their plan is easy and adjustable, so I saw no reason to reinvent the wheel. The wood is still green, so when it cures, we will stain and dress it up a bit.
 Once I had it all together, I had to giggle because if I had done a different effect to my barrel, it could look like a still. haha!! Wouldn't that make heads turn?

 If you're curious about hooking up the diverter set, just follow the instructions. It's easy and just requires a cut in your downspout, then the hose added. You can even winterize your barrel as the season requires.
 Now, my rain barrel is no longer an eyesore, but rather adds whimsy to my already fun garden. Yes, it's in our front yard...the mowlessgrow more mentality. ;)
 Also, pin and share this DIY rain barrel project to inspire others to get into garden fun and become self-sufficient.
 To get these DIY tips & tricks in your inbox, be sure to sign up for my newsletter. Until next time!

More garden projects like this DIY rain barrel:

