Oh, doesn't it feel so good to tackle a project that's been looming and be able to step back and say it is done? You know what I mean. There's those have-to kinds of projects and those want-to kinds of projects. Today, I'm pleased to say we were able to get our DIY patio & pergola update done. I do believe I hear angles singing! umm...that's actually just my kids. tee hee.

It has been 5 years since we began
our patio makeover journey. At that time we built the pergola, the furniture, and continued to add to our space. You can see the first "reveal"
HERE. While in most instances you should wait until pressure-treated lumber sits for a while before staining, it isn't always a must. You can see our addition of last-years fence we put up that we stained after installation and it's holding up well.

Also, if you look close, you can see our pergola is showing that it needs some lovin' too. We had planned to get this all done last year, but our trials left us waiting until this season.
DIY TIME
Normally at this time of year we would already have our curtains and lights up and be enjoying the summer days and nights. However, we wanted to tackle this project before settling in. Our first goal was to clean and prep the area. Because our patio has trees surrounding it, as well as a downspout that drains onto our patio, there are issues with mildew. I typically borrow a pressure washer from my dad to get the job done. This time, however, I treated myself to this beauty.

{{pause}} I just have to tell you that patience pays off. I have been waiting to purchase a pressure washer for years. One day I was waiting in my car for my kids to come out I saw a deal pop up. If I bought this unit within the next 18 minutes, I would get it half off. The bonus is I had a $65 credit in my account. So, I essentially only had to fork out $65 more. SOLD! Don't you love when that happens?
To say I am skip-happy is an understatement. I'm a clean freak in most instances and I don't like to bug others for help. This allows us to get our jobs done on our own. First up, we test it out on our backdoor steps. I've shared a video below of this DIY patio & pergola update. You can see it in action there. Then, I set up to refresh our faux fireplace. (
tutorial HERE)

Talk about therapy washing that mildew blast away. woot!
NEXT STEPS
Back a couple of years ago I won a contest for my BEEP chest of drawers. I purchased this patio set with my winnings and updated it with my
DIY thrifty patio pillows.

Presently, they are faded, smell blucky, and are also chewed up by squirrels and chipmunks. The little buggers climb under our tarp during winter and use the fabric and stuffing for nesting materials. ugh. One of my cushions has a huge hole under it. ssshhhh...don't tell.

I've been waiting for over 2 years to build a wooden sectional for our space that will sit all 8 of us plus guests. It looks like I'll have to keep waiting. It's all good!
UPDATE: We built it DIY style!
HEAD HERE.
On the next rainy day, I spend time sewing new covers for all 6 pillows. Easy and the most affordable way to update.
FINAL STEPS
Last, it's time to refresh the stain. The grain of the wood is in great shape, so I the prep I need to do is cleanup of mildew under the tree and smooth down any rough spots. Since my daughters and I wanted to tackle this together, we use rollers and brushes so we could all be out there at the same time. I say they deserve a round of applause for stepping up and helping, don't you?

Meanwhile, I'm up on our ladder hitting the high spots. I'm so absolutely thankful for this adjustable step/extension ladder I purchased a year or so ago. Last time, I had my neighbor's folding ladder and that was horrid. This one adjusts short on one side and long on the other to allow me to reach tricky spots on our slope.

In addition, I'm also thankful for a couple of beautiful weeks to work. The pergola is complete in less than a day. Yay! This was my view for most of the day.

For those of you interested, we used a solid stain by Behr in Cordovan Brown. Solid stain is different than paint. It absorbs into the grain as opposed to resting on top like paint. Plus, the solid will give longevity more than semi-transparent, or transparent. We used a semi-transparent on our fence in the background.
TOOLS & DECOR
All that's left now is to put up our decor and take a rest.

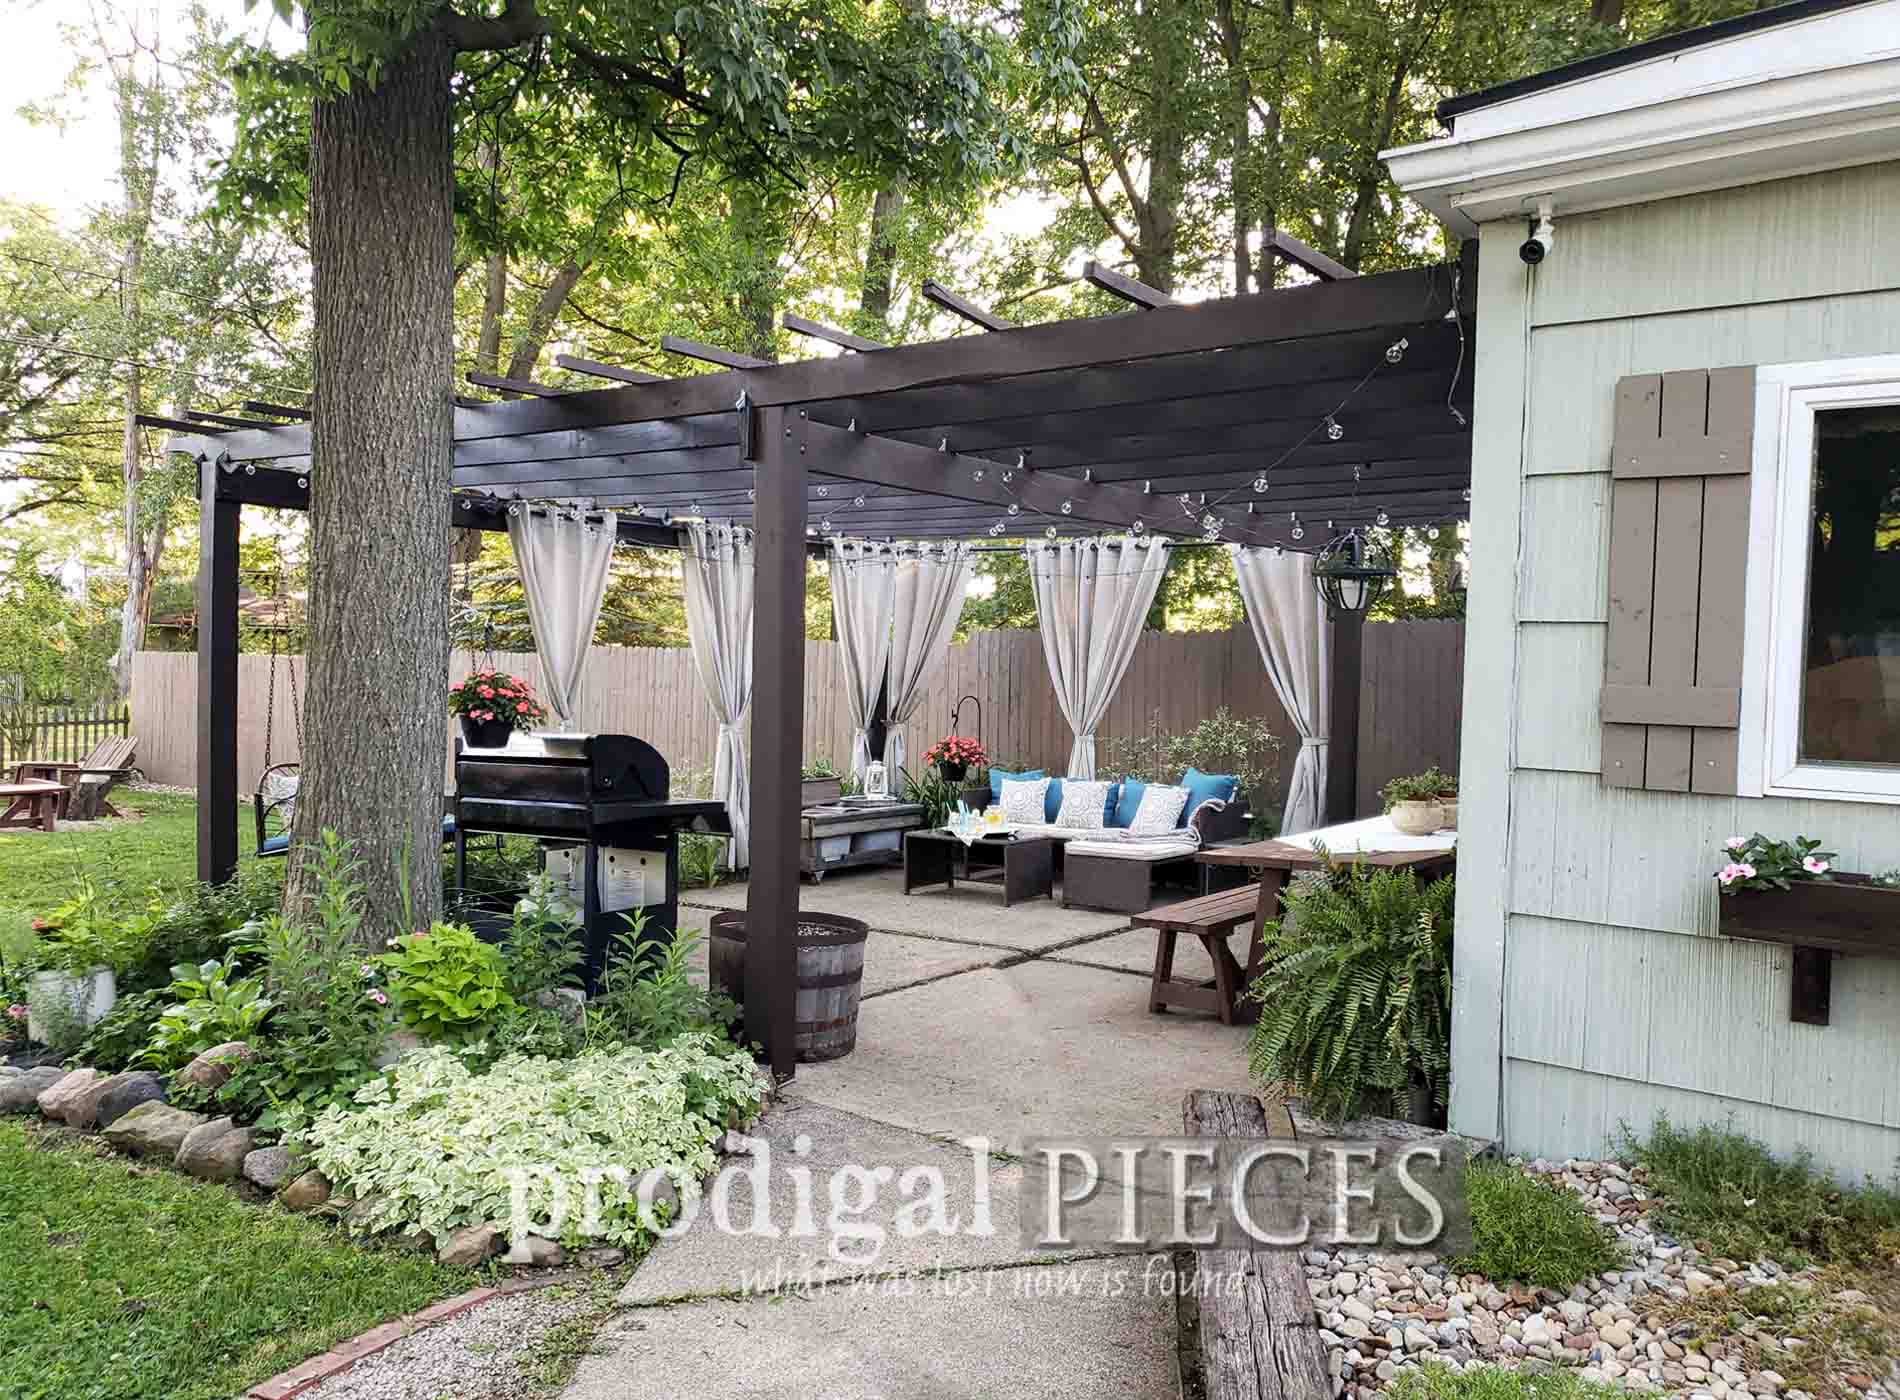
THE REVEAL
Finally, we can see the fruits of our labor have paid off in our DIY patio & pergola update.


After a rain, we have a damp place to be, but thankfully it dries up pretty quick with the sun and slope running it off. Our table is our favorite place to enjoy summer dinners and desserts. It sits 12, so plenty of room for a few guests to join us.

Also, our faux fireplace is clean and ready to go with a new coat of poly. We just love how much charm it adds to our space.


This time around, I chose to use blue accents. If we are here by next year, we will be siding the house. So, I wanted to change the exterior doors color to a blue instead of red. In
our recent garden shed remodel, I used a gorgeous blue and that inspired my patio colors.


Through the winter, I had been saving my pennies to purchase a new swing since our hand-me-down one was rotted. Thankfully, I also had some "cash back" from a store that paid for the cushion. Yippee!!


MANY THANKS
As is always the case, I am ever so thankful for my wonderful family. We know how to come together to get the job done, to fill in where needed, and support one another. This isn't my entire crew, but snapped a pic while we were enjoying an evening on our patio.


We hope you've enjoyed this project of ours. Our goal is to inspire you to tackle those daunting projects because they are typically easier than you think. Don't let the obvious distract you from trying. You can celebrate when you're done!

Also, do pin and share our DIY patio & pergola update to inspire others.

OTHER RELATED POSTS:
To get these DIY tips & tricks in your inbox, be sure to
sign up for my newsletter. Until next time!

Also, more outdoor projects like our DIY patio & pergola update: