While the days are flying by, I sometimes feel like all I can do is try to keep up. Do you savor each day? My kids are growing not only in stature, but also maturity. With that, comes wanting to step away from childish ways and enter the adult world. It happens so crazy fast! Take a peek at this vintage silverware chest. It's not much to look at now, but I intend to create a DIY jewelry box for one of my daughters who is becoming a beautiful young woman.

 What I like about this silverware box is that it has a lid on top with a drawer below. That offers plenty of room for necklaces, bracelets, and rings. Plus, it has this lovely brass hardware the just needs a good polishing with Bar Keepers Friend.

LET'S BEGIN
As you can imagine, I first begin to take apart the silverware box. I pull out the interior to see what I'm going to be working with. Likewise, if you want to see what I've done with other silverware boxes in the past (they're fun to do!), HEAD HERE. Or, watch this example in my video below.
 All looks to be in relative good condition. Also, at the same time, I take off all the hardware so I can tackle the box as well as polish the hardware for later.
 Next, when all is prepped, I take the box pieces outside so I can prime them. The dark stain used on the silverware box is sure to have bleed-through if I attempt to paint without primer. I lightly sand all pieces because there are plenty of scratches and scuffs. Then, I apply the Zinsser BIN primer with a micro foam roller.

FINE DETAILS
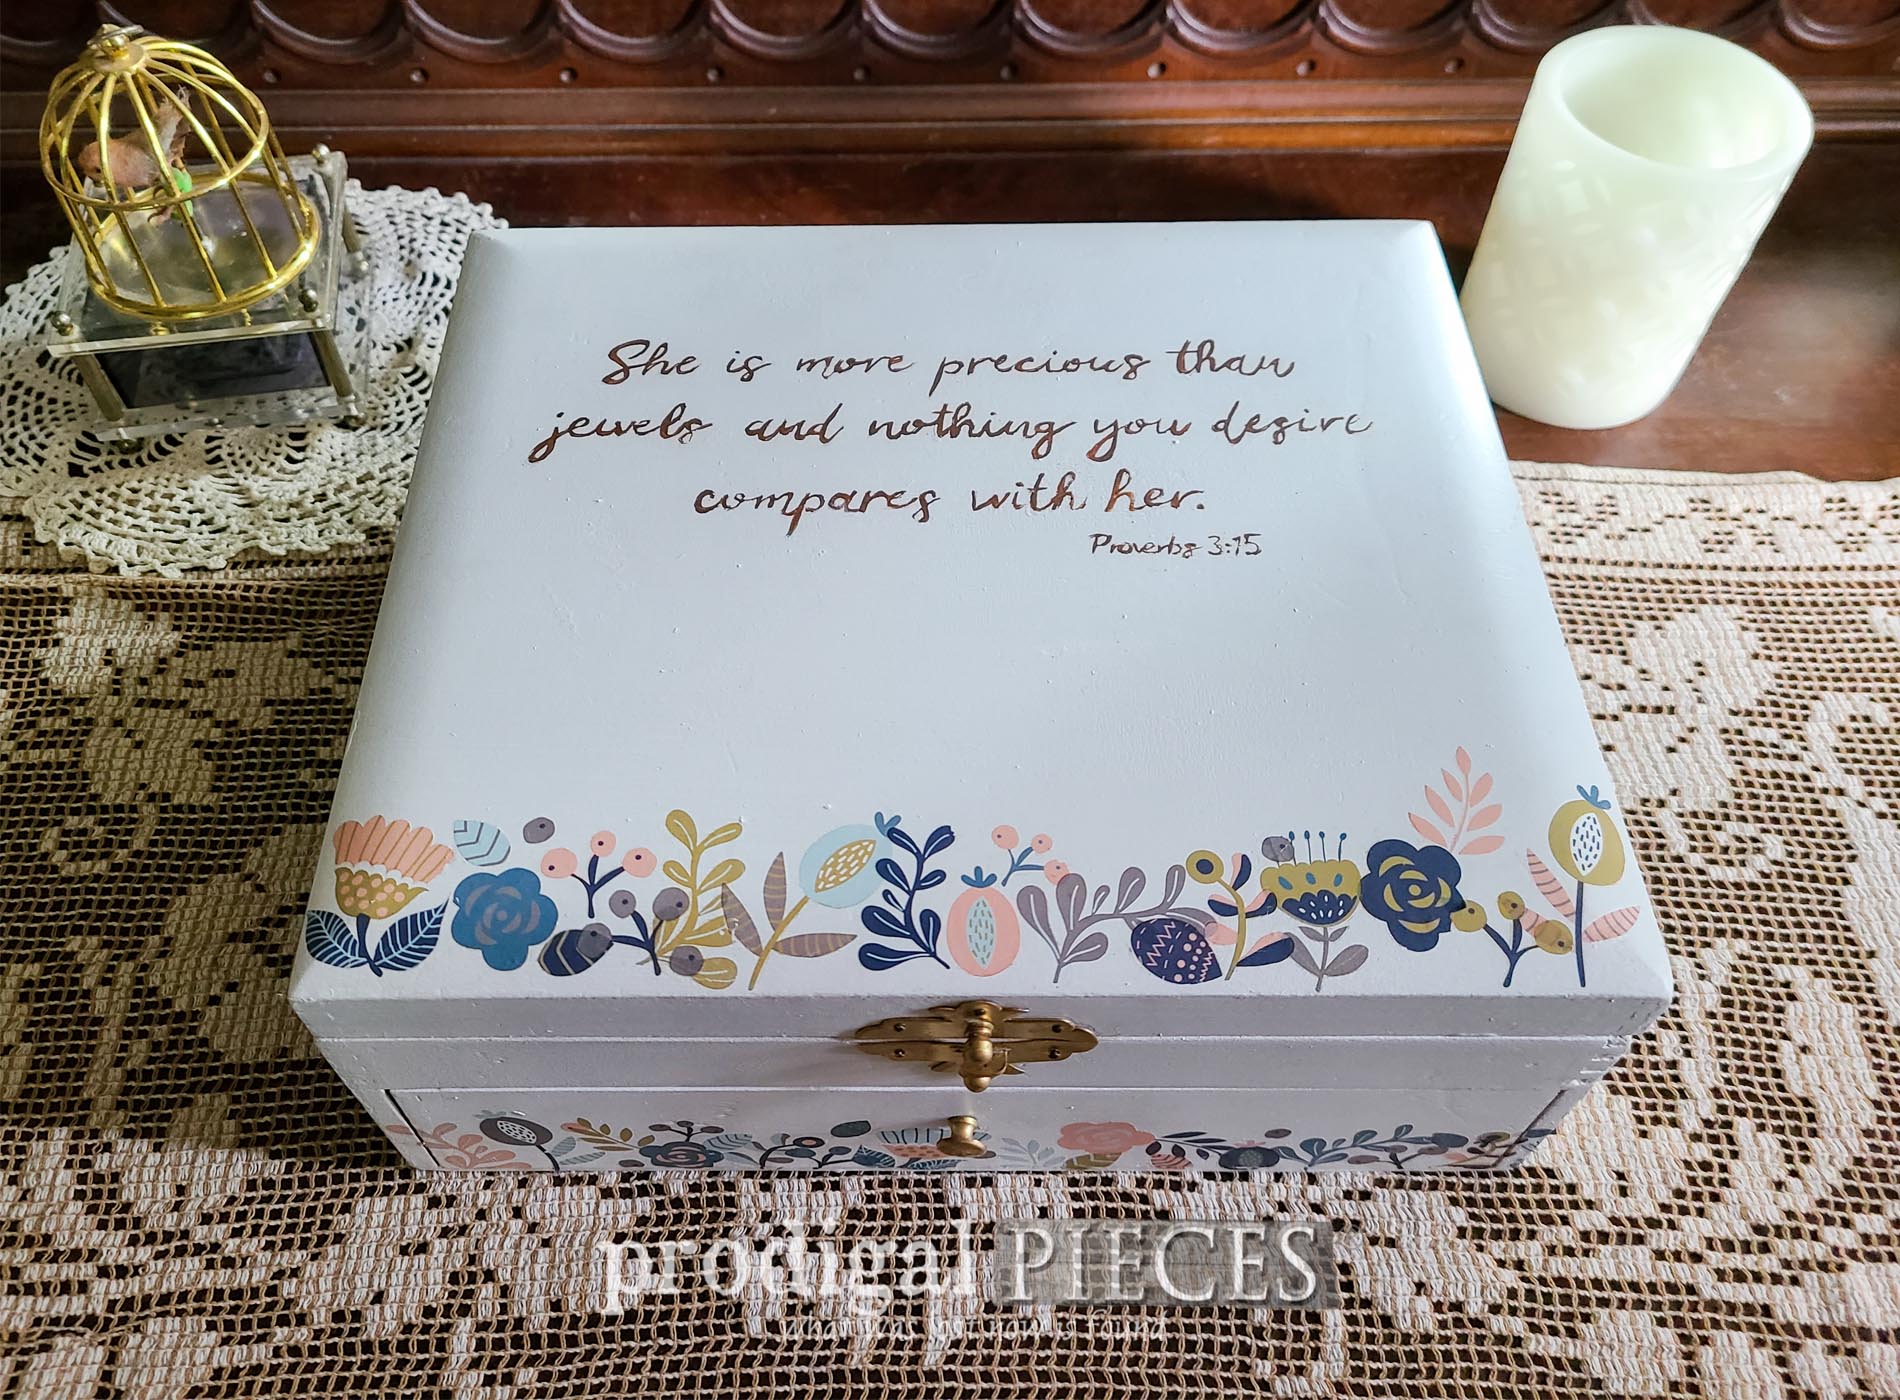
Now that I have a blank slate, I want to start the painting process. For the exterior of the box, I am using a soft white with two coats allowing to cure in between. However, for the drawer, I want a bit of a peek-a-boo effect to coincide with the colors I'm using. This is a color I custom-mixed for this upcycled hanging planter. Isn't it a pretty coral color? As soon as my coat of paint cures, I then want to line the box. Thankfully, I have a great stash of not only acrylic felt, but wool as well. I choose to use the good stuff for my daughter. Only the best for my girl! Last, but not least, I want to add a bit of floral accents in a sort of Boho(ish) vibe by using these transfers I find at a local store.
 After I rub them on, I use my own transfer tutorial to create typography art of one of our favorite Scripture verses.
THE REVEAL
Finally, after my little fun with creating, my DIY jewelry box for my daughter is ready for her to fill with her own treasures.
 I must say that I'm totally smitten with the color, transfers, the typography, and even the brass now a bright and beautiful accent. Additionally, the cherry on top is that Miss S loves it too. She can now graduate from her musical paperboard box donned with horses to this one. My baby girl is growing up and I couldn't be more proud. sniff...


 While the outside has the floral motif, the inside is showcasing that gorgeous green wool lining with a peek-a-boo drawer color. Likewise, if you notice, I have it staged in my antique farmhouse style bedroom. However, we are working on our girls' room remodel that has a bit of a different vibe, so stay tuned for that.

 Now it's time for you to find your own second-hand silverware box and have recreating it into something for you or someone you love. Are you ready to have a DIY adventure? Leave some comment love below, and also pin and share to inspire others too.
 Up next, I'll be transforming another piece of furniture from the girls' room makeover like the French Provincial desk set I redid HERE. Be sure to sign up for my newsletter to see! Until next time!

Also, more silverware box makeovers like this DIY jewelry box:

