What's new? Well, it's the last Tuesday of the month (already??), which means it's
Reduce, Refashion, REFASHION time. That means I take a discarded item that's typically used in fashion, home decor, or fabric items within your home. You can see all my previous creations by tapping/clicking on the text above or the graphic below. As for today, I need to make myself some new goodies for my kitchen arsenal as my old ones are
disgusting. What are they? Well, what you see is a DIY fabric bowl cover that I made ages ago from vintage bed sheets.


They are officially trash-worthy (yes, I said that), but want you to see what I have had hidden away in my kitchen drawer for far too long. I'm actually embarrassed to show you them, but you know they are LOVED! With that, also look at the underside...

...do you see the extra layer? That's something you don't see on most fabric bowl covers. It's a layer to keep moisture in (or out) by using a layer of PUL. PUL stands for polyurethane laminate that makes it a barrier for retaining moisture. I've mentioned it many times before:

Have you ever heard of it? In my home, I've used it to make wet bags, snack bags, cloth diapers, feminine hygiene products, shower caps, and more. IT'S SO AWESOME! Here's a glimpse of my stash as of now.

Further, I find it at a local fabric shop (skip the box stores) or small sellers online.
CUTTING TIME
Have I piqued your interest yet? While today's project is a sewing project, you can do this is you have a basic sewing machine and can sew a circle...really. Here's what you'll need:
- fabric for bowl cover - I'm using a linen bed sheet (consider cotton and natural fibers instead of polyesters, etc)
- PUL fabric for lining - if desired
- ¼" elastic - length will vary depending on bowl size
- coordinating thread
- safety pin
- scissors
- pencil
- sewing machine with heavy duty needle (you can use a 90/40 needle, but heavy duty does better with PUL)
- fabric clips - pins will make holes in your PUL, so if you don't have clips, consider paper clips or something similar
- iron/ironing board (optional)
STEP 1
First, you want to take the bowl you want a cover for, turn it upside down and trace 2" wider than the bowl rim. In my example, I'm using my old bowl cover adding about an inch so I can fold and create a casing instead of sewing on elastic as I did before.

Then, take the same bowl and trace another circle on the PUL about ½" wider than the rim. Cut and set aside.
STEP 2
Next, it's time to assemble our DIY bowl cover. In order to make this easier, I like to use my iron to press down the cover fabric ¼ - ½" to the inside so it makes sewing easier. After that, I place my PUL with fabric side facing up on top of the wrong side of my bowl cover fabric. Fold the pressed edge in to make a casing to accommodate your elastic, and clip in place.

STEP 3
As soon as you have the clips in place, sew down the inside edge about an eighth inch in to make the casing leaving an opening about 2" wide for inserting elastic. Don't be surprised if your casing has to be tucked or pleated a bit to make it lay flat - that's perfectly normal.
Finally, using a safety pin clipped to the elastic end, thread a length through the casing. Note: we're not cutting the elastic until we get it the right size to fit our bowl.

Last, while you have the elastic threaded into the casing, place it on your bowl and figure out how tight you want the elastic to be. Then, pin and cut it to length to have overlap of 1". Stitch the elastic down over the 1" overlap and stitch the casing opening shut.
STORAGE WITH STYLE
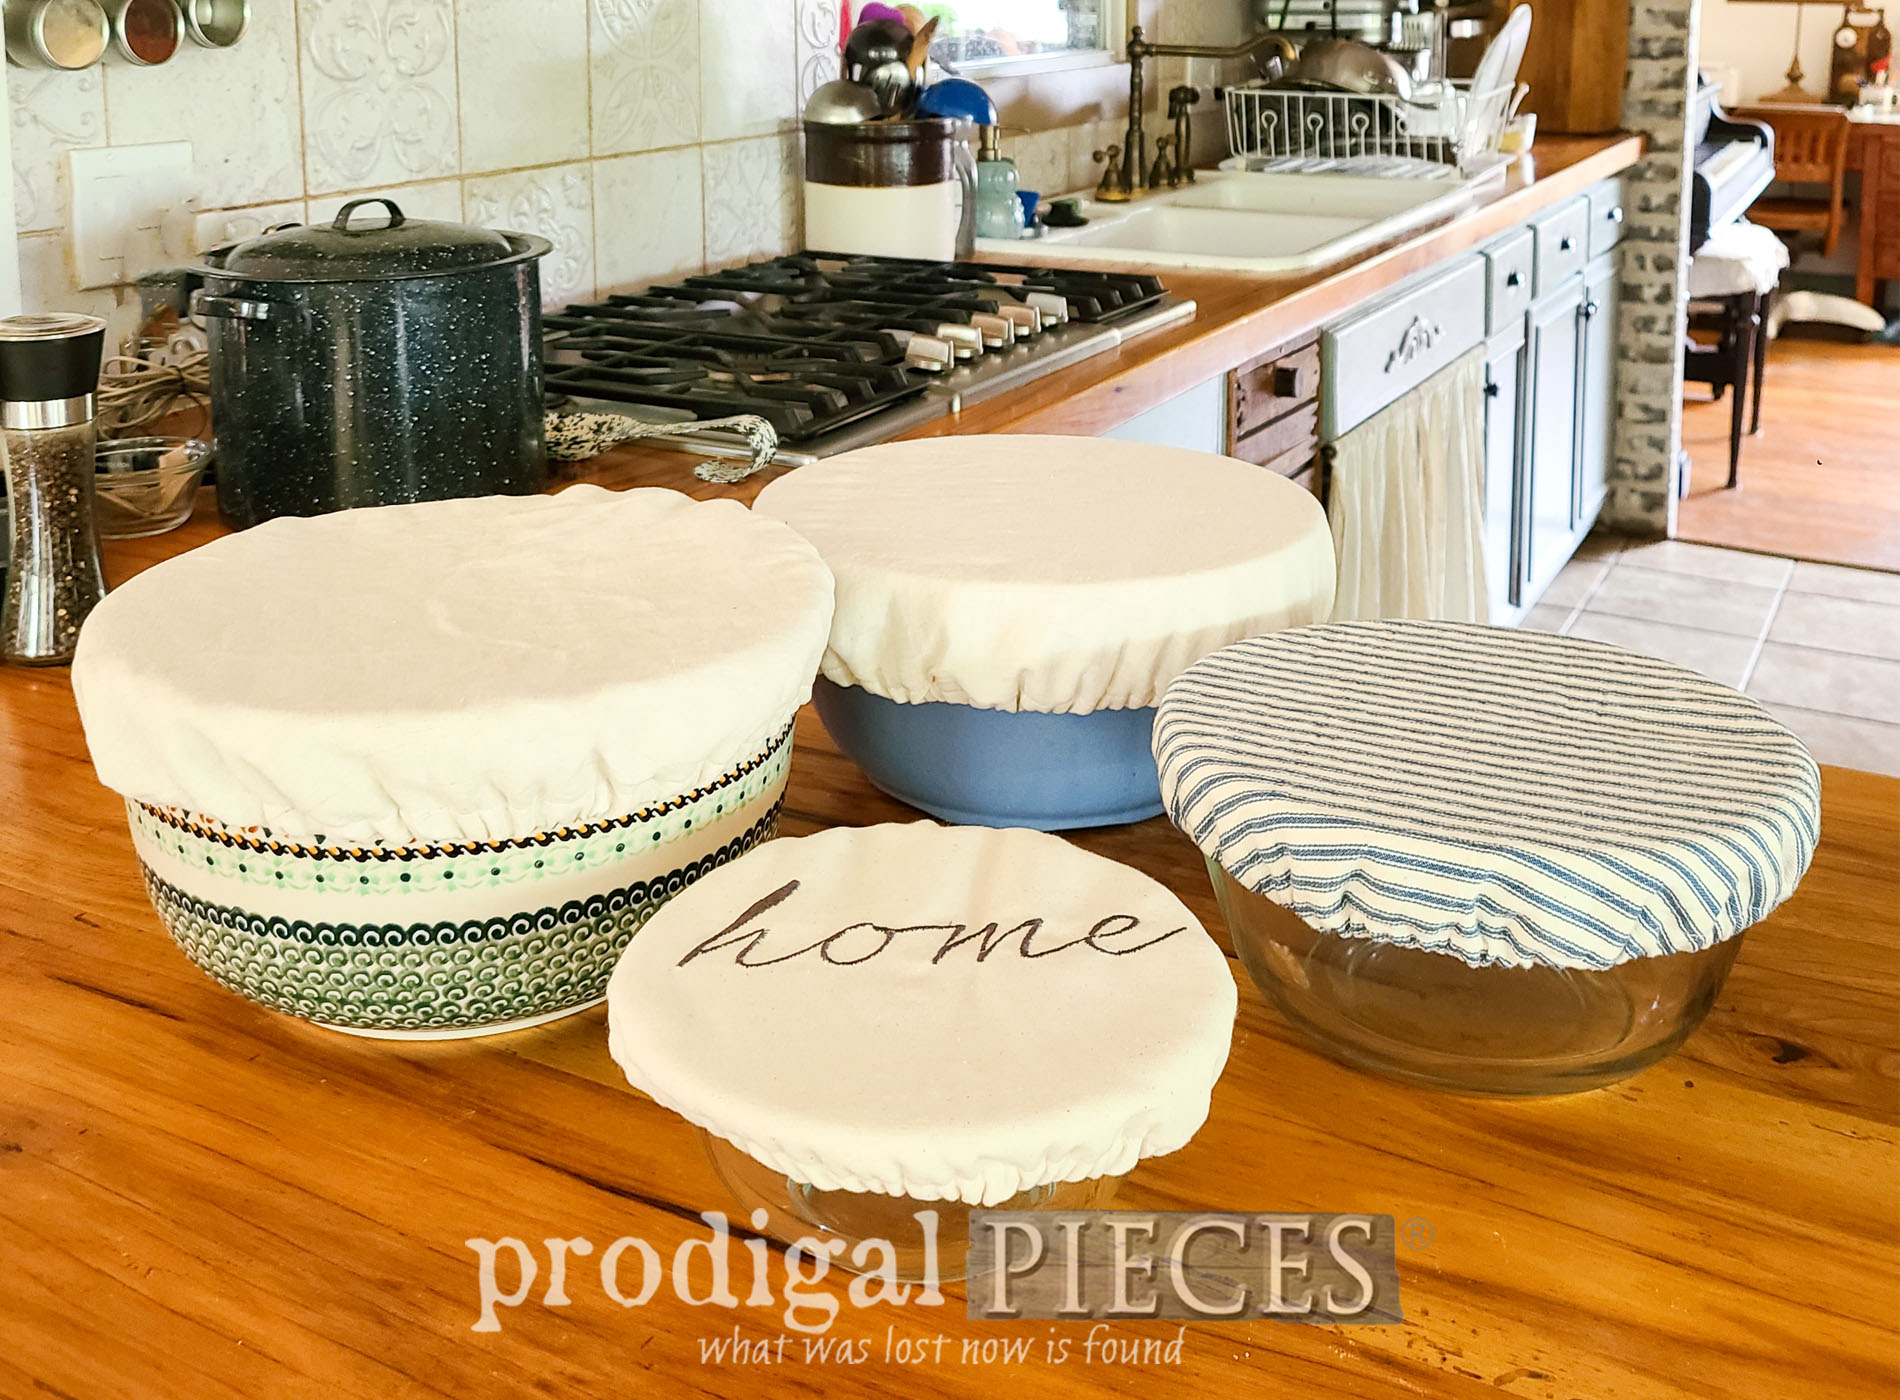
With a sigh of relief as I toss my old covers in the trash, I am delighted to share my refashioned DIY fabric bowl covers with farmhouse style.


I have two linen covers from my bedsheet, one from scrap blue ticking, and one I embroidered for pillows for
my online store. Aren't they so cute?
Meanwhile, on the inside, I have the PUL that adds stability as well as a moisture barrier. For laundering, wash on a cool/cold wash cycle and dry. However, with PUL, air-dry brings better longevity.


I used neutral and organic fabrics for my bowl covers, however, you saw my stash of fun PUL designs, so feel free to mix up! They sky's the limit with these as they can be custom made for any dish you want. Just think...newlywed gift, fill a bowl and make a cover to someone healing, or just for the sake of using up your scrap stash. woot, woot!

SHARE
Before you go, tell me, honestly, if this is something you think you can tackle. Also, feel free to ask questions! Likewise, pin and share this DIY fabric bowl cover tutorial to inspire others to make their own home story.

What is more, be sure to
sign up for my FREE newsletter as I'll be sharing something from the heart -
HEAD HERE. Until next time!

 PINTEREST | EMAIL
While you're at it, check out these other Refashion projects like my DIY fabric bowl cover: