
 " src="https://ezbloo.prodigalpieces.com/uploads/2020/10/louvered-cabinet-before.jpg" alt="Louvered Cabinet Before by Prodigal Pieces | prodigalpieces.com" width="550" height="376" />
I found this cabinet that is in a bit of rough shape, but it is perfect for creating a beverage station. Why? It has drawers for storage, a cabinet for accessories, and a drop leaf on the back. Plus, it is even on casters. Score!!
" src="https://ezbloo.prodigalpieces.com/uploads/2020/10/louvered-cabinet-before.jpg" alt="Louvered Cabinet Before by Prodigal Pieces | prodigalpieces.com" width="550" height="376" />
I found this cabinet that is in a bit of rough shape, but it is perfect for creating a beverage station. Why? It has drawers for storage, a cabinet for accessories, and a drop leaf on the back. Plus, it is even on casters. Score!!


*post sponsored by HomeRight (see full disclosure)
However, it is lacking in an interior shelf, drop-leaf supports, and a proper back panel. Also, it could use some dressing up. Likewise, you could use a dresser, desk, or buffet for this very same thing. Just add a drop-leaf and casters.DIY TIME
First, I use my sander to get the wood top and leaf back to basic pine. While doing that, I also set to install some new drop-leaf hardware. I'm not going to attach it just yet, but I'm smitten with how easy these are to use. In addition to the hardware, I cut a new shelf for the interior and used my Kreg Jig to make pocket joints. Without it, it seems that the inside is not maximizing the use of space.
 You see my saw and Rip-Cut Guide that I'm using to make the drawer fronts look like crates. I'm cutting shallow passes across the fronts to get the faux effect. You can see how I did the same thing to a chest of drawers before.
 It's a quick and easy fix that adds instant character. During this time, I also add a back panel of luan to better cover the back for showing when wheeled out for use.
NEXT STEPS
Once I have the repairs and additions made, it's time to break out some of my favorite tools. They are simple to use for professional results every time. You can see my past projects using these tools HERE. Notice, I have the top taped off because I'm staining it and finishing with a poly. The base, however, is getting fresh coat of paint. I'm using the blue tip, and fill up my canister following the paint manufacturer instructions. Then, I do a quick practice on scrap wood or cardboard to make sure my flow settings are what I desire. Here we go!
 I apply one coat, let cure for 2 hours, then apply a second. No primer needed. Meanwhile the paint is curing, I begin painting the louver doors a contrasting color. And I also begin to finish the drawer fronts with stain and typography.
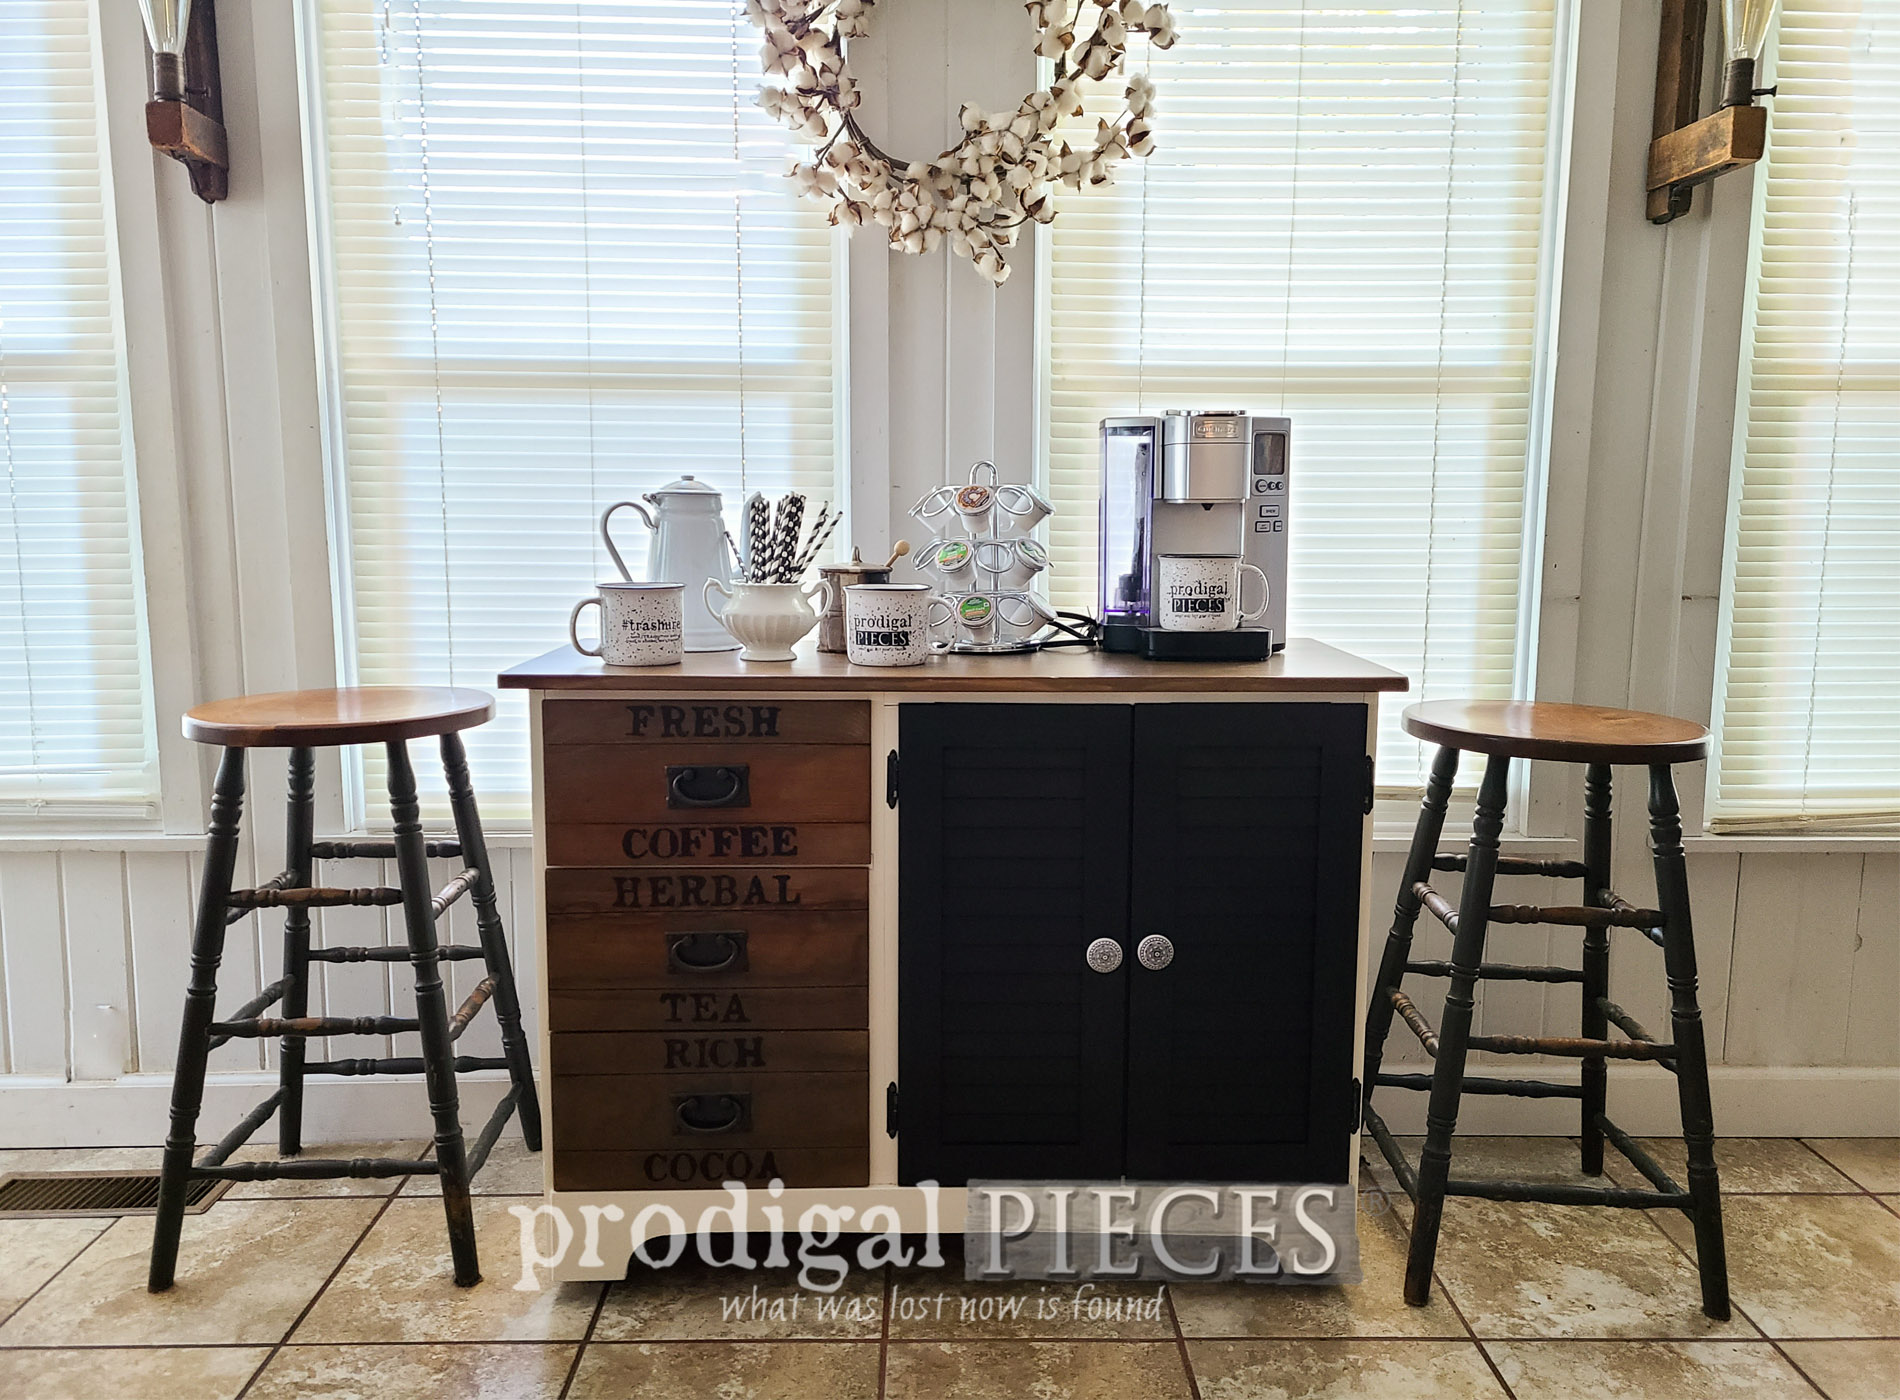
THE REVEAL
Here's my DIY coffee bar ready to go for family, friends, and a stray guest or two. I love it!
 The drawers can contains the coffee, teas, and cocoas in assigned typography. Meanwhile, the cabinet can hold the coffee maker and any other serving accessories needed. The shelf I added is a bonus, isn't it?

 Shout-out to my mom who willingly lent me her Keurig and carousel with pods for my staging fun. I don't drink coffee, but I do enjoy tea and cocoa in winter months.
 Now for the fun part...the leaf! Who doesn't love the versatility of a drop-leaf. It adds oodles of function to any old piece, especially on this one for creating a little seating area.


 If you'd like to make this DIY coffee bar your own and skip out on the elbow grease, you can find it available in my online store.


SHARE
Also, do pin and share my DIY coffee bar makeover to inspire others to create that cozy spot in their home. It's fun too! To get these DIY tips & tricks in your inbox, be sure to sign up for my newsletter. Until next time!

Also, more upcycled furniture like my DIY coffee bar:
