Oh, how fast time is flying! Can you believe it's the last Tuesday of the month which means it
Reduce, Reuse, REFASHION time? Last month, I had a blast
making a linen jacket with matching bloomers from a thrifted shirt and bed sheet. However, this time around, I'm taking this...er...skirt (ahem) and turning it into a DIY Boho bag.


I'd say that's a much better use of this fabric that will barely cover a bum in any modest fashion, don't you agree? My kids and I were thrift shopping for clothes, and I see a peek of this fabric from the aisle with this tag hanging out.

Afterward, I had a huge belly laugh to show my kids..."Hey! Look at this scrap of fabric that's brand new!" (haha) At any rate, the idea is to make use of something no longer useful or needing a new purpose and turn it into something new. Shall we have at it? YES!
CUTTING TIME
Before I get started, first take a peek at these other refashioned bags:
There ain't no shame in my game, I'm a bag nut! Actually, I started off with my first shop over 12 years ago selling bags and dolls. Okay, so now I've established my knowledge in bag-stuff, let's get started. First, I plan to use this wonderful denim linen that I have on hand in my stash, plus a few salvaged bits from old purses, and a zipper from a large lot I bought years ago with a tassel for fun.

Then, to figure out what sizing I need, I measure the width of the top.

After that, I measure the depth of the yet-to-be bag.

That leaves with a measurement of roughly a 15" square. Now, I can't just cut a square and be done with it. However, I do want to create an open bottom, so I need to box the corners. Since I want a 5" base, I add 5" to my 15" measurements.
STEP 1
After that, I fold my linen into a 19" square and cut. In order to make the boxed corners, I measure 2 ½" in from each edge and cut out that square.

STEP 2
Because I want to add a zippered pocket, I need to do that now before assembly. My zipper is 6" long, so I create a box, with my water-soluble pen, that is 7" long by ¾" high.


Once you have your box, you need to draw a center line with two small triangles at the ends. Then, as soon as you feel you have your diagram correct, carefully cut it open as shown and iron to the wrong side (aka. back side).

.
Next, you pin in place and stitch down with a zipper foot on your sewing machine.

STEP 3
For the next part of our pocket addition, we cut a piece of fabric 7" wide and as deep as you like. Given that I choose to go 7" deep, I then cut a piece 14" long x 7" wide. To prepare the pocket, I iron down the short ends ½" in to the wrong side of the fabric. First, place right side down with the edge as shown and sew down.

Secondly, take the other short end and fold the pocket up with right side facing down as shown and sew.

Afterward, you're going to sew the folded sides shut being careful to only stitch the pocket, so it doesn't get sewn to the lining.
We're almost all done, but before we can finish, we need sew our boxed corners. Meanwhile, fold as shown and stitch.

Finally, for added reinforcement, I use plastic canvas cut to the size of the bottom and anchor on with a few stitches. Normally, I stitch it to the inside bottom of the outer shell, but in this case, I'm creating a different outer shell because of the skirt.

Last, but not least for our DIY Boho bag, I iron down the top edge of my lining ½" and sew in.

Eventually, for the bottom I pull out my remnant leather from
my knock-off bench and
my desk chair re-upholstering.


While I could share with you how I create the bottom, it would really pertain to what you're creating it for. Instead, let's take a peek at the end result, shall we?
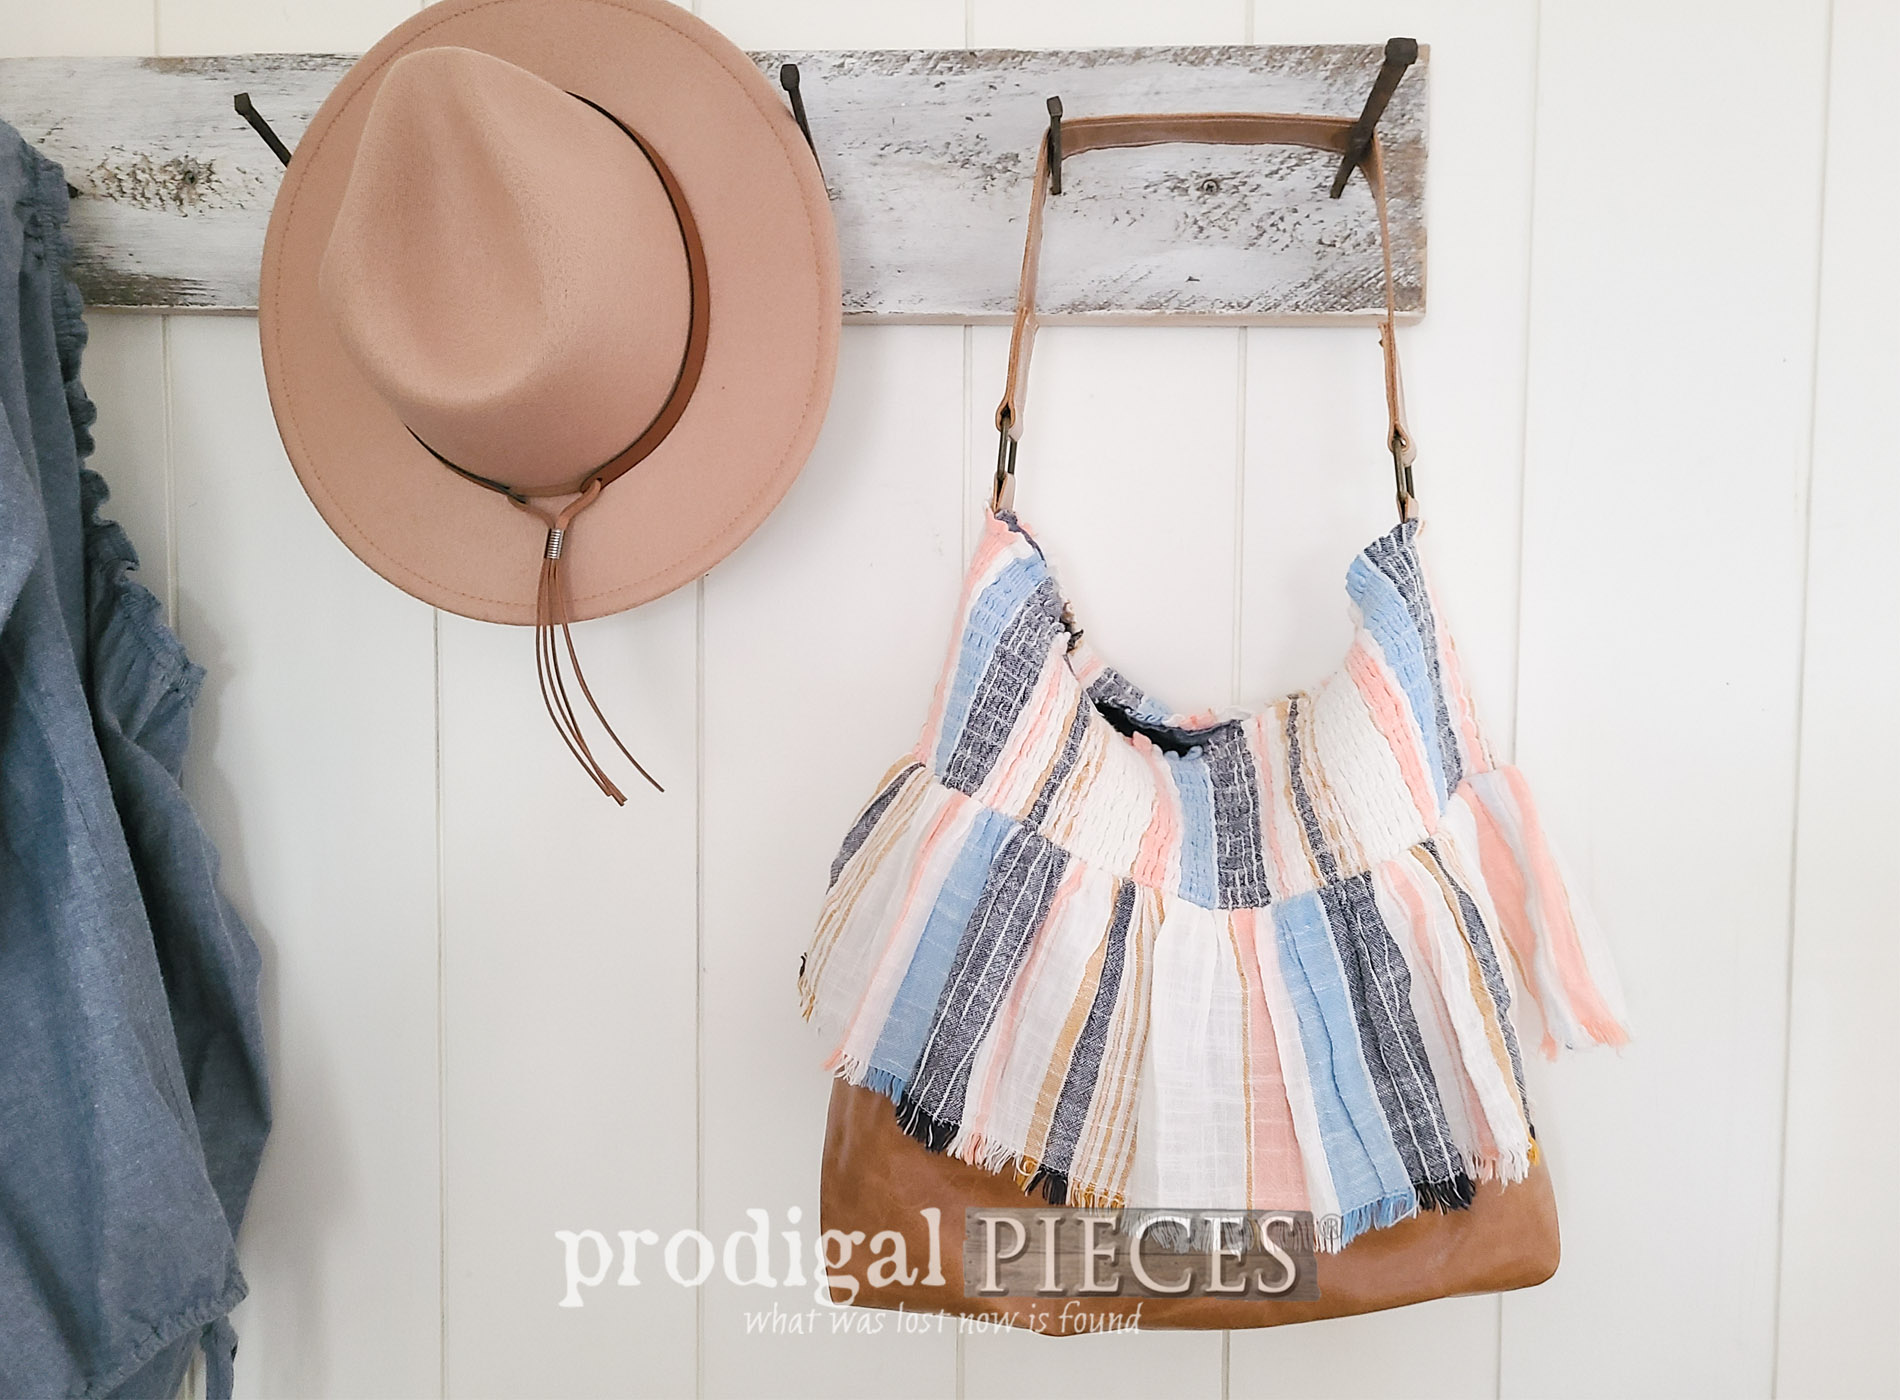
BAGS RULE
Ta da! My latest bag is ruffled, sassy, with leather to boot.


Isn't it fun?!? While it's got a spunky vibe with those muted tones, it also has the leather that gives it the warmth and stability too. By the way, for the base, I cut a rectangular piece of leather that added enough up the side. As you can see, I folded the corners in and use the folds for added umpf.

Not only that, but also paired with my refashioned linen jacket it looks perfect.


In addition, here's a peek at how the bottom attaches to the skirt...


...I remove the bottom ruffle and sew on the leather with my sewing machine and leather needle.
SHARE
Does this make you want to go grab your own skirt...er...slip of fabric? In any event, my goal is always to get you to see outside the typical box and give DIY a try. In fact, leave me some comment love and then pin and share to inspire others too!
Also, if you'd like to make this DIY Boho bag your own, you can find it and much more available in
my online store.


Before you go, check out my next little thrift store find that's up for a new purpose. You can see
their springy-new life HERE.

In fact, just be sure to
sign up for my FREE newsletter. Until next time!

 PINTEREST | EMAIL
Both enjoy this DIY, and while you're at it, check out these other refashion projects like my DIY Boho bag: