Do you ever feel like your frayed at the edges? I'm sure this is how this damaged side table feels. It's from the 1920's era with oodles of style to showcase the craftsmanship of the time. The scalloped style edge, the inlaid veneer, and the tapered legs on the pedestal with claw feet...most of them present. I'm thinking with some elbow grease and TLC it will live to tell many more stories. Don't you agree?


Missing veneer that was once the forte of this piece is now a testimony to the life it's lived. Maybe the wear is telling of love and life telling a story, much like we all have no matter what our age. The best part is, we know we have a Creator that sees the potential in us all.
Well, you all know I'm a sucker for the downcast, the misfit, the damaged and worn. Hence the name I chose for my work, Prodigal Pieces. With that in mind, you can see
my project gallery to see all the projects from my workshop.
RESTORATION TIME
Okay, let's get this makeover party started! First, I'm going to tackle that veneer using my putty knife to see what I'm up against. At first, I thought I might need to use my
towel soak method to remove it smoothly.


However, I'm happy to say that with a little elbow grease, most of it came off by peeling it. Before I head out to my sander, I need to use wood filler to patch the places where the wood is damaged.

Meanwhile, while the filler cures, I begin to tackle the pedestal base. Since there are only two brass claw feet, I remove them and save them for a future repair. Then, I paint the base a very light, soft mint green color.

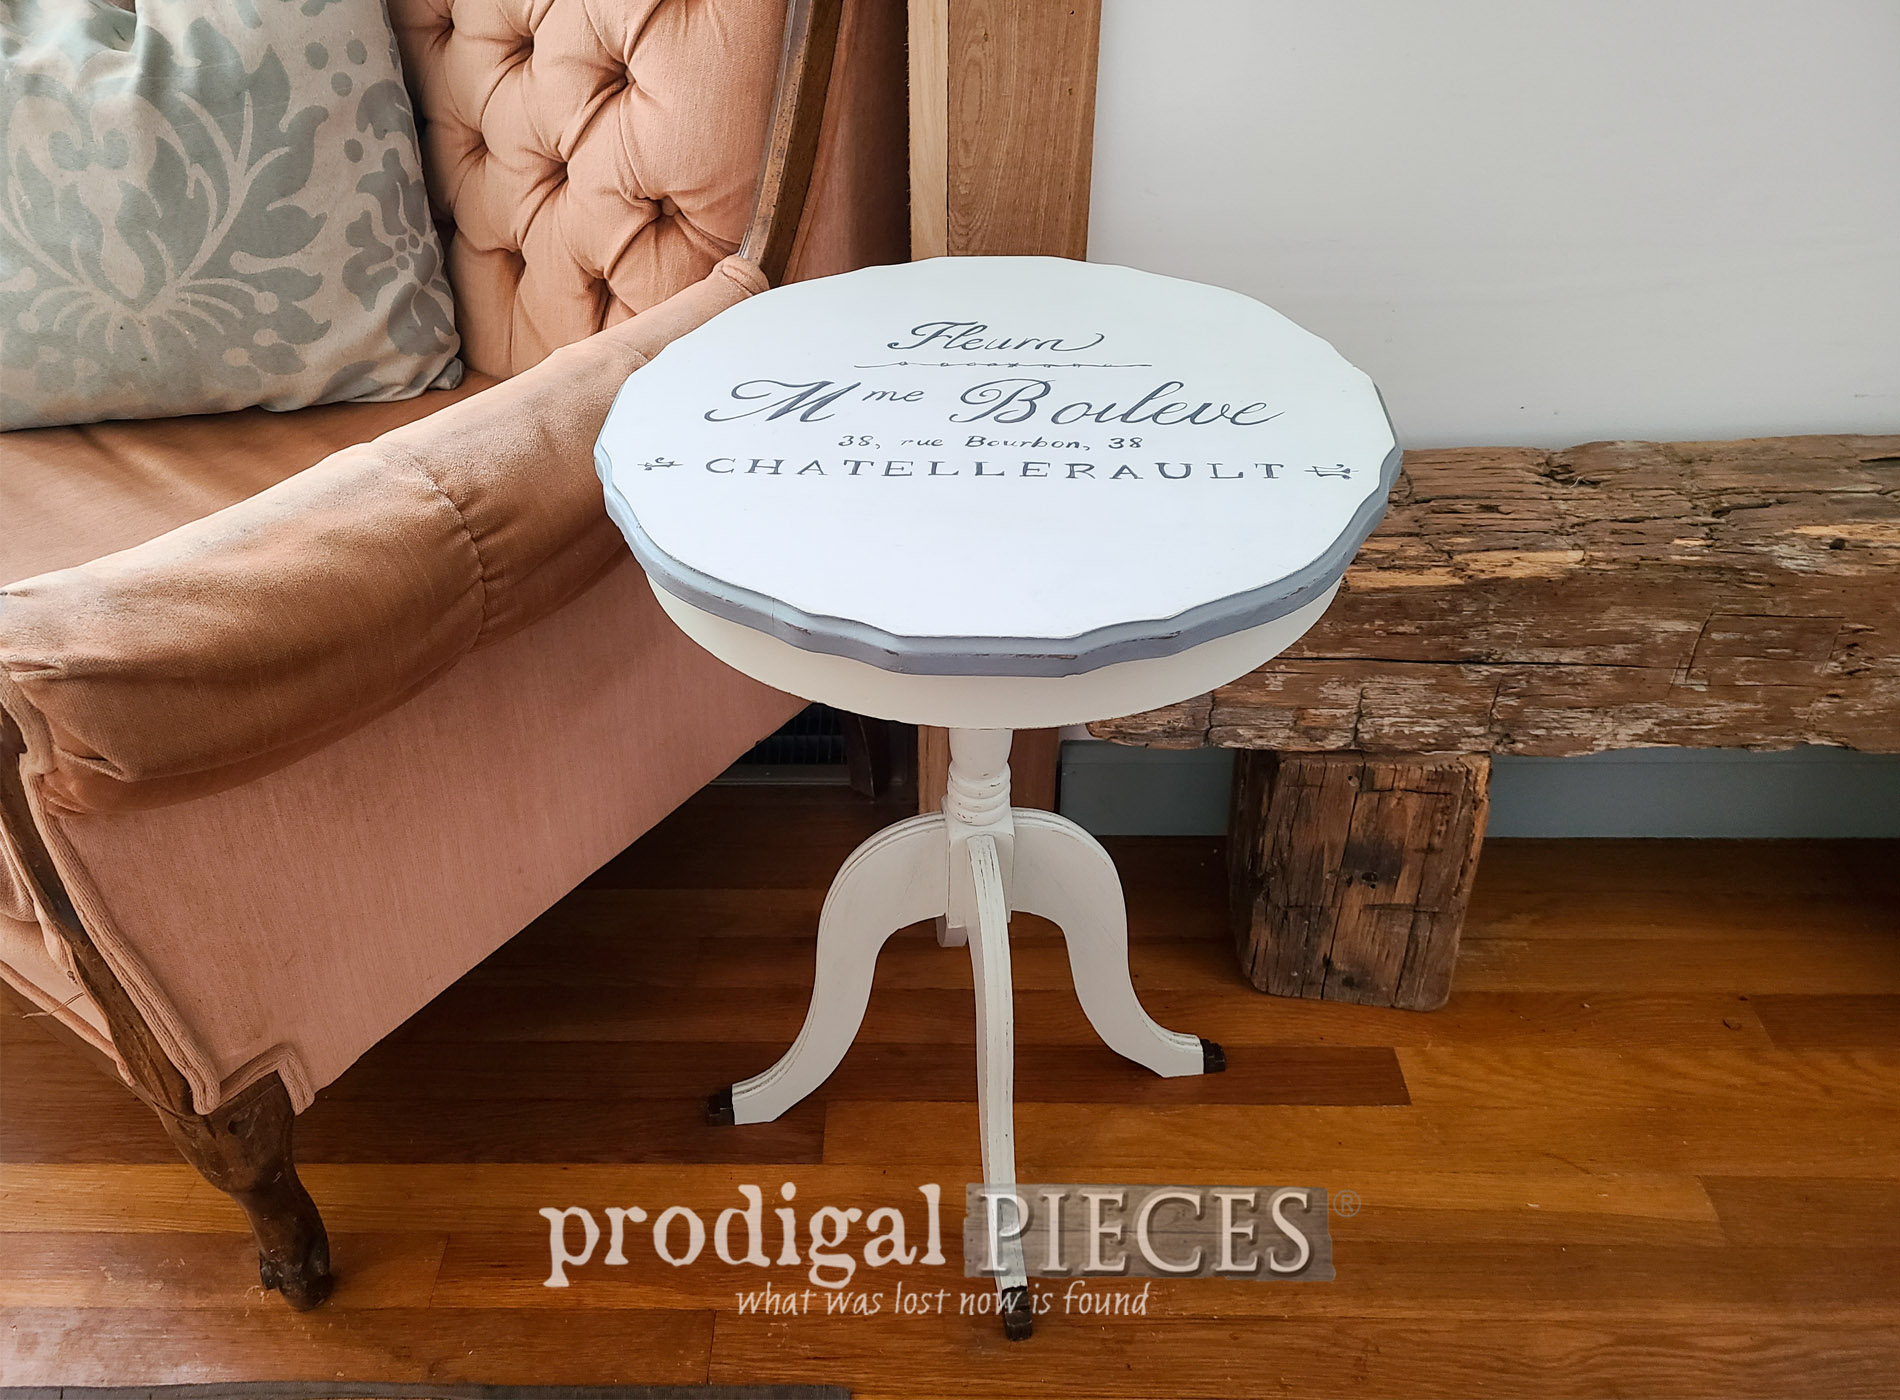
As for the top, I use a basic white to roll onto the surface once it's sanded and ready to go. Additionally, I want the scalloped edge to have a contrast with a soft gray.

FINISHING DETAILS
Last, but not least, I need to add finishing touches to take this damaged side table makeover to a magnifique level. oui? Because I remove the brass feet, they look kinda boring. To remedy that I could try to track down replacements like I did for the antique lyre table I did shown at the bottom of this post. However, this time around, I am painting them to look like brass instead.

I begin with a base color of burnt umber, then follow what with a metallic English brown. Then, once cured, I apply a bit of highlights using my antique bronze.

As for the top, you know I adore my typography when I can use it, so I head to
The Graphics Fairy to snag this graphic. To apply, I use
my transfer method and then hand-paint it all in.

OOH LA LA
Finally, here is my sweet side table with a fresh new look and a bit of French flair. I'm smitten!


Who knew that the potential is there? me!! haha. Honestly, though, it really is all about willing to try. As well, taking the time to add a personal touch.


Feeling inspired yet? I sure hope so! As always, motivating you to see past the obvious is my goal with each project I tackle. Maybe you can find one of your own inspiring pieces...when you do send me an email!
With that in mind, you can find this sweet table and much more available in
my online shop.

SHARE
While you're at it, take a minute to leave comment love below, as well as pin and share to spread the inspiration.

Before you go, you might want to see what I have my sights set on for my next project. Yup. Recycling. See
my end results HERE.

Make sure to
sign up for my FREE newsletter to see the end result. PLUS, you will get your free Furniture Buying Checklist and special discount to
my shop. Until next time!

 PINTEREST | EMAIL
Also, here are more antique finds like this damaged side table makeover: