The second Tuesday of the months is here! That means it's
Trash to Treasure time. woot, woot! You're here today to join me and four other bloggers as we share new inspiration for you. While you'll see their projects in a bit, take a peek at this damaged dresser.

I got it from a local (and awesome) couple that live on a farm. Apparently, it belonged to the wife since she was growing up and decided to give it a new home. That made my heart soar! I lovea good story like that.
As with any project I take on, this damaged dresser needs some TLC. Not only is the top showing much wear, but also the drawers. Let's take a peek.


First, the top has a crackled and mottled lacquer that's gotten kinda gummy. Second, there is plenty of missing veneer that needs addressed. I can either remove it all like I've done in
these past posts, or I can patch it up. For me, it looks like the rest of the veneer is on tight and I don't need another hot mess like
THIS ONE. With that, I being to repair the damaged veneer on the top, the side panels, and the drawers.

Also, right when I went to pick up the damaged dresser, I checked the drawers and found that one drawer was more a hot mess than the others. The face was pulled off, the bottom was cracked, but still stable, and it was out of joint generally.

This may scare some away, but I've had MUCH WORSE! haha.
GET 'ER DONE
Next, once I fill all the missing spots, repair holes, repair drawers, etc. I sand and sand some more. That took the finish down enough that I can move on to the next part. PAINT.
Yes, with all the fixes, the best thing for this ol' gal is paint (I'm speaking of the dresser, ahem). Some have often asked why I don't just repair the veneer with veneer. I reply by telling them how much veneer costs alone. It's far above the value of a piece like this unless it has sentimental value to you.
As a true DIYer, I want to mix my own color for this project, so I fill a quart with half of blues and the other half yellow. I begin to shake it up...mind you, I'm running around like a nut on this day because I have so very much to do. While shaking it up, someone pushed past me and the can ERRUPTED all over my laundry room cabinets, my sink, counters, down my neck, all over my clothes, and covers the floor. Apparently this ol' gal needed paint after all.
I would have had a picture if I wasn't so upset with myself. After I got out of the shower, I find my older girls cleaning it up for me. Have I ever told you how awesome my kids are? Now, I'm frazzled, trying to clean up, but need to be working instead. Then, out of the blue, lil' Loula looks at me sadly and says, "Oops" with her buttons. (see how
she talks HERE or in the video below)

That made me bust out laughing! She drops her head and her tail wags, and we cuddle. Yes, Loula...oops. God knew I needed her, and she needed me.
PAINT WHERE IT BELONGS
Finally, I'm able to get the custom color on using my microfoam roller.

The color is a sort of blue/green that is very similar to
my favorite color, but with a deeper tone. I love it! At least I mixed it right...ahem. Between each coat, I also paint the drawers in another custom color...a light beige. I have all of it prepped for the next day and I get nailed with a stomach issue. Folks, I feel like I just can't win sometimes, but am glad to be able. So, I hunker down and get done what I can when I can.
On a side note, I use old candles to rub drawers, runners, and all over the places that touch that allow the drawers to glide in freely.

DAMAGED ANYMORE?
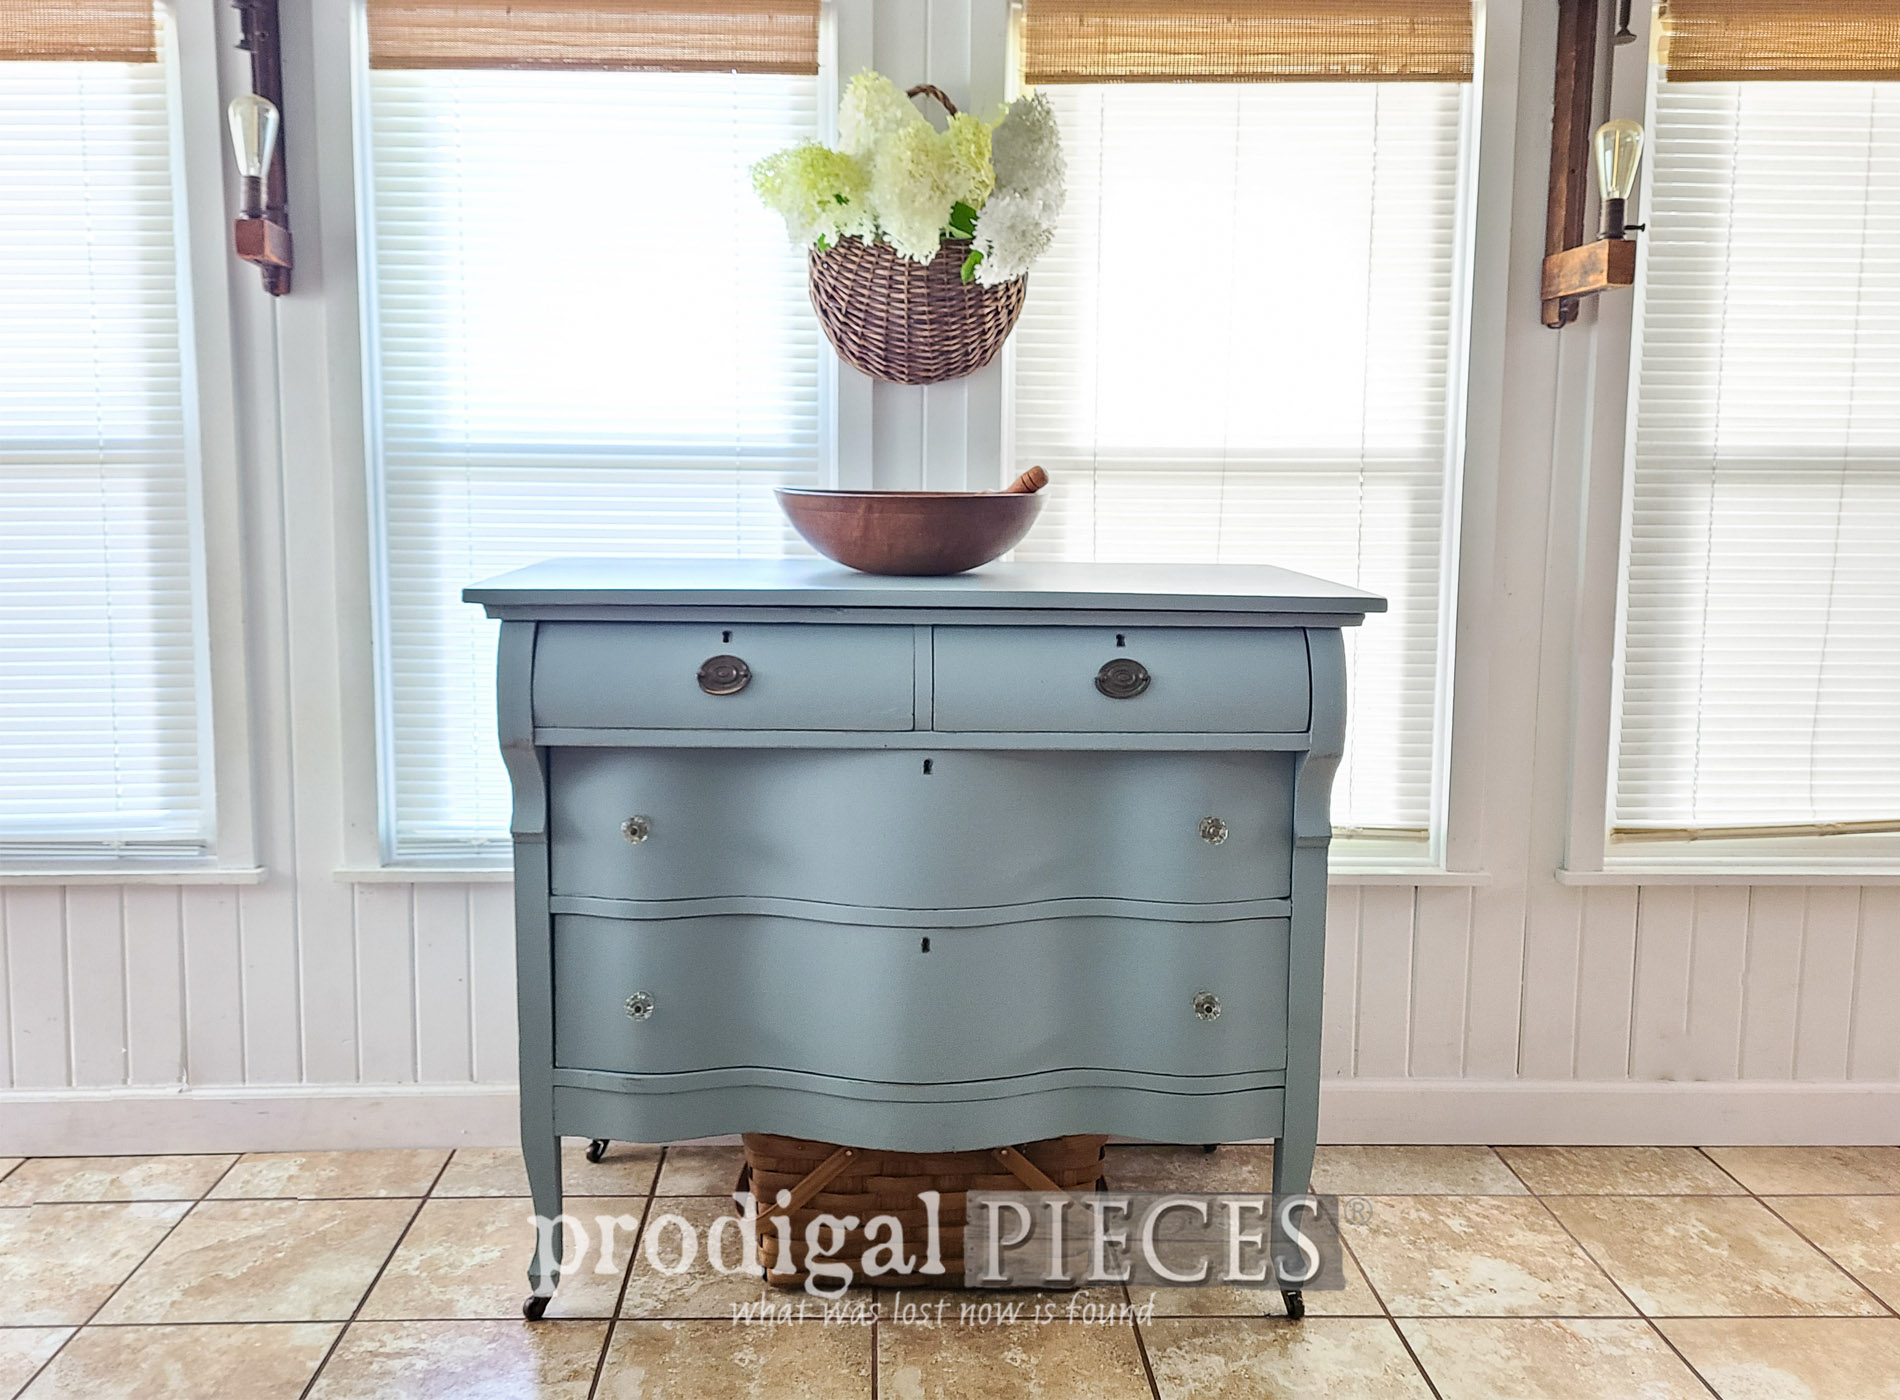
Here, at last, is the reveal of the damaged dresser revival. It's refreshed and ready to go!


I'm tellin' ya, those curves get me every time. While I could have done most any color and even added a design to the front, I really wanted the craftsmanship of this piece to shine. As I mention, I lined the drawers with this blue ticking for added peek-a-boo fun.


Additionally, did you notice I used antique faceted glass knobs mixed with Hepplewhite brass drawer pulls?


Not only can I see this in a bedroom, but also in an entry, living room, and even as a sideboard in a dining or bathroom even. Where would you use it?

If you'd like to make this part of your home story, you can find it and more in
my online store along with many other goodies.

SHARE
Does this type of project inspire you? I sure hope so! There are so many ways we can create our own home story. After leaving some comment love below, please pin and share to inspire others too.

I'm sharing a new
trashure find with you next, so be sure to
sign up for my FREE newsletter. Now, it's time to see what my Trash to Treasure girls have for you!

 PINTEREST | EMAIL


- Salvaged Inspirations
- Artsy Chicks Rule
- Confessions of a Serial DIYer
- Girl in the Garage
While you're at it, check out these other furniture transformations like this damaged dresser: