In all of my furniture adventures, I have yet had the opportunity to work on a china cabinet. Ya know, those big brown beasts from days of old? Seriously, they can be pretty cool when done right and I wanted a chance at this one I found on Craigslist.

What a beast to move though! You can imagine the look I got from my husband. ahem. Anyhoo, it came into my possession and quickly got dismantled. Aren't the details fantastic?
DIY TIME
Before you give the "no, don't paint it" thought. This isn't entirely solid wood, but rather that 1960's style with the speckled finish onto a veneer much like
this dresser I recently did. This China cabinet was looking tired with its damaged backing and superficial wear, which could all be relieved with an update. The carvings, trim and doors are solid though, which makes this a wonderful piece.

Notice my kitchen tore apart to the left. You can read more about in
my first post, but let me tell ya...there ain't no room up in here!!
The doors were up in my living room, which is now my dining room, ready for a paint job.

PAINTING
Last, I chose to use one of the paints I received from DecoArt as my prize for the
chest of drawers. It's called Relic (a smoky gray) and is a chalky finish paint much like the Carbon color that my daughter used on
her dresser. We love the ease of use it offers.

Only one coat was needed to get the look I was after because this stuff coats so well. For a topcoat, I used a satin poly which deepens the color and gives it a rich look.
Now for the back. I took the panels off and decided to make use of my kitchen floor mess to do my work. See my little helper? What a cutie.

I wanted this piece to really showcase the details in the wood, so I picked this gorgeous heavy-duty wallpaper. It has a charcoal pattern with a silver inlay...beautiful!

Not only was this paper a dream to use, but it also is made from materials good for the environment. No chemicals releasing over time, and easy to remove when you decide to change it up. Just add some wallpaper adhesive and hang.
NEXT STEPS
Last, but not least is the hardware. Since the China cabinet was now a gray, I didn't want the brassy colored pulls and hinges. An easy fix is to clean them up with some alcohol and then spray paint using one of my favorites I used in
my bathroom remodel. It's a flat metallic paint called Antique Nickel by Rustoleum.

THE REVEAL
Ready to see this brown beast tamed?

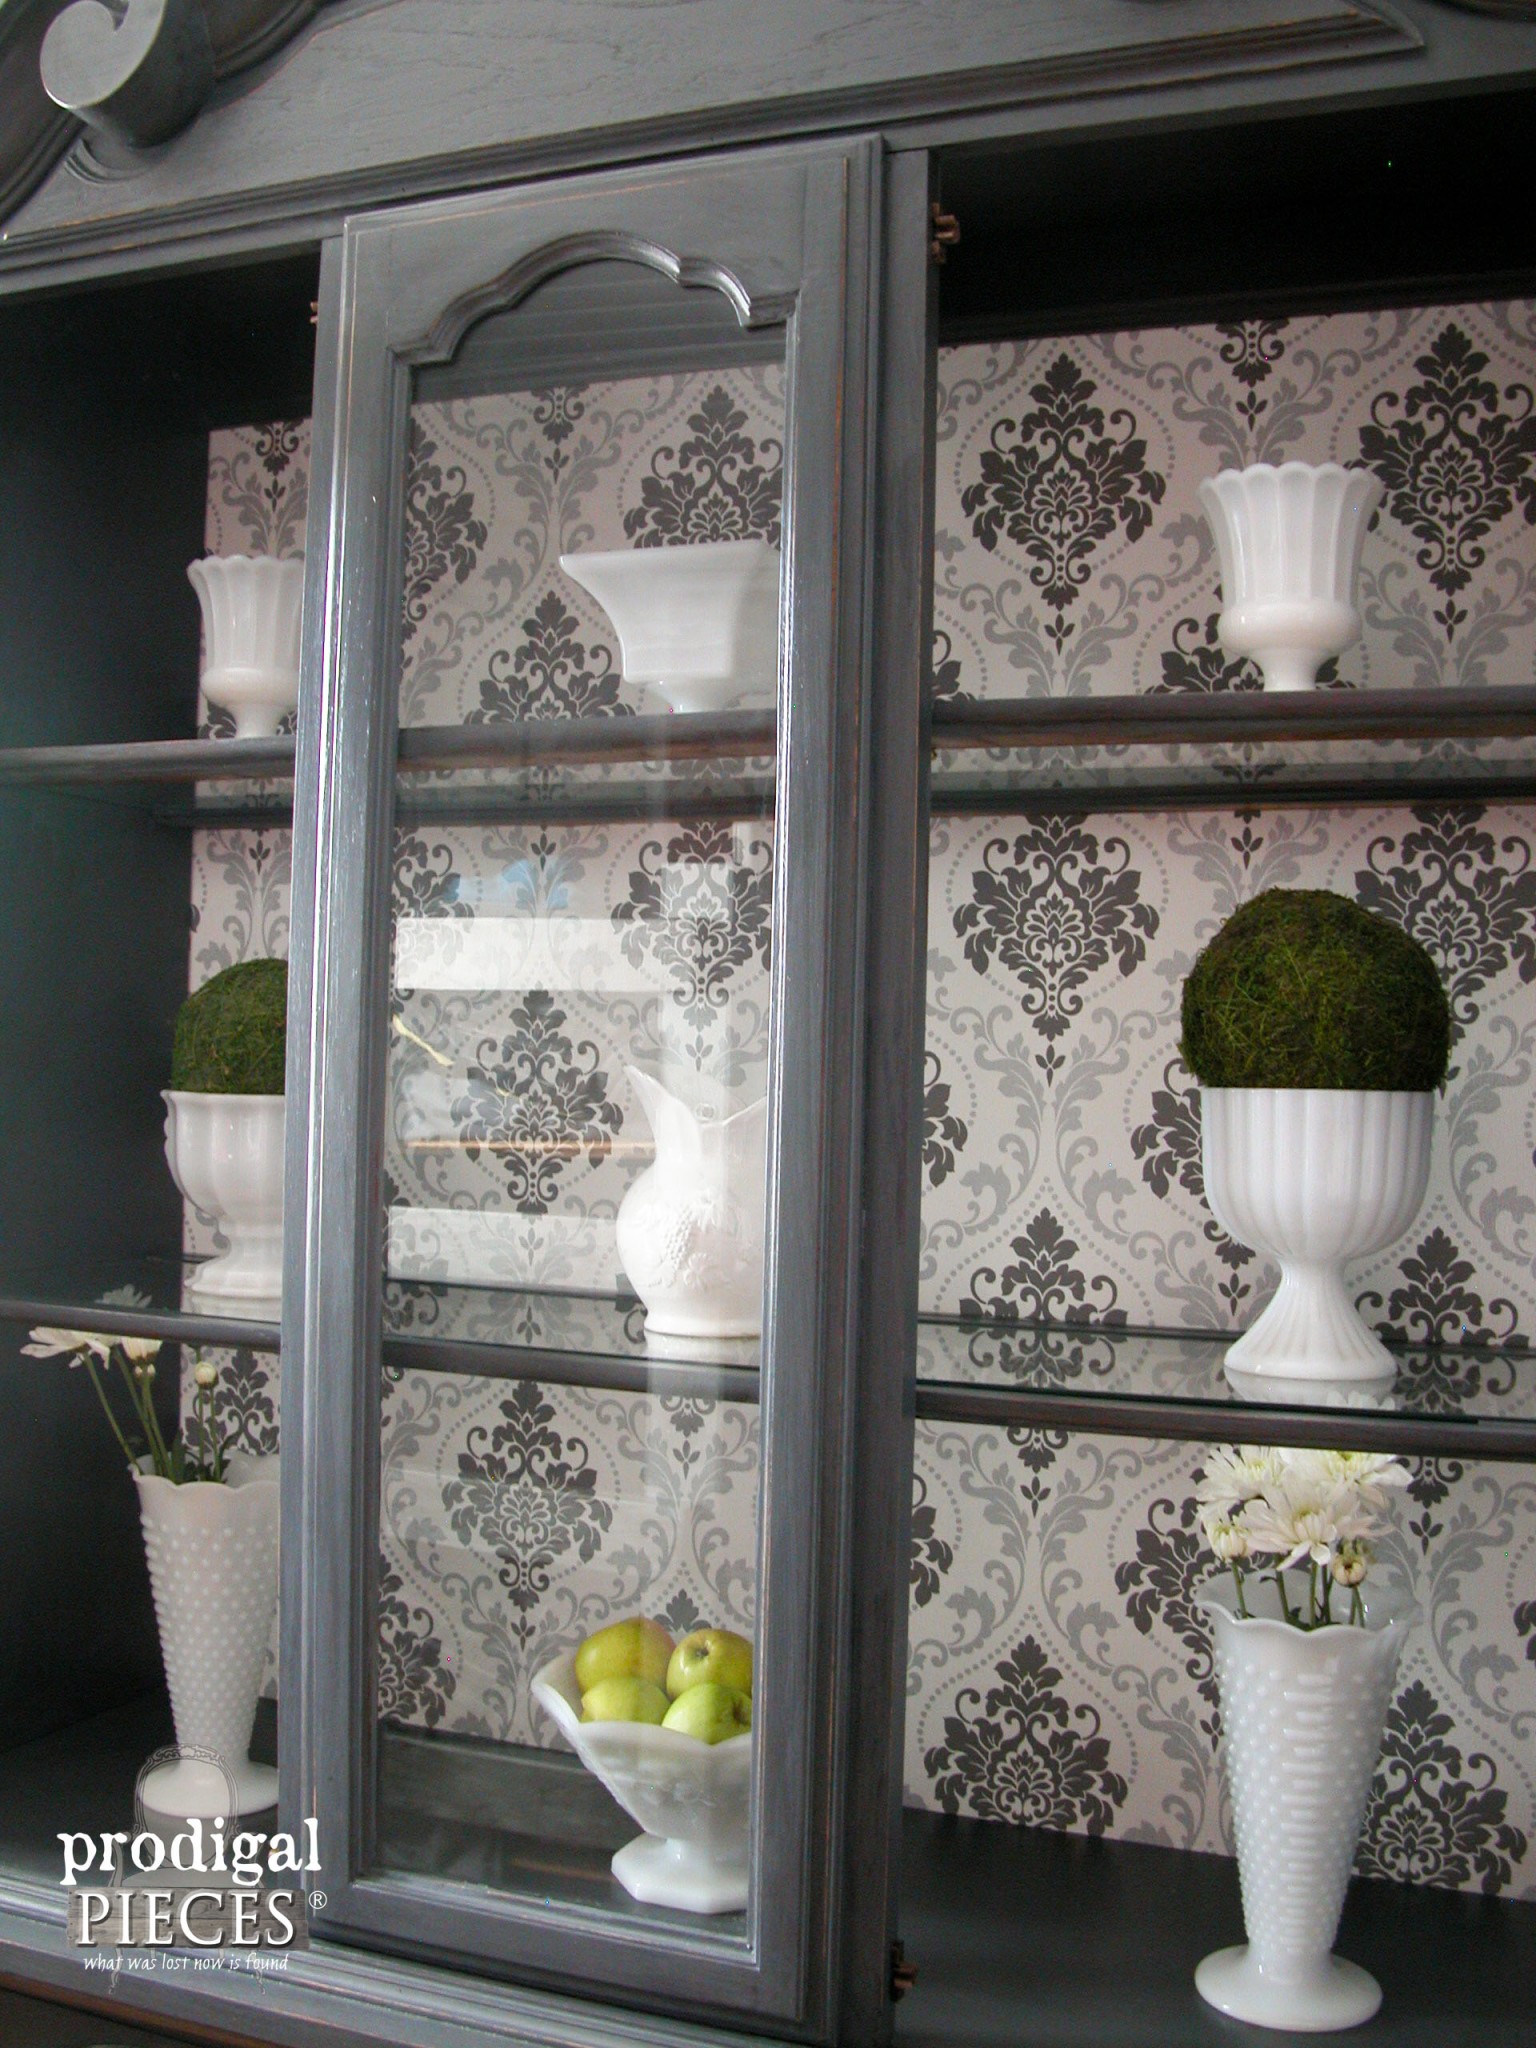
A definite improvement and now it can really be a statement piece showcasing your wares, like my milk glass, with those glass shelves and plate racks to boot.

Before adding my topcoat, I did a little bit of distressing to make those lovely curves pop.

BOTTOM
The bottom offers ample storage space for linens and even has the peek of wallpaper too. I love it! Do you?


I wish you could see this wallpaper backing close up because it really is gorgeous with the metallic accents.


I even lined the drawer too for some peek-a-boo fun.

How cool is it that I have gotten my furniture repertoire complete by finally working on a China cabinet. woot! If you love this piece and would like to have it as your own, you can find it in
my online store.

In addition, pin and share to help others see how a brown beast gets new life. ♥

What's next on my bucket list? hmmm...you'll have to wait and see. Before you go, be sure to
sign up for my FREE newsletter. Until next time!

 PINTEREST | EMAIL
Also, more furniture makeovers like this china cabinet:


 What a beast to move though! You can imagine the look I got from my husband. ahem. Anyhoo, it came into my possession and quickly got dismantled. Aren't the details fantastic?
 Notice my kitchen tore apart to the left. You can read more about in my first post, but let me tell ya...there ain't no room up in here!!
The doors were up in my living room, which is now my dining room, ready for a paint job.
Notice my kitchen tore apart to the left. You can read more about in my first post, but let me tell ya...there ain't no room up in here!!
The doors were up in my living room, which is now my dining room, ready for a paint job.

 Only one coat was needed to get the look I was after because this stuff coats so well. For a topcoat, I used a satin poly which deepens the color and gives it a rich look.
Now for the back. I took the panels off and decided to make use of my kitchen floor mess to do my work. See my little helper? What a cutie.
Only one coat was needed to get the look I was after because this stuff coats so well. For a topcoat, I used a satin poly which deepens the color and gives it a rich look.
Now for the back. I took the panels off and decided to make use of my kitchen floor mess to do my work. See my little helper? What a cutie.
 I wanted this piece to really showcase the details in the wood, so I picked this gorgeous heavy-duty wallpaper. It has a charcoal pattern with a silver inlay...beautiful!
 Not only was this paper a dream to use, but it also is made from materials good for the environment. No chemicals releasing over time, and easy to remove when you decide to change it up. Just add some wallpaper adhesive and hang.

 A definite improvement and now it can really be a statement piece showcasing your wares, like my milk glass, with those glass shelves and plate racks to boot.
 Before adding my topcoat, I did a little bit of distressing to make those lovely curves pop.


 I wish you could see this wallpaper backing close up because it really is gorgeous with the metallic accents.

 I even lined the drawer too for some peek-a-boo fun.
 How cool is it that I have gotten my furniture repertoire complete by finally working on a China cabinet. woot! If you love this piece and would like to have it as your own, you can find it in my online store.
 What's next on my bucket list? hmmm...you'll have to wait and see. Before you go, be sure to sign up for my FREE newsletter. Until next time!


