 JC had one job to do. Mind you he works full-time, so, I guess he deserves a little slack, but...this happens A LOT. I asked him to stop by and pick up this "filing cabinet" (as the lady described), but only bring it home if it was solid wood and would hold my files. ahem...does it look like solid wood to you?

 He brings it home. {{head smack}} This is nothing but a fabricated mess. And there's no way my files would fit in there. This is exactly why I have too much in my stash and am working on clearing out.
DIY TIME
So, since this little ugly stand won't work for me, it gets added to the makeover list to become new. First up, beat it apart and get rid of those side panels. Ahhh...there's the wood. {{she dies laughing}} I wanted to add a little character to it, so I chose to use some beadboard to replace the sides. Thankfully, I quickly attached them with my cordless nailer. I LOVE THIS TOOL. This is exactly why my motto has always been toolsoverjewels. I was able to make the structure of the cabinet much stronger and more durable for what I had envisioned - an apothecary cabinet.
 Once the sides were on, I added a board to the bottom of the cabinet using my Kreg Jig to make pocket screw holes. That is another of my must-have tools. The board firmed up the frame, but also added the structure I needed to add casters.
ASSEMBLY
Meanwhile, I needed to fix the drawers. The face was made of two pieces connected together feebly. In order to reinforce them, JC cut some scrap luan and I attached them to the back side with wood glue. (because of course he's going to help me fix this thing. tsk.) For added reinforcement, I then nailed on with my nailer.
 Now to pretty the drawers up. Nothing like a good sanding with my orbital sander to take that old orange color away. After that, I used a combination of my favorite Early American (as seen in these posts) and Sunbleached stains (also seen here).
 While the stain was curing, I went back to the cabinet and gave it two coats of a soft white that I used on this dresser. It was perfect to clean up the look of the piece and help me get to the apothecary cabinet I was after.
THE REVEAL
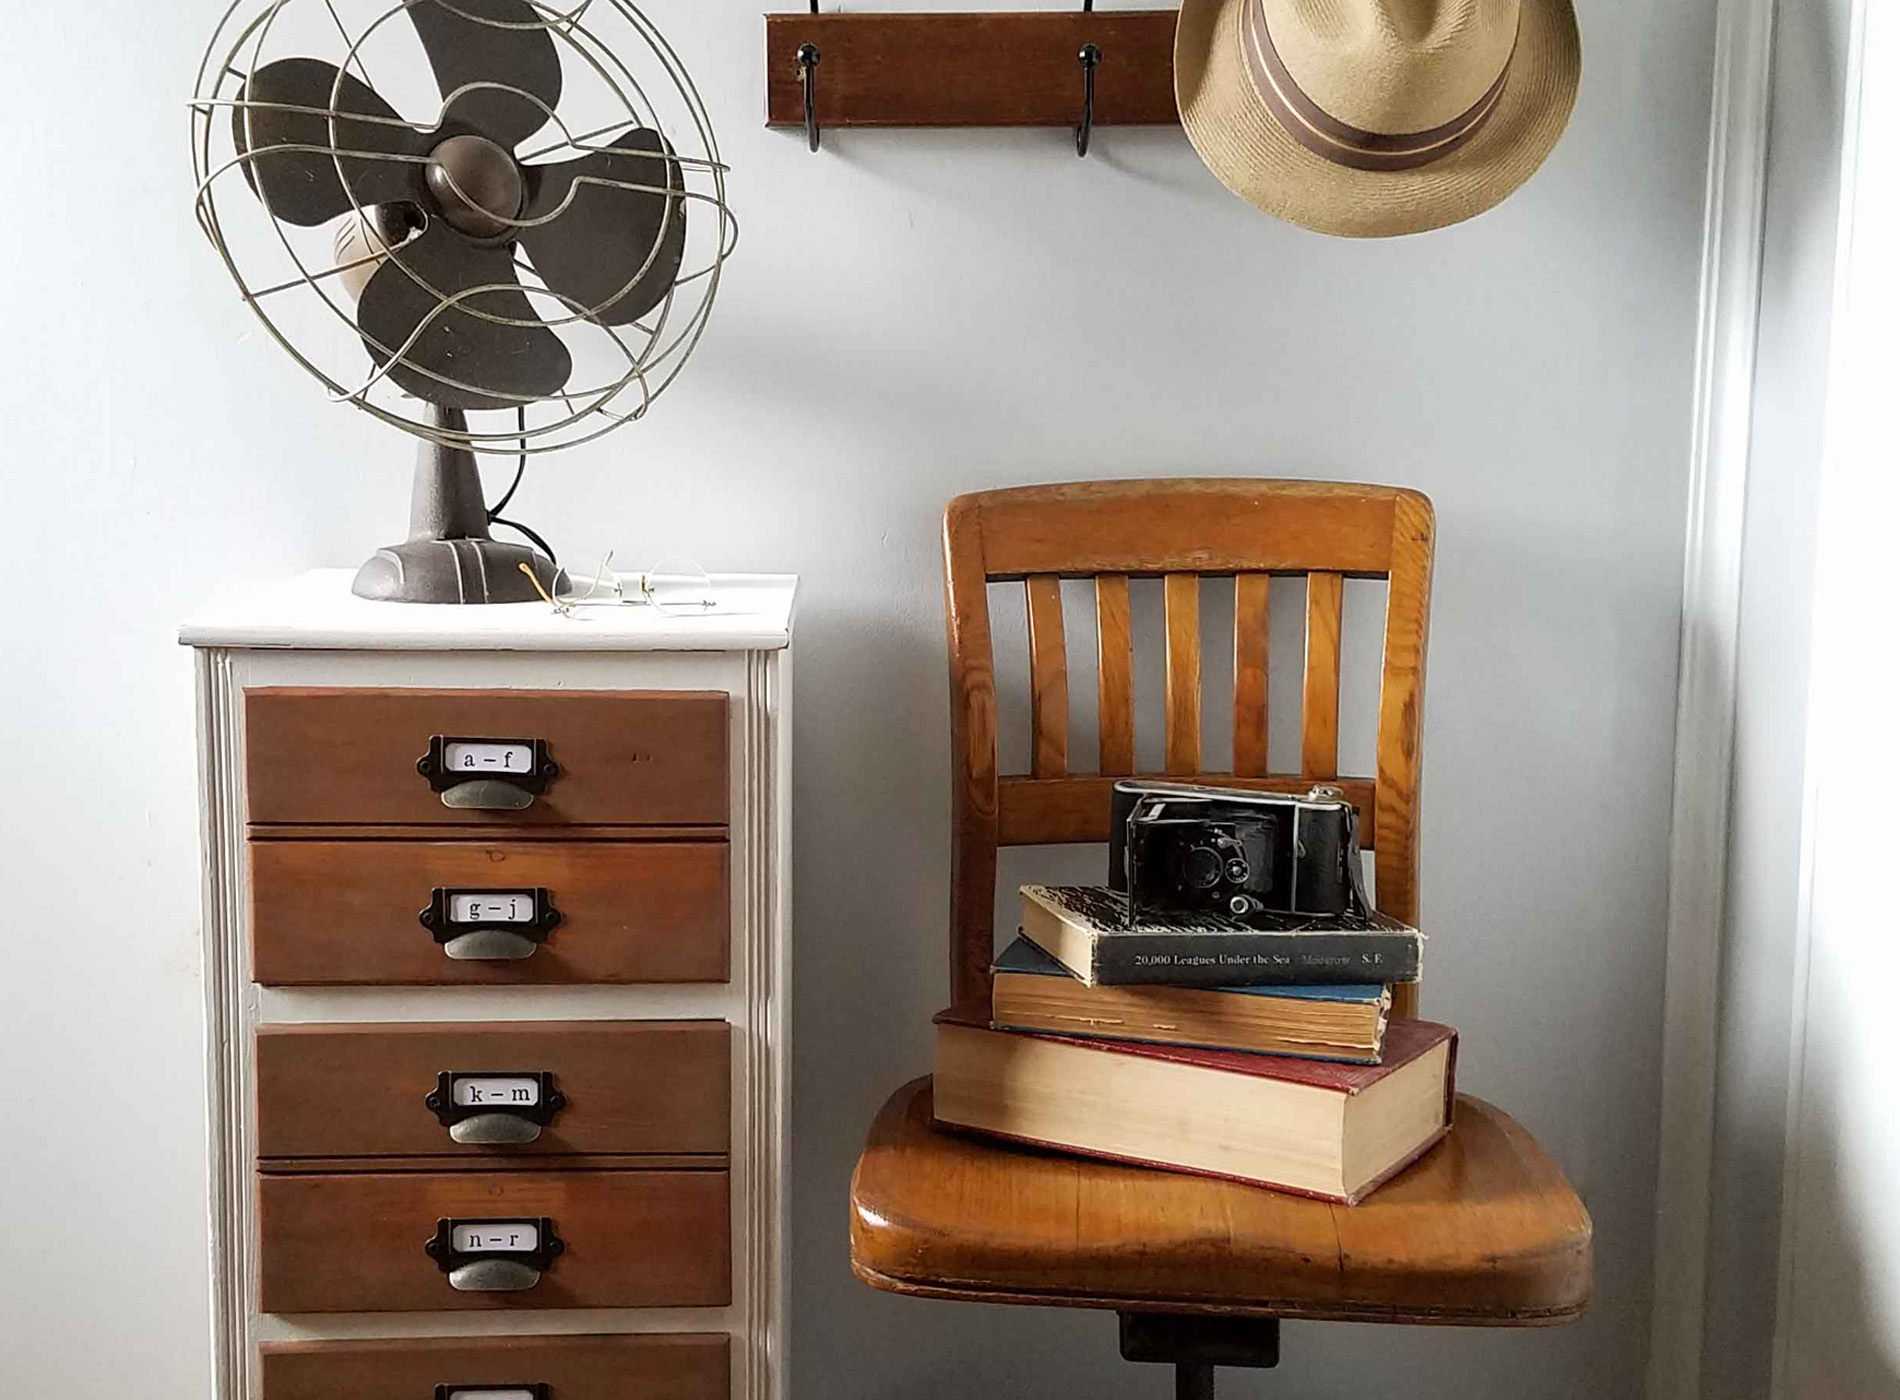
Here it is all redone from the skeleton down and looking much better. The label pulls made it have just the right touch, and the matching metal casters are ever so cute. They all add function and the vintage appeal that I love. I even lined the drawers with a few of my vintage wallpaper samples. Fun!

 It looks cute with my office chair and would be wonderful to keep, but alas, it doesn't do what I need it to do...hold my files. sigh...so it is now available in my online store.


 Finally, my ultimate hope is that you can see beauty in the cast-off and take a minute to try DIY. You can make your house your home, even on a budget. In addition, pin and share to inspire others too!
 What is more, I have more de-stash goodness coming up for you next week. Before you go, be sure to sign up for my newsletter. Until next time!

It's Furniture Fixer Upper time and these are some sweet makeovers for you.


- Just the Woods
- Confessions of a Serial DIYer
- Petticoat Junktion
- Girl in the Garage
- The Interior Frugalista
While you're at it, here are more projects like my apothecary cabinet:

