Sometimes it can be hard to let go of things. Especially things that have sentimental value. For me it was this 12' wooden ladder that my dad had loaned us when we bought our first home. I remember as a child using it in my parent's home to decorate our 20'+ Christmas trees in our living room while using a broom to string lights. Or dangling from it to play with my siblings. Problem is, when let my husband take care of it, it fell in disrepair. ugh. It had to be outside for various reasons and it rotted away. Today it becomes something more. Let me show you how I made an antique clamp chair using this ladder for parts.

I suppose most people would just pitch or burn this thing, but I couldn't do it. Too many memories and I felt as though I failed my dad. I dragged it up to the front of my house and used my jig saw to cut it into salvageable pieces late last summer. The promise to myself was to make use of this bit by bit and create some new memories.
Enter in this pair of antique clamps that I found at a local flea market. This pair is the two left of a lot of 5.

The other long one became our dining room lighting, and a smaller pair became sconces in that same area. You can read about those
in this post.

DIY TIME
Today, I decided to create an antique clamp chair using the rungs from the ladder. Do you know how hard it is to find truly weathered dowel? tsk. This stuff was
trashure gold for me.
Since the design I had in my head required the clamps be turned to the narrow side, I had to reduce the size of the dowel so it could fit in nice and snug while not losing strength. My hacksaw helped me notch out the ends and then I used a hammer and chisel to tap it off. Last, I used my utility knife to whittle it down.

Up next, add the rungs to the clamps. This was kinda like a puzzle to me as everything had age and a few twists here in there in the grain. It was fun! My drill and spade bit set made easy work of getting the holes. Since my rungs had hand-carved ends, I used two sizes to make sure they fit snug.

BARN WOOD
After that, I grabbed a few scrap pieces of the glorious barn wood. It's the same wood we are using in our kitchen remodel.

Since I tend to build on the fly when it is something like this, I used my miter saw as I went to make the lengths I needed. Then (enter in dramatic music) my Kreg Jig came to my rescue again to help me create pocket holes to make building the seat a breeze. You should
check out these posts to see why if you are into DIY, you should purchase this tool.

Because this wood is first-growth wood. It has grain tighter than me and my wallet! It took some doing to make those holes.
I love it. You can't buy this stuff in a box store.
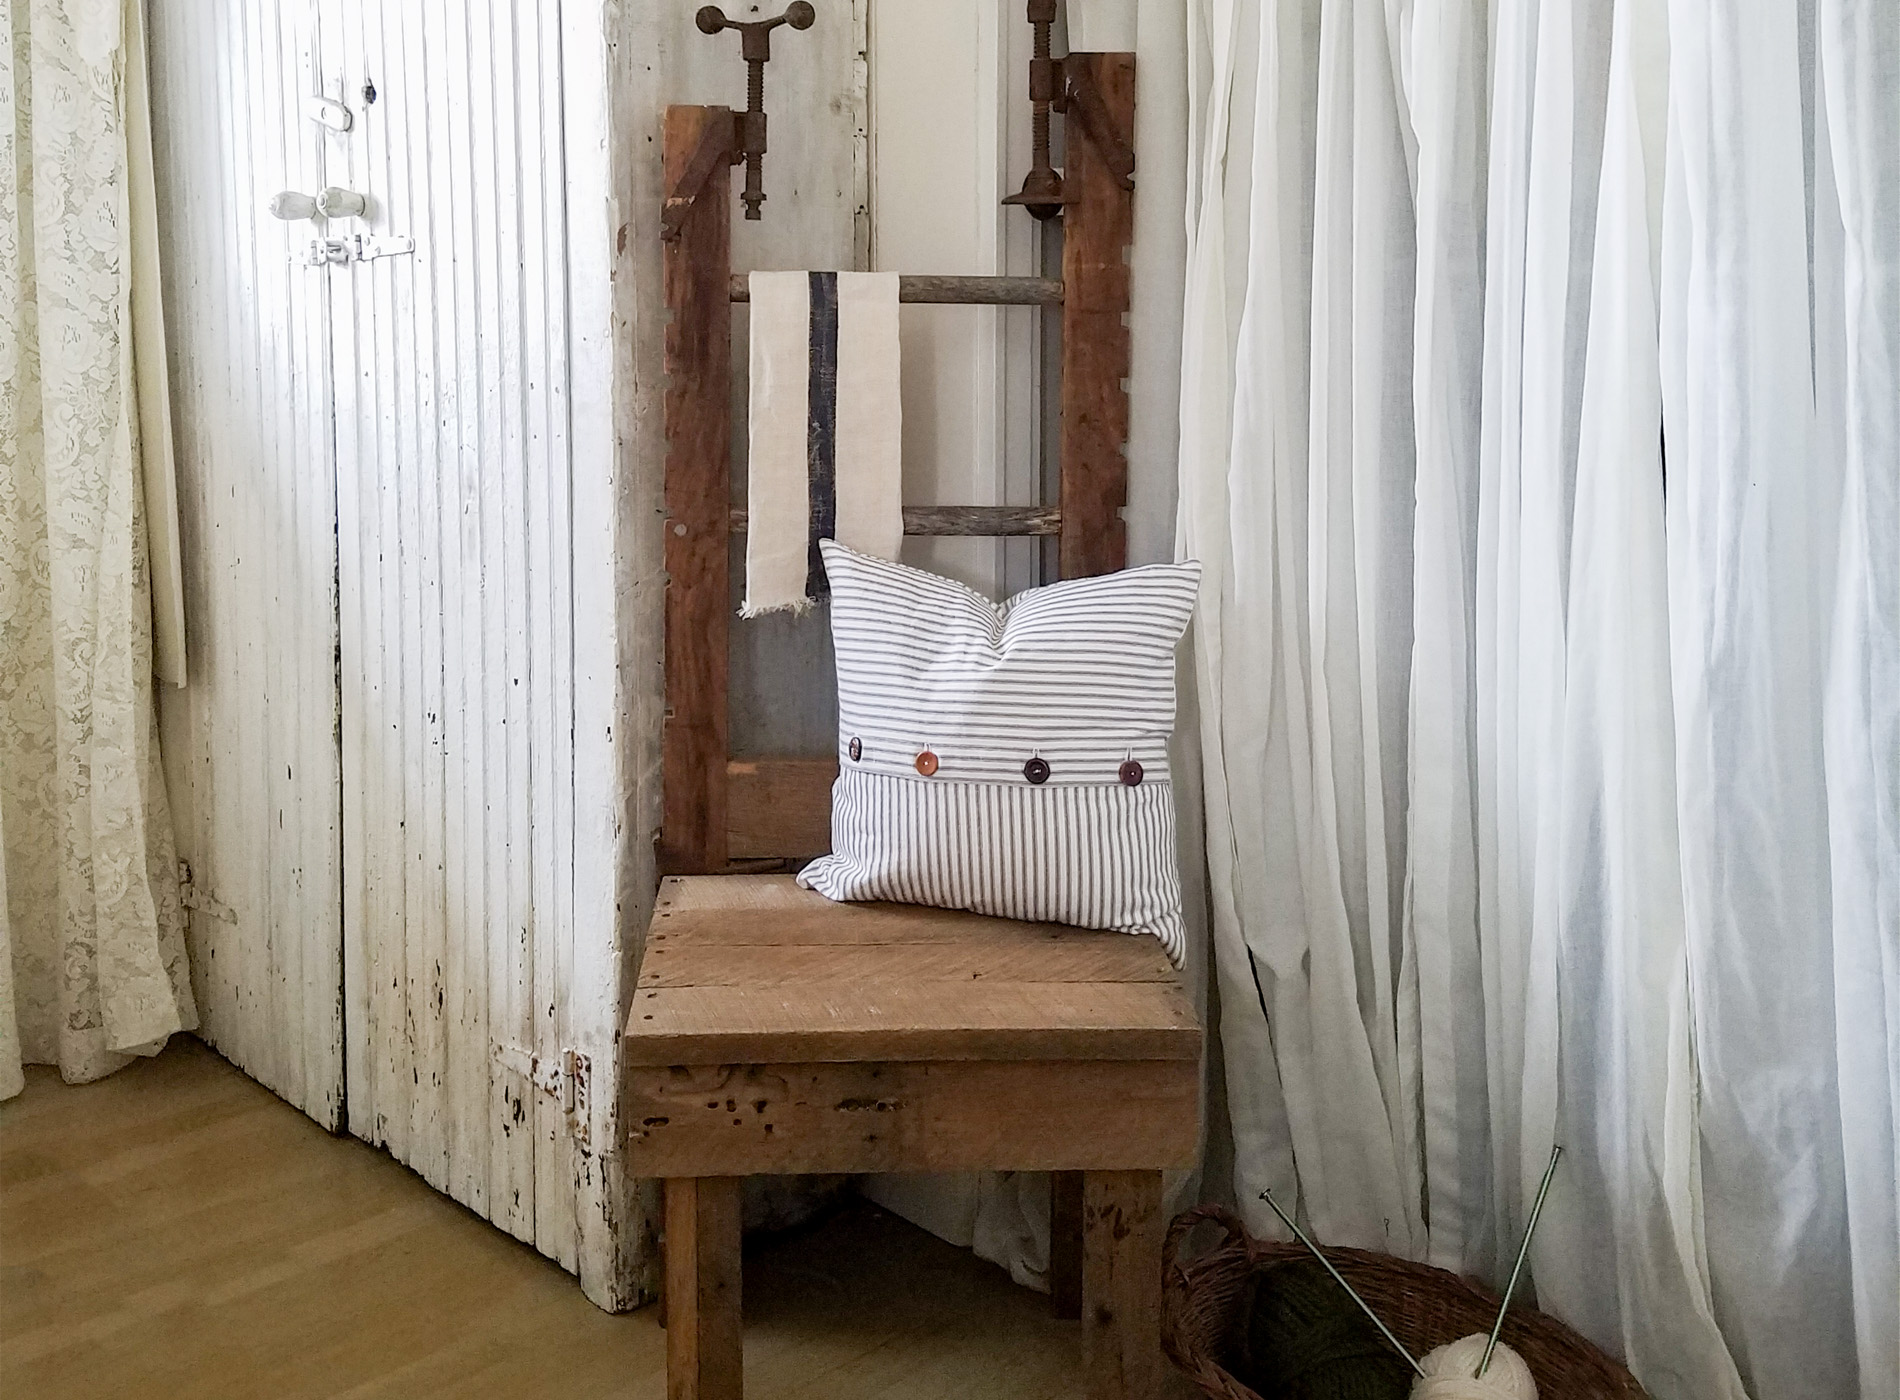
THE REVEAL
After a bit more building, here is the antique clamp chair I came up with...

My goal was to create something to stick in a corner to be used to hold a vignette or daily grind essentials. Hang a hat or some towels and call it a day.


My heart is happy because I get some woodworking in. I salvage some wonderful wood and create a piece I am sure to treasure. Also, it is full with all the memories it holds.


If you come away inspired to give DIY a try, that is what I'm all about. Likewise, my house is a home with simple things to create a story. Do pin and share to inspire others.

Up next is
Trash to Treasure Tuesday, and I will be showing you what I did with this headboard from the recent
bedroom set makeover. Any guesses?
See the after HERE.

Don't forget to stop by
my online store to see the latest additions.
 AND...
Be sure to
sign up for my newsletter to get updated in your inbox. Until next time!

 PINTEREST | EMAIL
While you're at it, here are more repurposed projects like my antique clamp chair:


 I suppose most people would just pitch or burn this thing, but I couldn't do it. Too many memories and I felt as though I failed my dad. I dragged it up to the front of my house and used my jig saw to cut it into salvageable pieces late last summer. The promise to myself was to make use of this bit by bit and create some new memories.
Enter in this pair of antique clamps that I found at a local flea market. This pair is the two left of a lot of 5.
I suppose most people would just pitch or burn this thing, but I couldn't do it. Too many memories and I felt as though I failed my dad. I dragged it up to the front of my house and used my jig saw to cut it into salvageable pieces late last summer. The promise to myself was to make use of this bit by bit and create some new memories.
Enter in this pair of antique clamps that I found at a local flea market. This pair is the two left of a lot of 5.
 The other long one became our dining room lighting, and a smaller pair became sconces in that same area. You can read about those in this post.

 Up next, add the rungs to the clamps. This was kinda like a puzzle to me as everything had age and a few twists here in there in the grain. It was fun! My drill and spade bit set made easy work of getting the holes. Since my rungs had hand-carved ends, I used two sizes to make sure they fit snug.

 Since I tend to build on the fly when it is something like this, I used my miter saw as I went to make the lengths I needed. Then (enter in dramatic music) my Kreg Jig came to my rescue again to help me create pocket holes to make building the seat a breeze. You should check out these posts to see why if you are into DIY, you should purchase this tool.
 Because this wood is first-growth wood. It has grain tighter than me and my wallet! It took some doing to make those holes. I love it. You can't buy this stuff in a box store.
 My goal was to create something to stick in a corner to be used to hold a vignette or daily grind essentials. Hang a hat or some towels and call it a day.

 My heart is happy because I get some woodworking in. I salvage some wonderful wood and create a piece I am sure to treasure. Also, it is full with all the memories it holds.

 If you come away inspired to give DIY a try, that is what I'm all about. Likewise, my house is a home with simple things to create a story. Do pin and share to inspire others.
 Up next is Trash to Treasure Tuesday, and I will be showing you what I did with this headboard from the recent bedroom set makeover. Any guesses? See the after HERE.
 Don't forget to stop by my online store to see the latest additions.


